4.3.1.3
Upper Housing (Artisan 700/PX700W/TX700W)
Parts/Components need to be removed in advance:
Scanner Unit/Upper Left Housing/Paper Guide Top Assy
Removal procedure
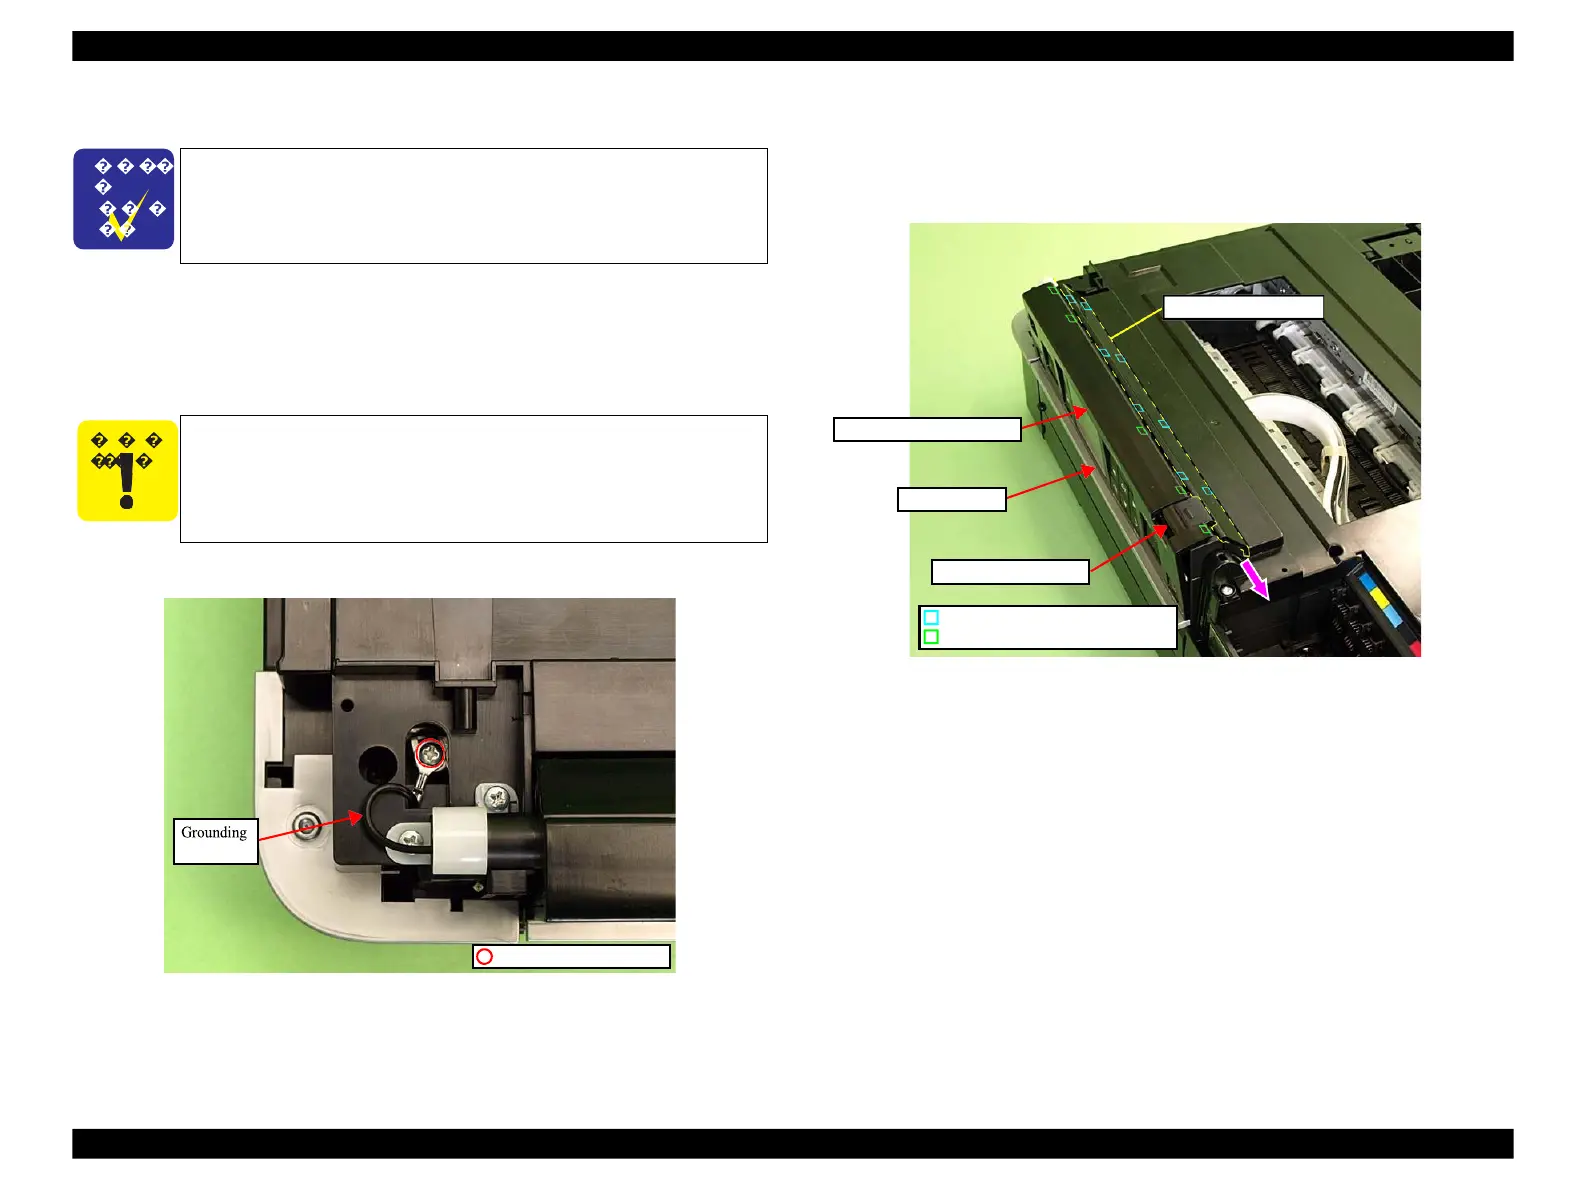
1.
Remove the screw (x1) and release the Grounding Wire.
Figure 4-210. Releasing the Grounding Wire
2.
Release the hooks (x5) of the Panel Unit Front Cover. (See Fig. 4-211)
3.
While pushing the Panel Lock Button, slide the Panel Upper Cover in the
direction of the arrow to release the hook (x8) of the Panel Upper Cover, and
remove the Panel Upper Cover.
Figure 4-211. Removing the Upper Housing (1)
The Grounding Wire is attached to the frame with a screw. Be
careful not to deform the frame when removing the screw.
The disassembly/reassembly procedures for Artisan 800/PX800FW/
TX800FW differ from those of Artisan 700/PX700W/TX700W, see
4.2.2.5 "Upper Housing" (p107) for the procedures.
 Loading...


