Epson Artisan 800/Epson Stylus Photo PX800FW/TX800FW/Epson Artisan 700/Epson Stylus Photo PX700W/TX700W
Disassembly Procedures
https://www.manualsbooks.com
4.2.3.3
Power Supply Unit
Parts/Components need to be removed in advance:
ADF Unit (Artisan 800/PX800FW/TX800FW only)/Scanner Unit/Upper Left
Housing/Paper Guide Top Assy/Upper Housing/Rear Left Housing/Left Housing
Removal procedure
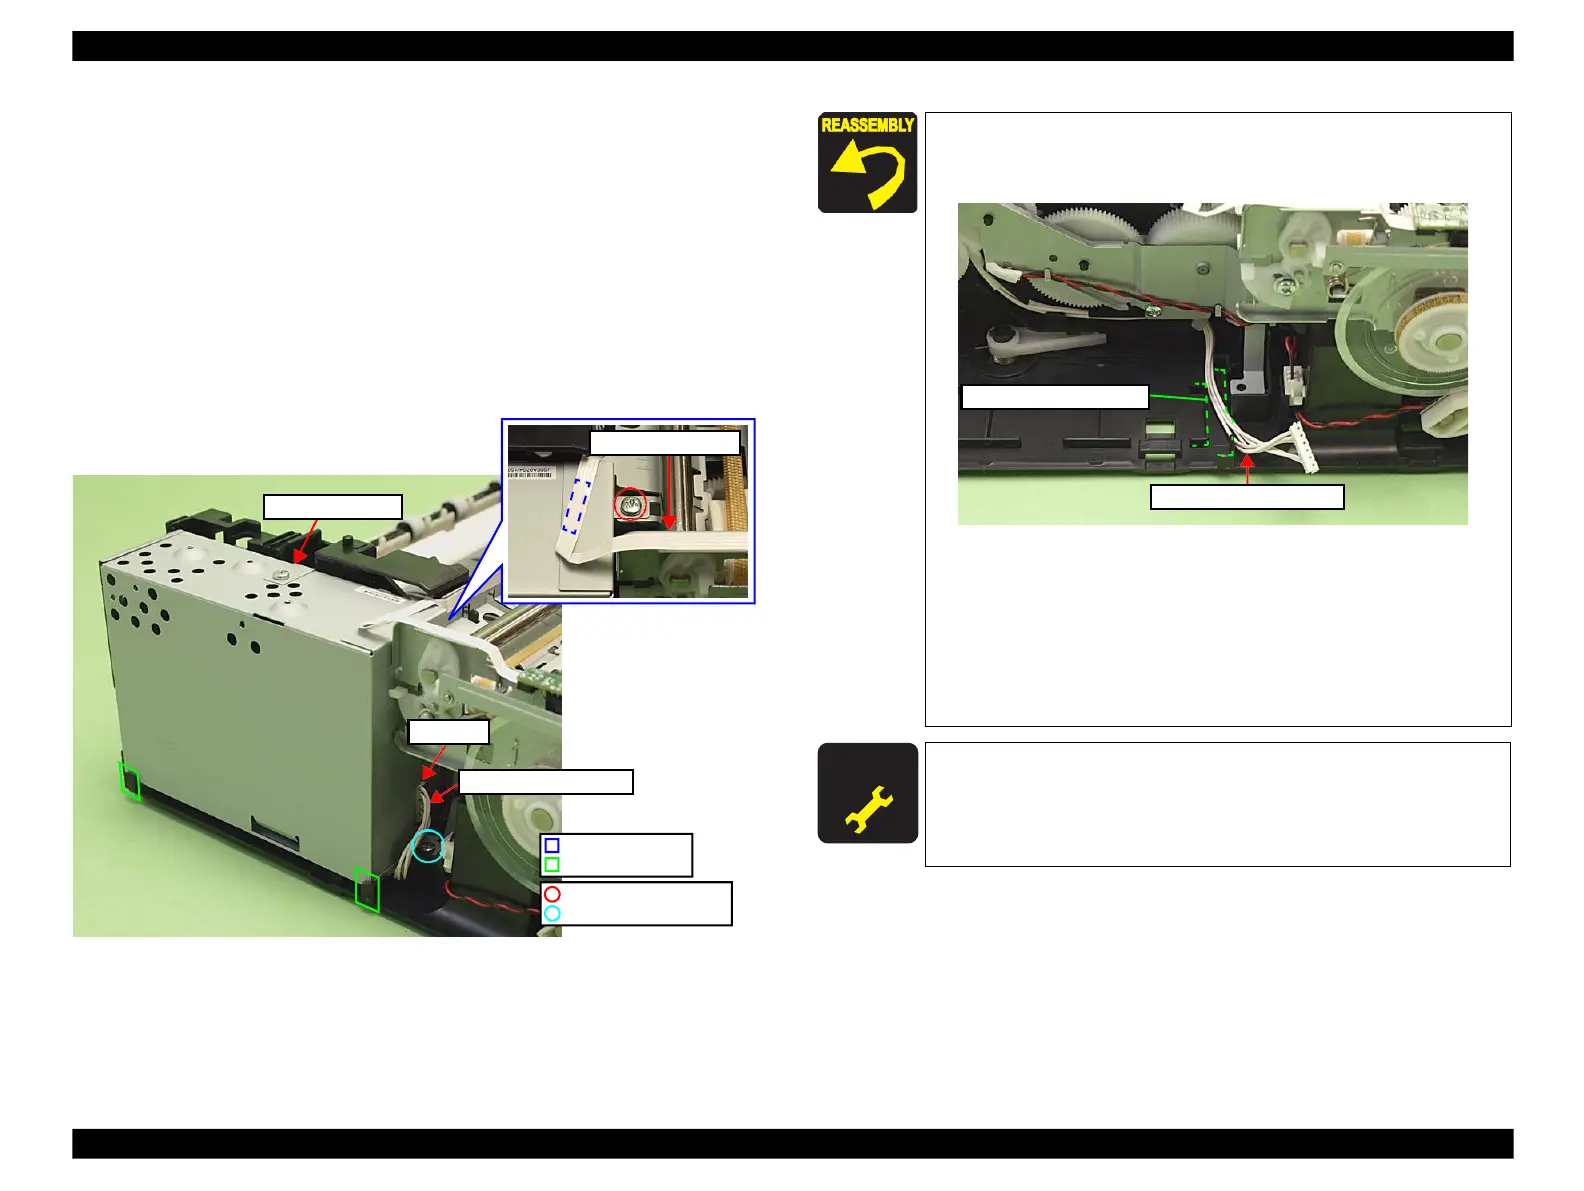
1.
Peel off the PF Encoder FFC from the Power Supply Unit. (See Fig. 4-49.)
2.
Disconnect the Power Supply Unit cable from the connector of the Power
Supply Unit. (See Fig. 4-49.)
3.
Remove the screws (x2) that secure the Power Supply Unit, and remove the
Power Supply Unit from the Base Frame.
Figure 4-49. Removing the Power Supply Unit
Route the Power Supply Unit Cable through the groove of the
Base Frame, then install the Power Supply Unit to the Base
Frame.
Figure 4-50. Installing the Power Supply Unit
Install the Power Supply Unit inside the ribs (x2) of the Base
Frame. (See Fig. 4-49)
Be careful not to damage the Power Supply Unit cable by
catching it with the screw when screwing. (See Fig. 4-49)
Secure the PF Encoder FFC to the Power Supply Unit with the
double-sided tape. (See Fig. 4-49)
C.B.S. 3x6 (8±1Kgfcm)
C.B.P. 3x8 (6±1Kgfcm)
After removing/replacing the Power Supply Unit, make the
specified adjustments. (See Chapter 5 "ADJUSTMENT".)
 Loading...


