Epson Artisan 800/Epson Stylus Photo PX800FW/TX800FW/Epson Artisan 700/Epson Stylus Photo PX700W/TX700W
Disassembly Procedures
https://www.manualsbooks.com
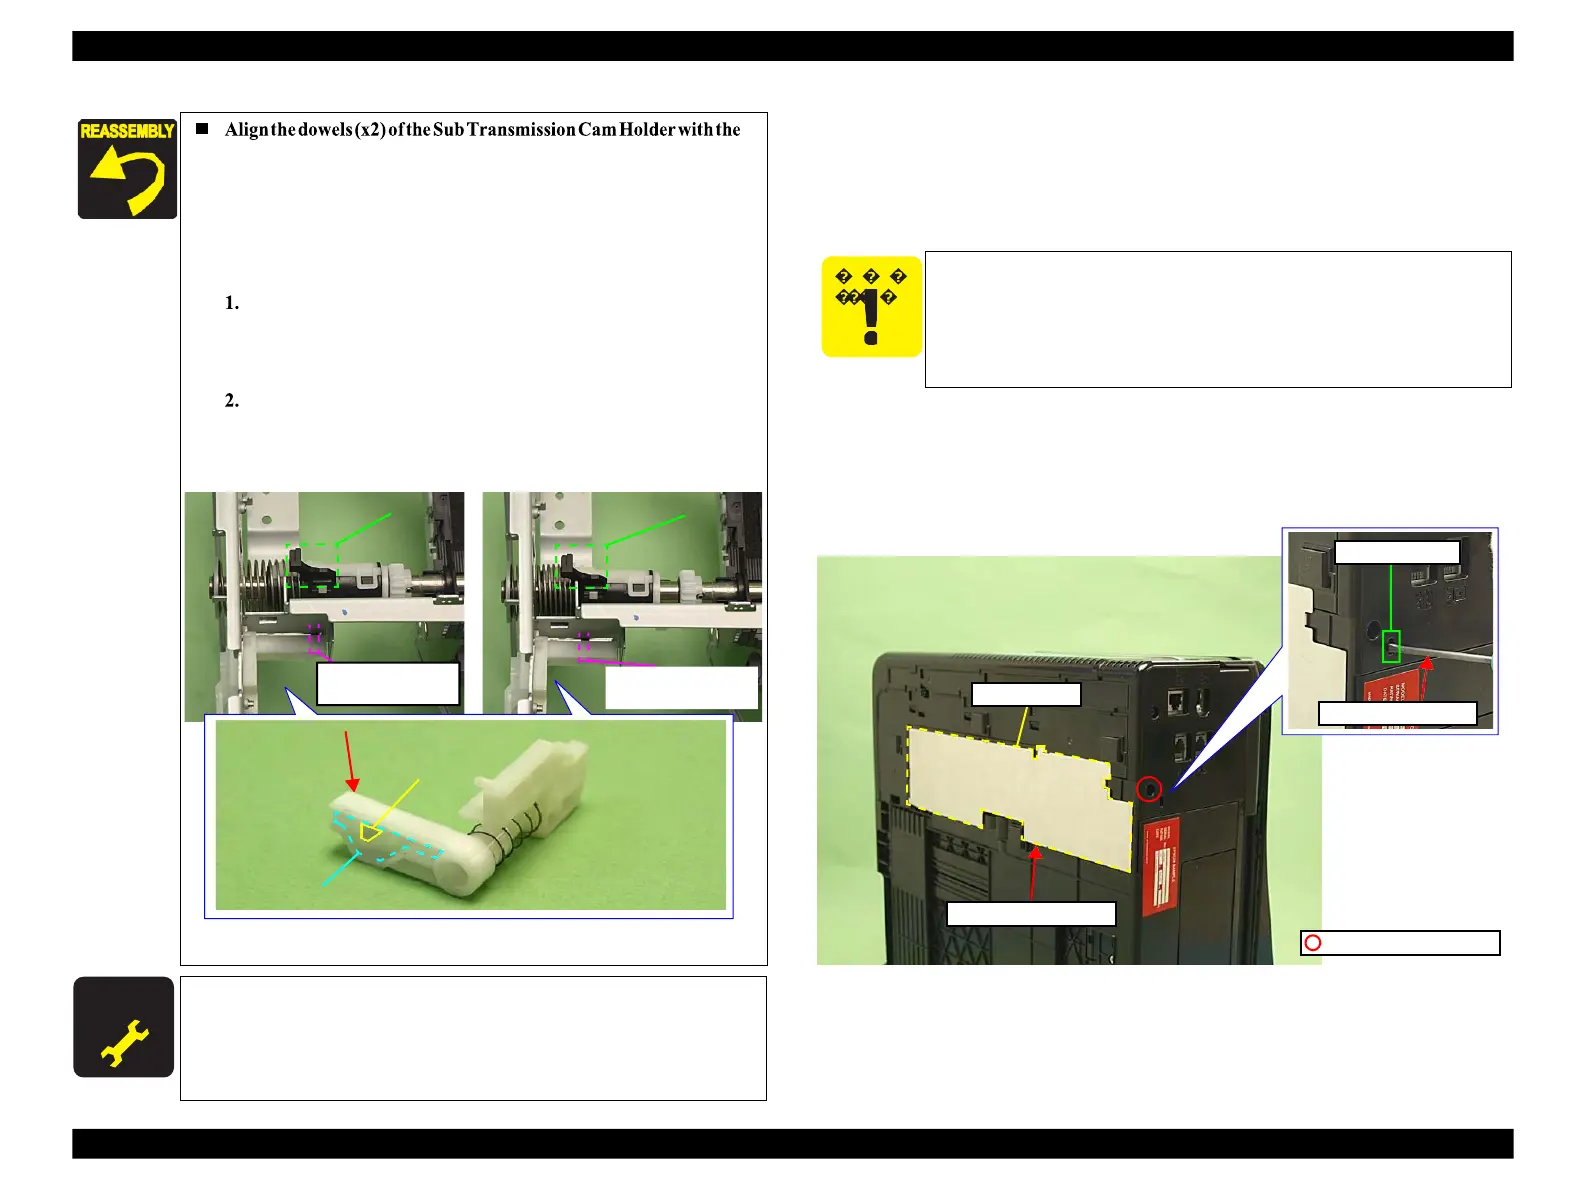
positioning holes (x2) of the Main Frame. (See Fig. 4-148.)
Align the protrusion of the Transmission Arm with the groove
of the Sub Transmission Cam Holder. (See Fig. 4-153.)
After installing the Sub Transmission Cam Holder, follow the
procedure below to check the movement of the Sub
Transmission Cam Holder.
Slide the switch lever to the 0 digit side to check if the point
A of the Sub Transmission Cam Holder locks the
protrusion of the Transmission Arm, and the arm moves to
By sliding the switch lever further to the 0 digit side, check
if the lock is released and the Sub Transmission Cam
Holder returns to the regular position when letting go of
the change lever.
Protrusion of
Transmission Arm
Figure 4-153. Installing the Sub Transmission Cam Holder
Sub Transmission Cam Holder
Protrusion of
Transmission Arm
4.2.4.20
Waste Ink Tray Assy
Parts/Components need to be removed in advance:
None
Removal procedure
1.
Remove the screw (x1). (See Fig. 4-154.)
2.
Insert the flathead screwdriver to the hole of the Rear Right FAX Housing to
release the hook (x1), and remove the Waste Ink Tray Assy. (See Fig. 4-154,
Fig. 4-155.)
Figure 4-154. Removing the Waste Ink Tray Assy (1)
After removing/replacing the Upper Paper Guide L/R, make the
specified adjustments. (See Chapter 5 "ADJUSTMENT".)
So as to make description easier, the printer in the photographs
is placed vertically in the following steps. Be careful about ink
spilling if the printer is tilted in practical operation.
Be careful not to get injured with the sharp edges of the
grounding plate of the Waste Ink Tray Assy.
 Loading...


