Epson Artisan 800/Epson Stylus Photo PX800FW/TX800FW/Epson Artisan 700/Epson Stylus Photo PX700W/TX700W
Disassembly Procedures
https://www.manualsbooks.com
4.2.4.2
CR Scale
Parts/Components need to be removed in advance:
ADF Unit (Artisan 800/PX800FW/TX800FW only)/Scanner Unit/Upper Left
Housing/Paper Guide Top Assy/Upper Housing
Removal procedure
1.
Release the Carriage Lock and move the Carriage Unit to the center. (See
4.2.4.1 Printhead Step2 (p125).)
2.
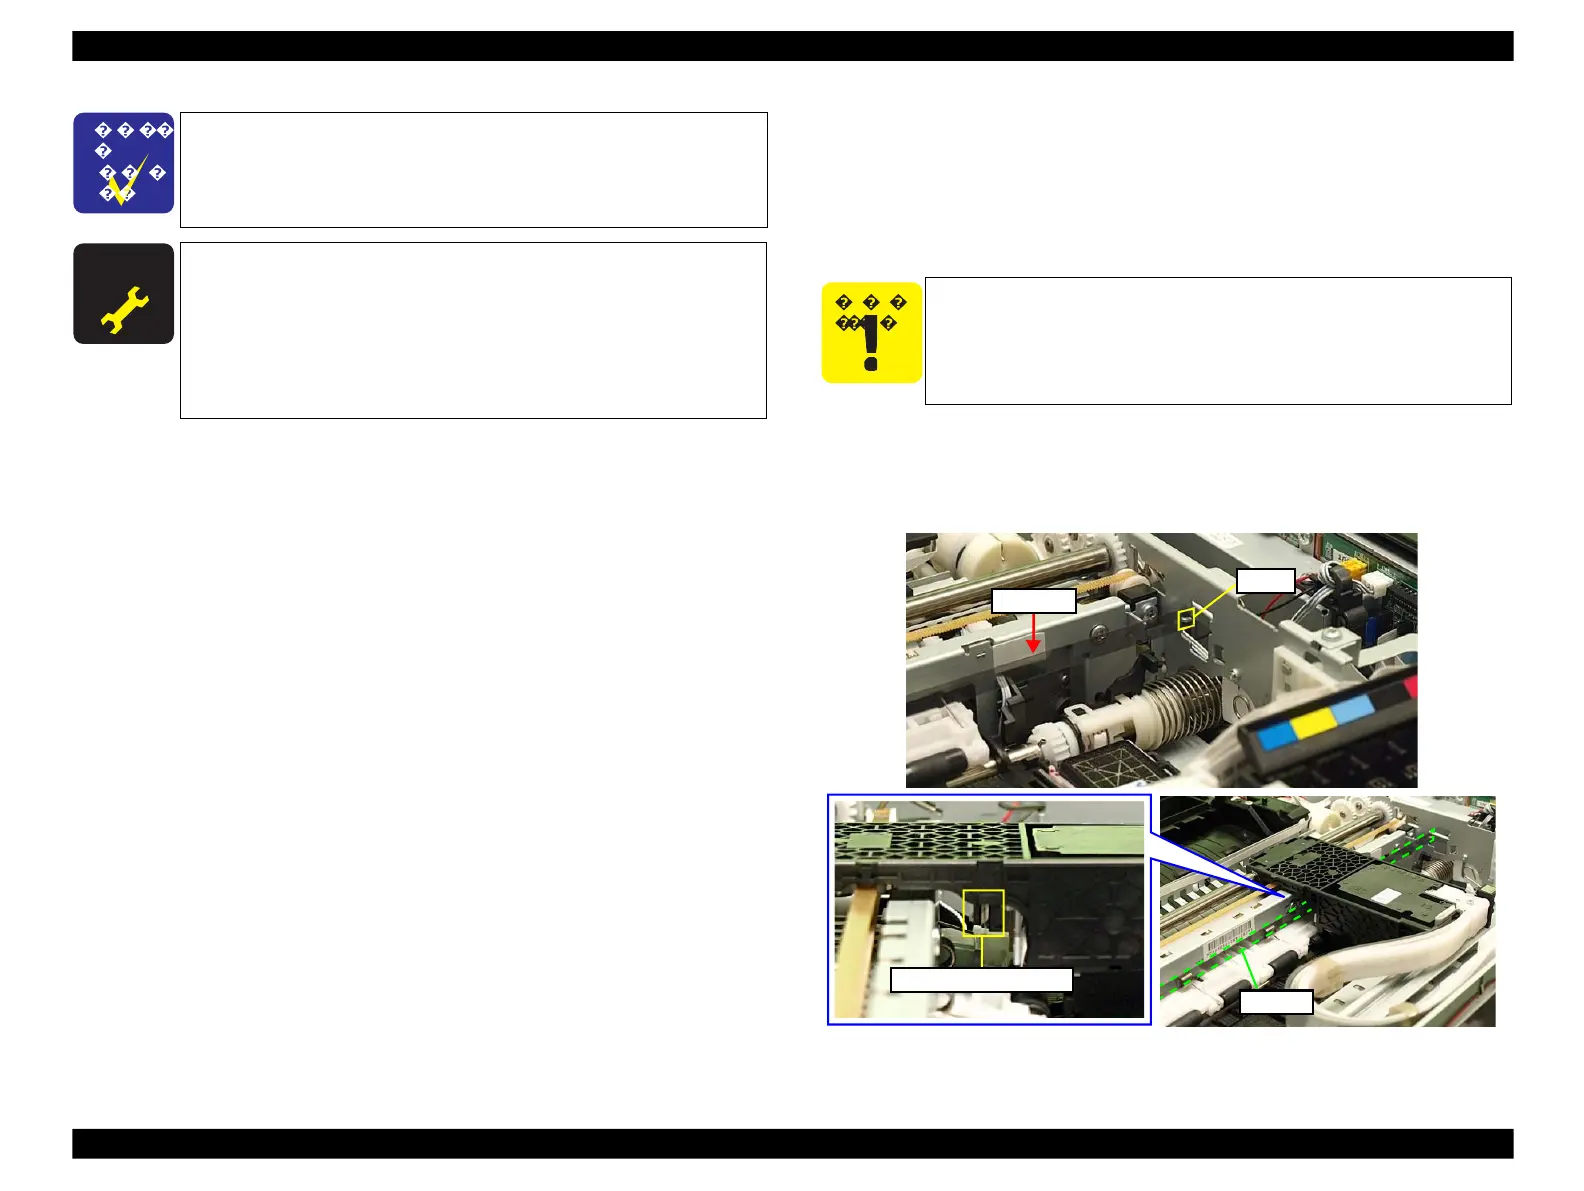
Release the right side of the CR Scale from the hook.
3.
Pull out the CR Scale from the slit of the CR Encoder Sensor.
Figure 4-69. Removing the CR Scale(1)
After removing/replacing the Printhead, make the specified
adjustments. (See Chapter 5 "ADJUSTMENT".)
When disconnecting the joint of the Printhead and the Ink
Tube, in particular, the Leak Check is necessary.
If the position of the notch on the Parallelism Adjustment
Busings have not changed, only “ Checking the result of PG
adjustment (p239)” is necessary. ( See “ PG Adjustment (p235)” .)
Confirm that there is no ink penetrating into the Decompression
Tube located inside the Ink Supply Tube Assy. If such ink
penetration is observed, make sure to replace the Ink Supply IC
Holder Assy (p133) together with the Printhead.
Do not touch the CR Scale with bare hands.
Do not damage or contaminate the CR Scale.
Take care not to damage (extend too much) the Torsion Spring
16.43.
Slit of CR Encoder Sensor
 Loading...


