4.
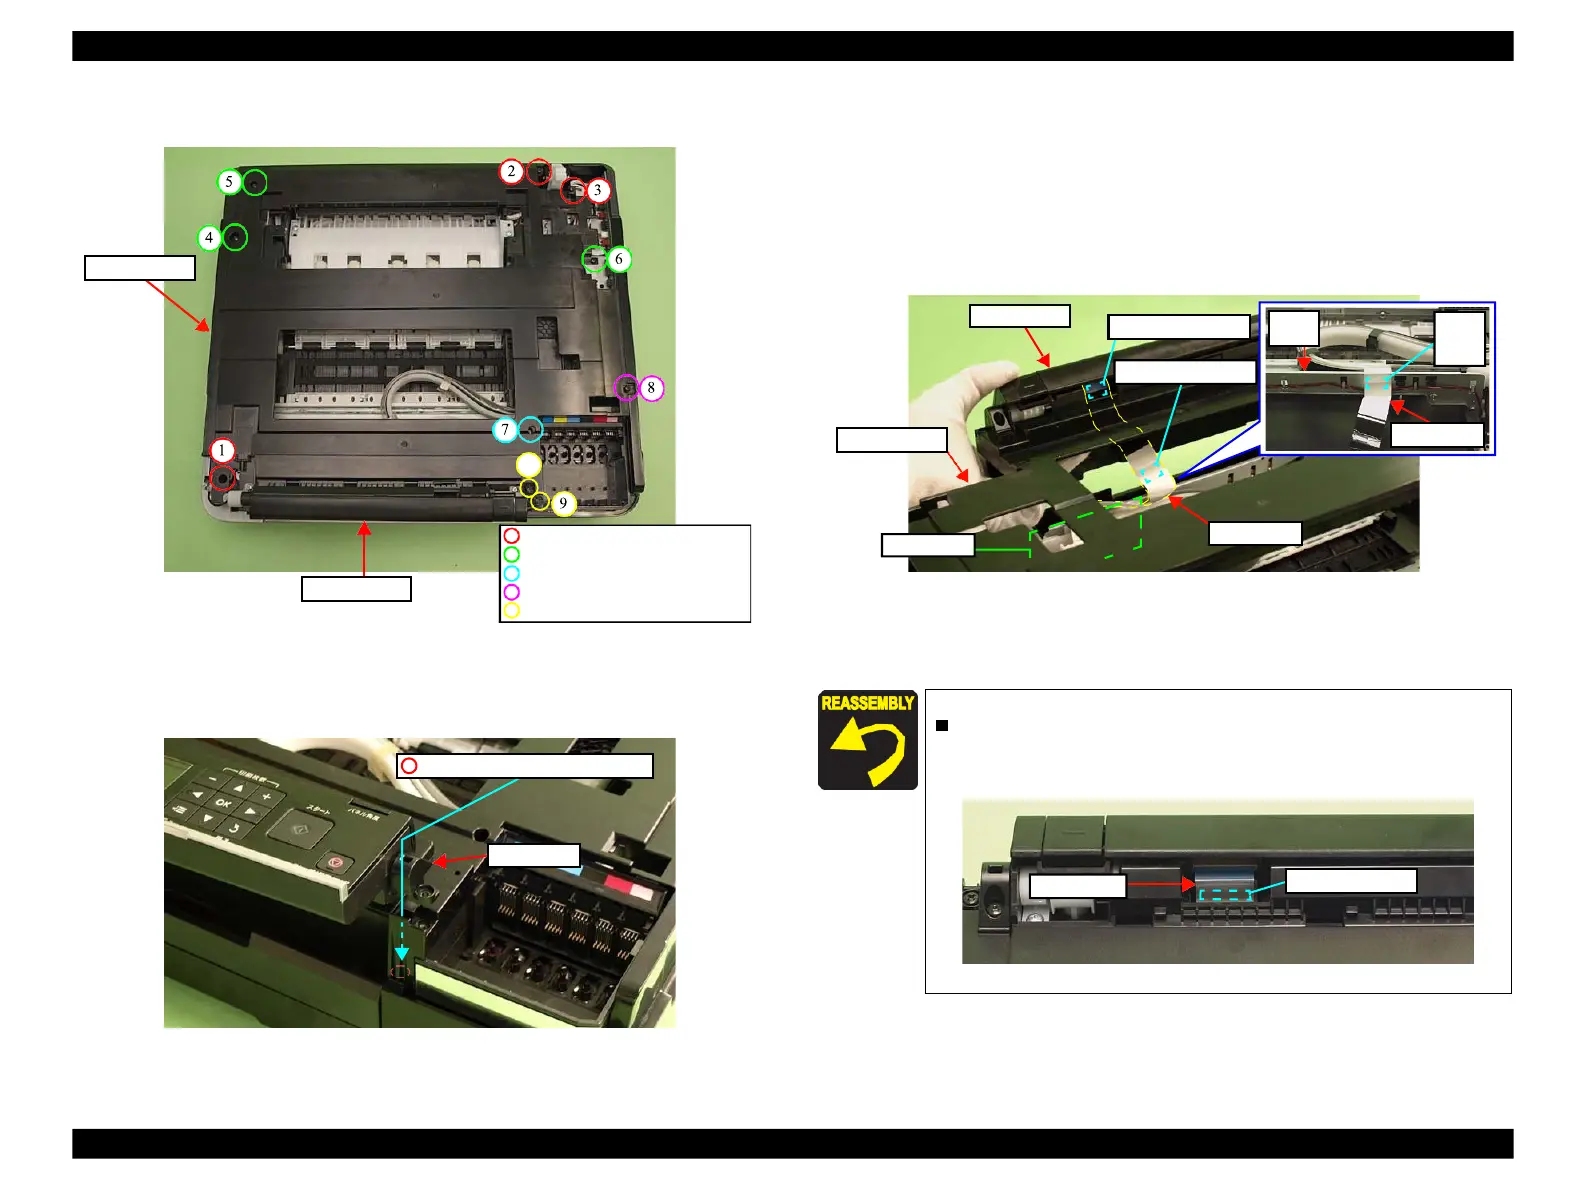
Remove the screws (x10) that secure the Upper Housing.
Figure 4-212. Removing the Upper Housing (2)
5.
Open the Panel Unit, and lift the Panel Unit until the screw (x1) can be seen
from under the Right Hinge, and then remove the screw (x1).
Figure 4-213. Removing the Upper Housing (3)
6.
Peel off the double-sided tape A that secures the Panel FFC to the Front
Frame, and lift the Upper Housing until the Panel FFC becomes detached
from the FFC Holder. (See Fig. 4-214.)
7.
Peel off the double-sided tape B that secures the Panel FFC to the Panel Unit.
(See Fig. 4-214.)
8.
Disconnect the Panel FFC from the connector on the Panel Unit, and remove
the Upper Housing together with the Panel Unit.
Figure 4-214. Removing the Upper Housing (4)
9.
Remove the Panel Unit from the Upper Housing. (See 4.3.2.1 Panel Unit
(Artisan 700/PX700W/TX700W) (p194).)
C.B.P. 3x10 (6±1Kgfcm)
C.B.A. 3x6 (black) (6±1Kgfcm)
C.B.S. 3x6 (8±1Kgfcm)
C.B.S. 3x8 (black) (8±1Kgfcm)
C.B.P. 3x10 (black) (6±1Kgfcm)
 Loading...


