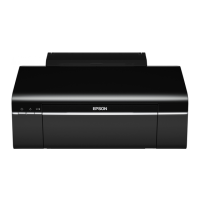
Epson Artisan 800/Epson Stylus Photo PX800FW/TX800FW/Epson Artisan 700/Epson Stylus Photo PX700W/TX700W
Troubleshooting without Error Message
https://www.manualsbooks.com
Print quality problems
Table 3-19. Troubleshooting Print Quality Problems
Certain dots are always not
printed correctly
Contamination of the Printhead surface
(dots are missing)
Run a cleaning and make a test print. Repeat it several
times.
Clean the Printhead surface using a cotton-tipped swab.
The capping absorber contacts with the
Printhead surface.
Is the capping absorber deformed or damaged?
Replace the Ink System with a new one. (See 4.2.4.6 " Ink
System " (p.135).)
Check if the Head FFC is damaged. (See 4.2.4.1 " Printhead "
(p.124), 4.2.4.16 " Carriage Unit " (p.154).)
Run a cleaning and nozzle check. Repeat it several times.
If the cleaning does not solve the problem, replace the Printhead
with a new one. (See 4.2.4.1 " Printhead " (p.124).)
Dots are sometimes missing
Contamination of the Printhead surface
(dots are missing)
Run a cleaning and nozzle check. Repeat it several times.
Clean the Printhead surface using a cotton-tipped swab.
Replace the ink cartridges with new ones, and run a nozzle
check.
Replace the Ink cartridges with new ones.
Poor connection of the Head FFC
Check the FFC using a tester. Does the result show
abnormality?
Replace the Head FFC with a new one. (See 4.2.4.1 " Printhead "
(p.124), 4.2.4.16 " Carriage Unit " (p.154).)
Run a cleaning several times, and then run a nozzle check.
If the cleaning does not solve the problem, replace the Printhead
with a new one. (See 4.2.4.1 " Printhead " (p.124).)
Printout is totally abnormal
Poor connection of the Head FFC
Is the FFC securely connected to the boards and Carriage
Unit?
Connect the Head FFC correctly.
Is the Head FFC securely connected to the Printhead?
If no problem is found in the connection, replace the Printhead
with a new one. (See 4.2.4.1 " Printhead " (p.124).)
Vertical lines are not
straight
Has the Bi-D adjustment been carried out properly?
Carry out the Bi-D adjustment. (See 5.2 " Adjustment Using
Adjustment Program " (p.219).)
Ink mist is attached on the
paper.
Anti static cloth on the rear frame is
deformed.
Check if the anti static cloth is correctly formed to touch the
paper.
Attach the anti static cloth again so as to let it touch the paper. If
not improved much, replace the printer mechanism with a new
one. (See 4.2.4.18 " Rear Frame " (p.159).)

 Loading...


