Installing the heat sink
Figure 182: Installing the heat sink
▶
Ensure that the heat sink cooling fins match the direction of the airflow!
▶
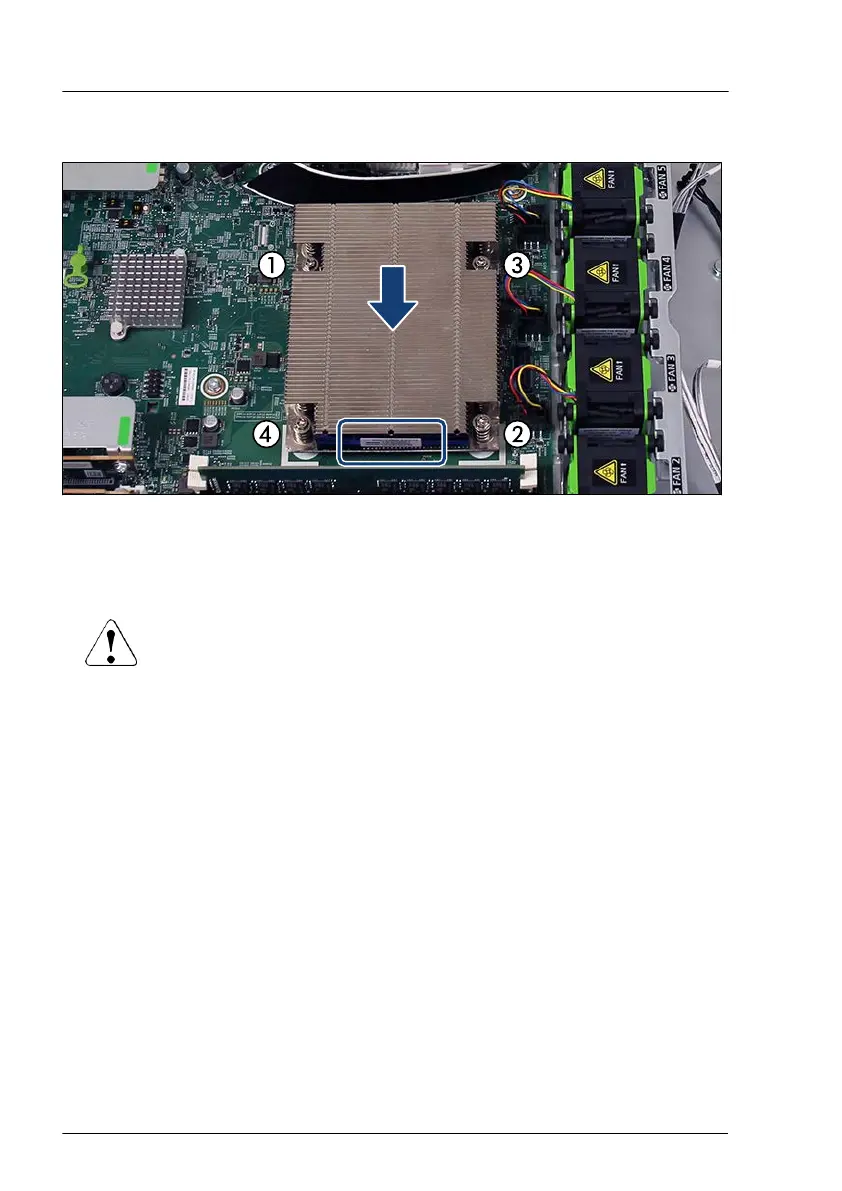
Carefully seat the heat sink on the four threaded holes as shown.
CAUTION
▶
Ensure that the screws on the heat sink are properly seated on
the threaded holes.
▶
Fasten it in a crossover pattern with four screws according to the numbering
(torque: 0.6 Nm, not applicable for Japan).
▶
Notice the position of the air flow label.
Concluding steps
▶
"Installing the air duct" on page
66.
▶
"Reassembling" on page
53.
▶
"Connecting the power cord" on page 57.
▶
"Switching on the server" on page 60.
▶
If applicable, "Installing the front cover with lock" on page 61.
Processor (CPU)
240 Upgrade and Maintenance Manual RX1330 M5

 Loading...