12 - 9
12.9 Adjustment and Check of Each Part
(1) Adjustment of Sample Probe Position
(a) Place the sample cups at Pos. 1 and W1 on the S. disk, and execute "Probe Adjust
[S. Probe (Horiz)]".
(b) Check the respective positions of the probe, sample cup and rinsing bath each time
the Execute key is pressed.
(c) Adjust the probe position by hand if deviated above the cell and through pulse
adjustment if deviated above the sample cup.
(d) Place the sample cups at Pos. 1, 2 and W1 on the S. disk, and execute "Probe
Adjust [S. Probe (Vert)]". The S. probe moves down and the height of the sample
cup bottom at each position is measured.
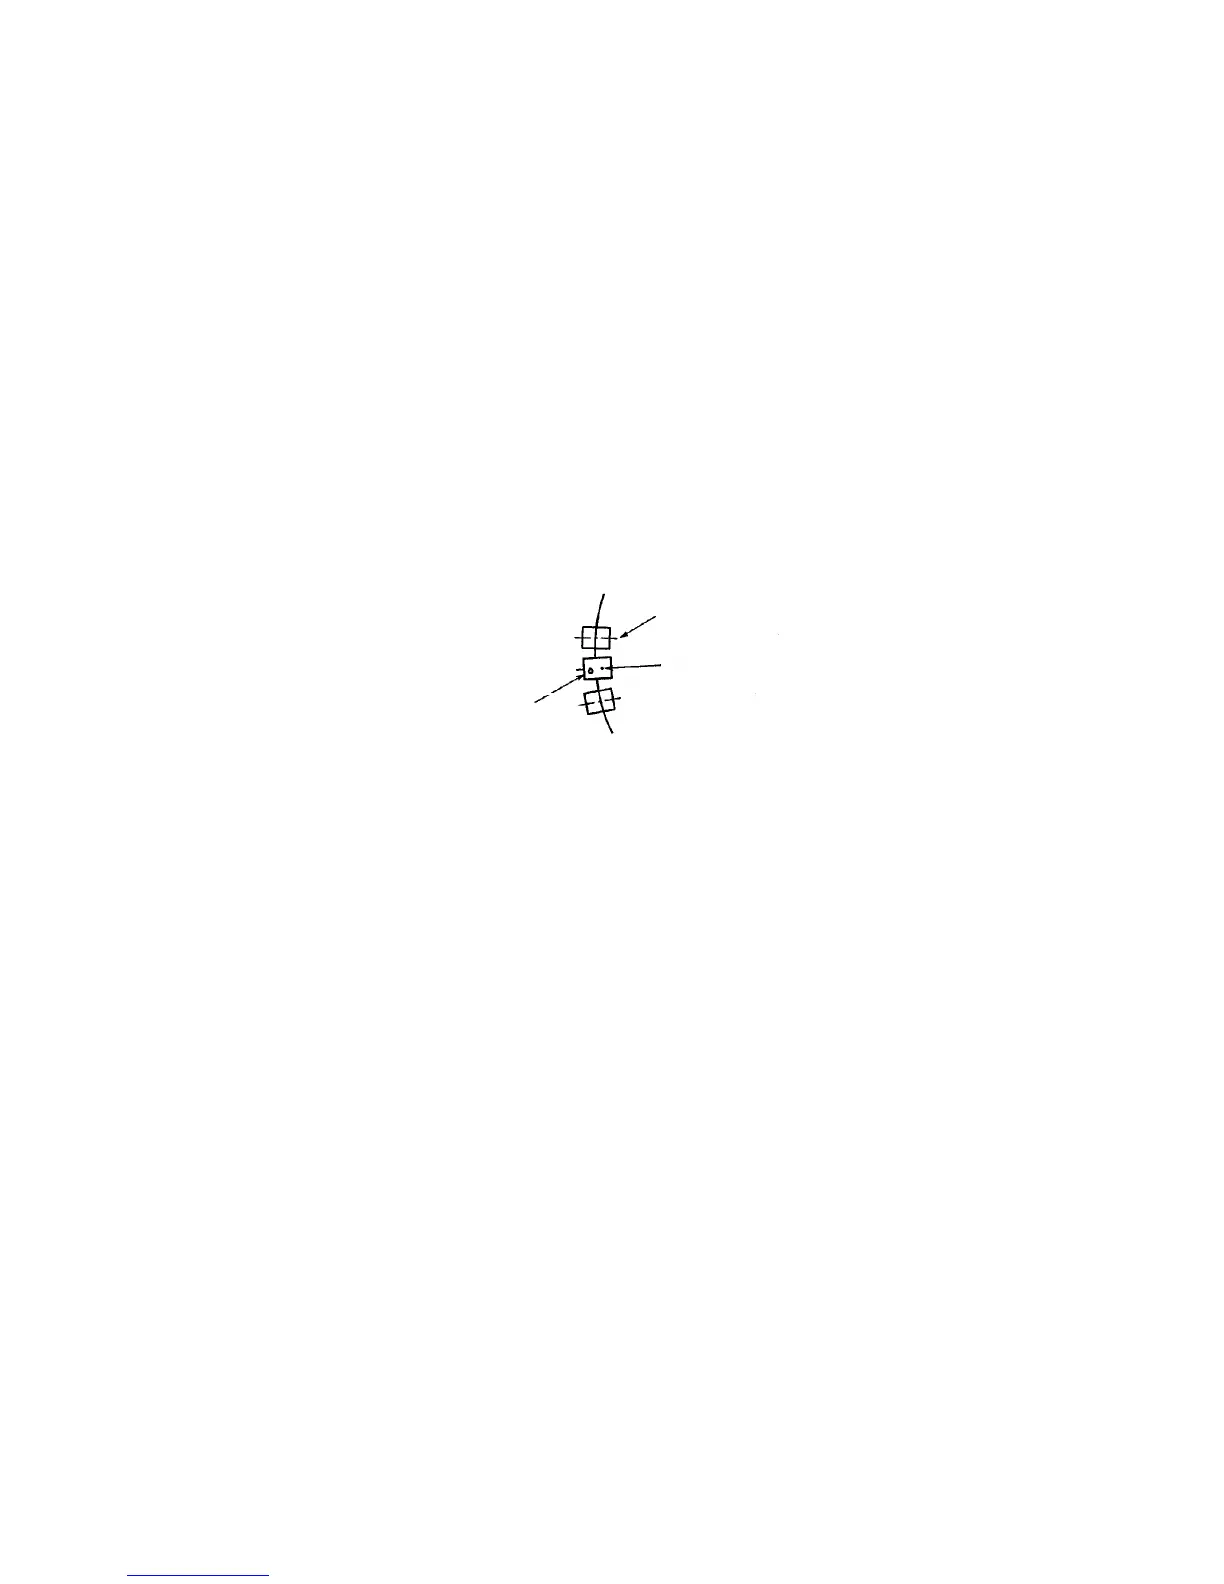
Fig. 12-4 Sample Probe Position
(2) Adjustment of Reagent Probe and Stirring Rod
(a) Place the 50 mL reagent bottle at channel 1 of the reagent disk, and execute "Probe
Adjust [R. Probe (Horiz)]".
(b) Check the respective positions of the probe, rinsing bath and reagent bottle each
time the EXECUTE key is pressed.
(c) Adjust the probe position by hand if deviated above the cell and through pulse
adjustment if deviated above the reagent bottle.
(d) Remove the reagent bottle from the reagent disk, and adjust "Probe Adjust [R.
Probe (Vert)]". The R. probe moves down and the height of the reagent bottle
bottom is measured.
(e) Adjust the distance between the cell holder assy and stirring rod end by use of the
furnished spacer.
(f) Press the Execute key and check the position with reference to the rinsing bath.
Probe end
Cell (reaction cuvette)
Liquid level sensor