16
Installing the Scan Assembly
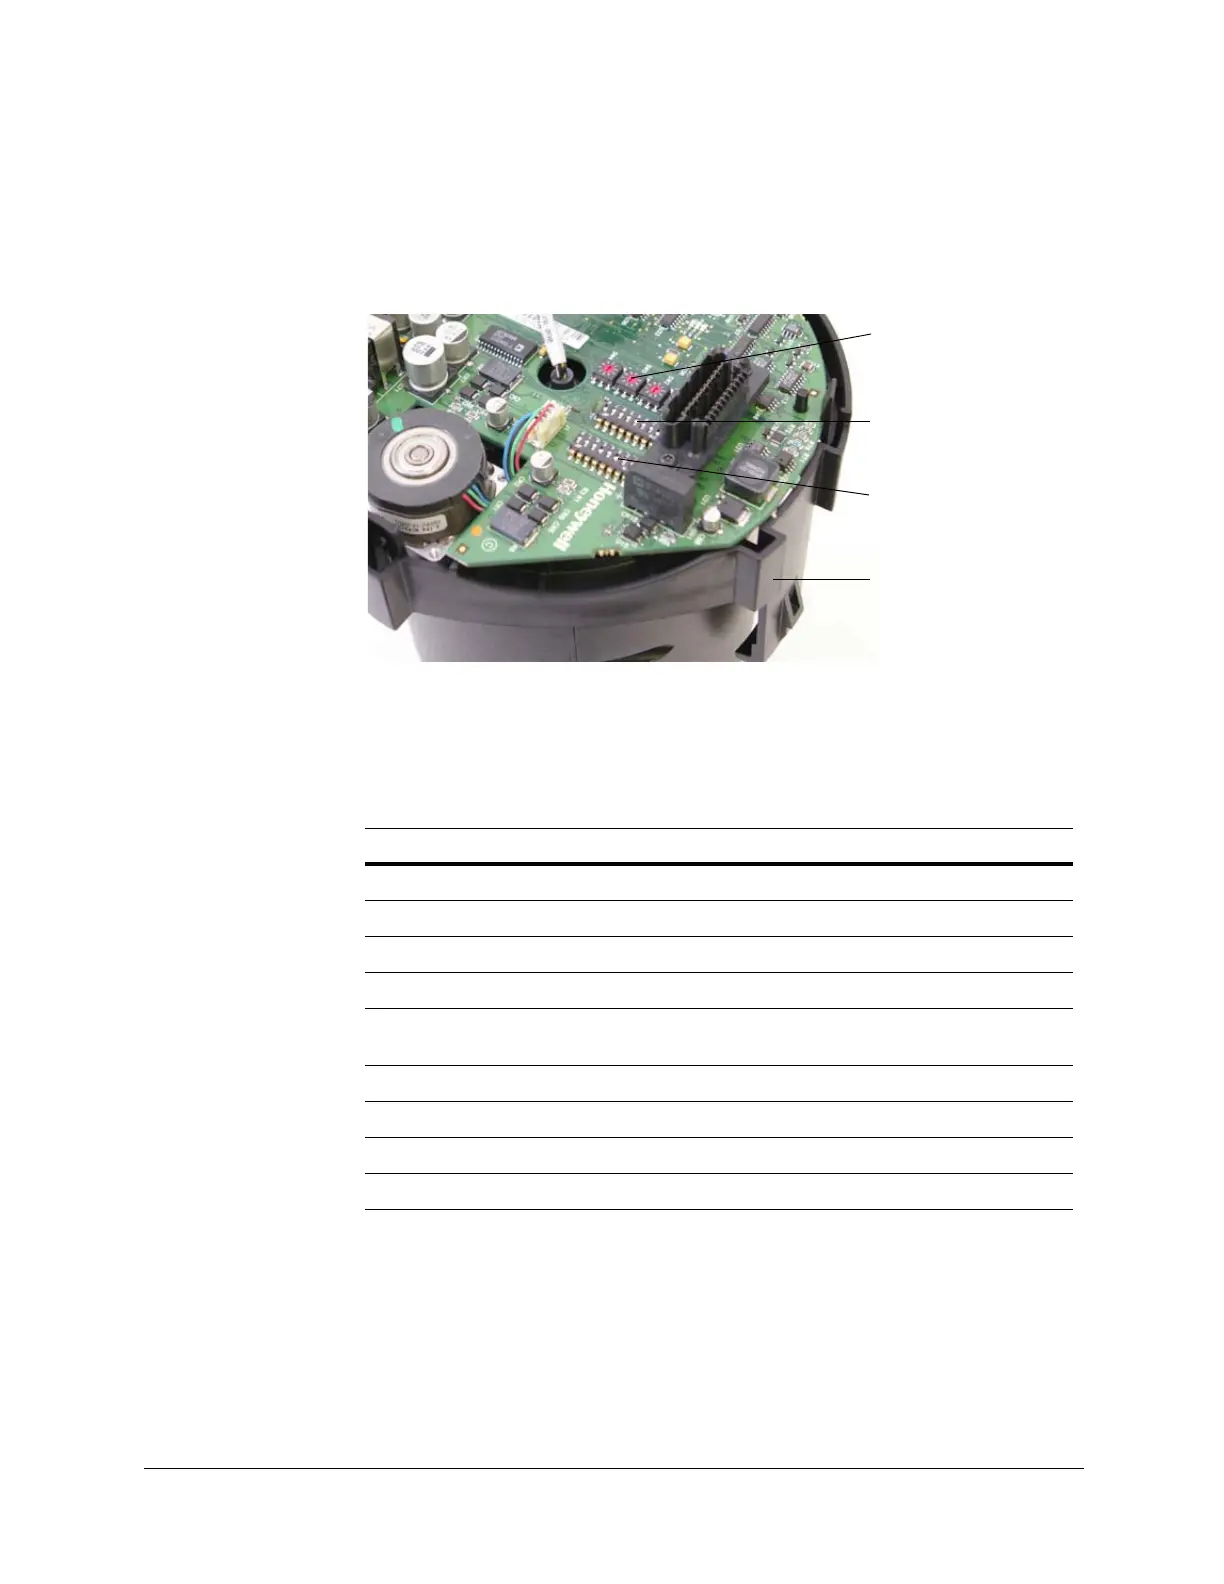
Figure 3-1 shows the location of the DIP switches (SW1 to SW6) on the scan
assembly main board.
Figure 3-1 DIP Switch Locations
Table 3-1 lists the default DIP switch settings.
SW5
SW6
Scan assembly
(includes camera)
SW1, SW2, SW3, and SW4
Table 3-1 Default DIP Switch Settings
Setting Default Switch
Address 0001 SW1, SW2, SW3, and SW4
Protocol MAXPRO-mode SW5-1 to SW5-5
Baud rate 9600 SW6-1 to SW6-4
Parity Even SW6-5 SW6-6
Miscellaneous Defaults*
Restore factory defaults OFF SW5-7
Override the logical address ON SW5-8
Debug/boot control OFF SW6-7
Reserved OFF SW6-8
* These are advanced switch settings and it is not recommended to make changes to
these defaults. See the System Administration and Equipment Handling for more
information.
 Loading...