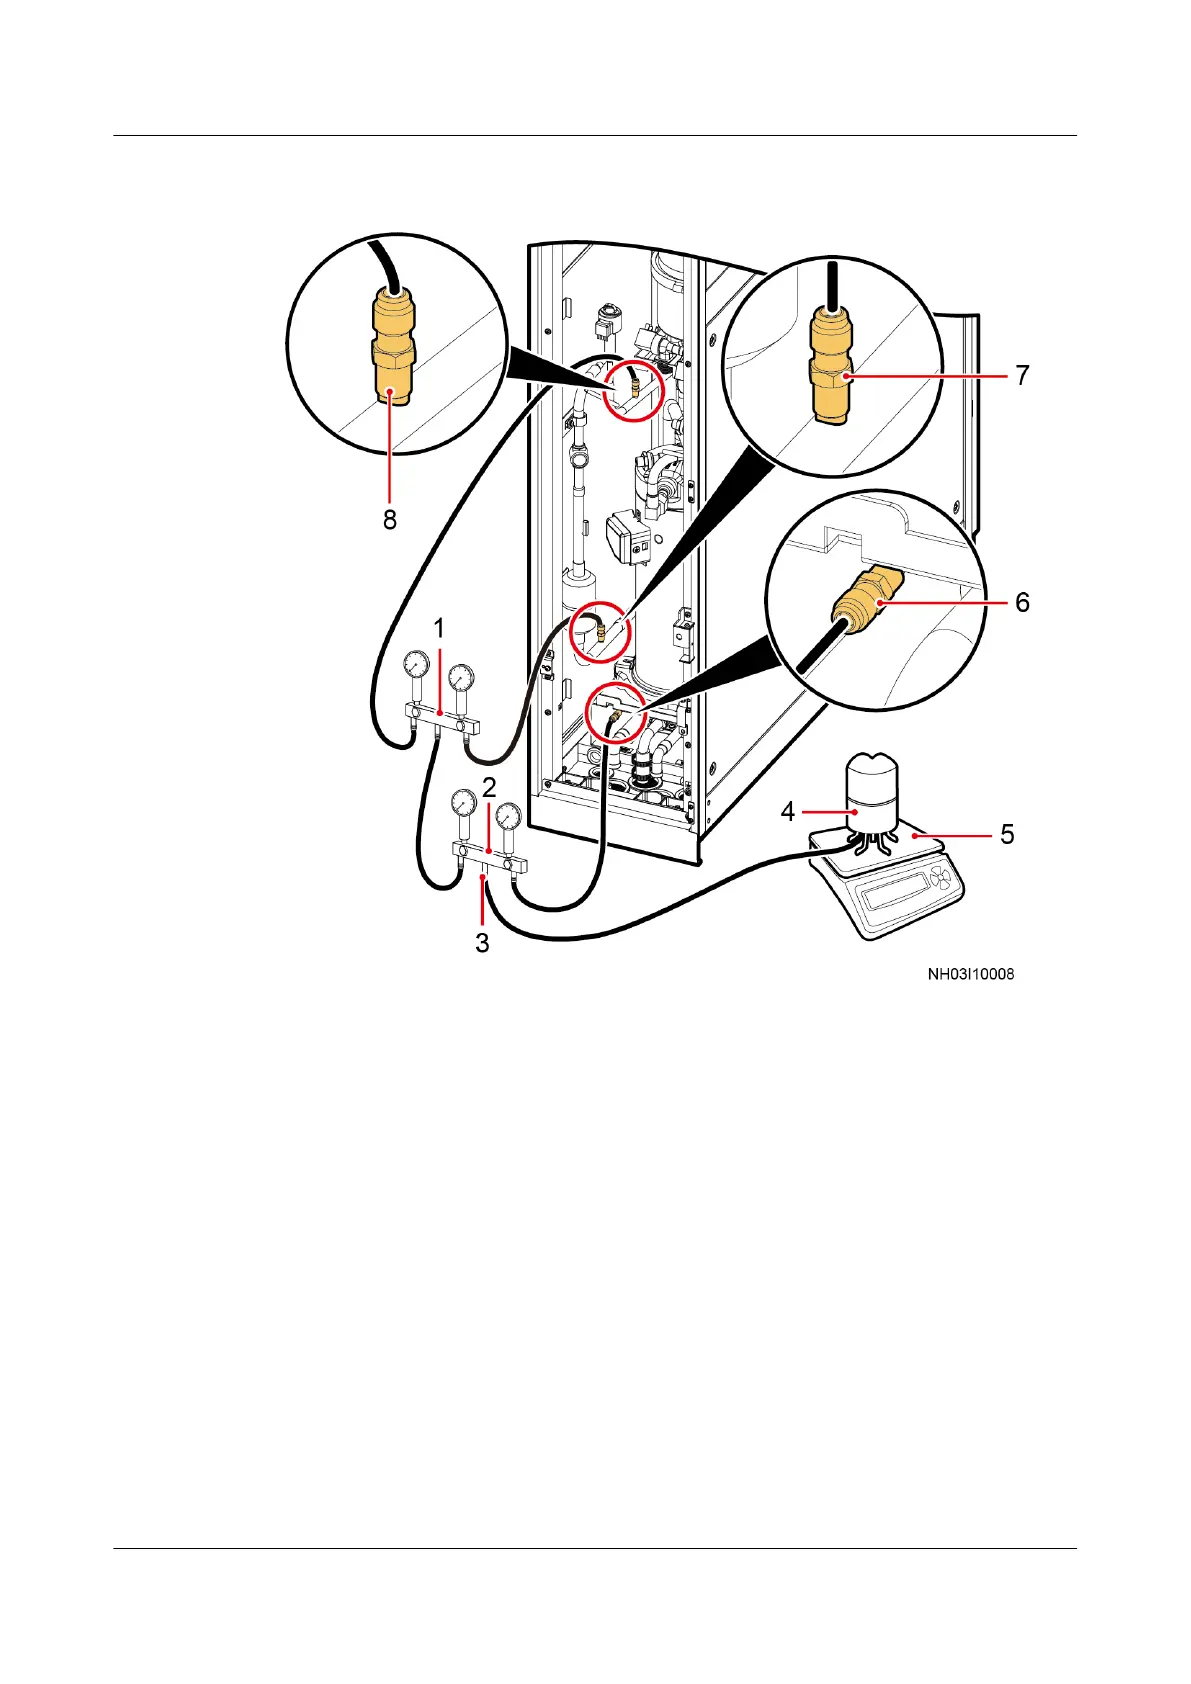
Figure 4-4 Precharging refrigerant when a low-temperature component is
installed
(1) Pressure gauge 1 (2) Pressure gauge 2 (3) Coupling nut (4) Refrigerant steel
cylinder
(5) Electric balance (6) Discharge pipe
needle valve
(7) Liquid pipe needle
valve
(8) Low-pressure
needle valve
Step 3 Slightly open the refrigerant steel cylinder valve and coupling nut for the pressure
gauge shown in Figure 4-3 (pressure gauge 2 in Figure 4-4). Tighten the nut
when cold air escapes out of the nut.
Step 4 Put the refrigerant steel cylinder upside down on an electric balance and clear the
reading to zero.
Step 5 Open all valves of the pressure gauges shown in Figure 4-3, and start charging
refrigerant.
NetCol5000-A025 In-row Air Cooled Smart Cooling
Product
User Manual (300 mm Width) 4 Power-On Commissioning
Issue 15 (2020-12-10) Copyright © Huawei Technologies Co., Ltd. 105