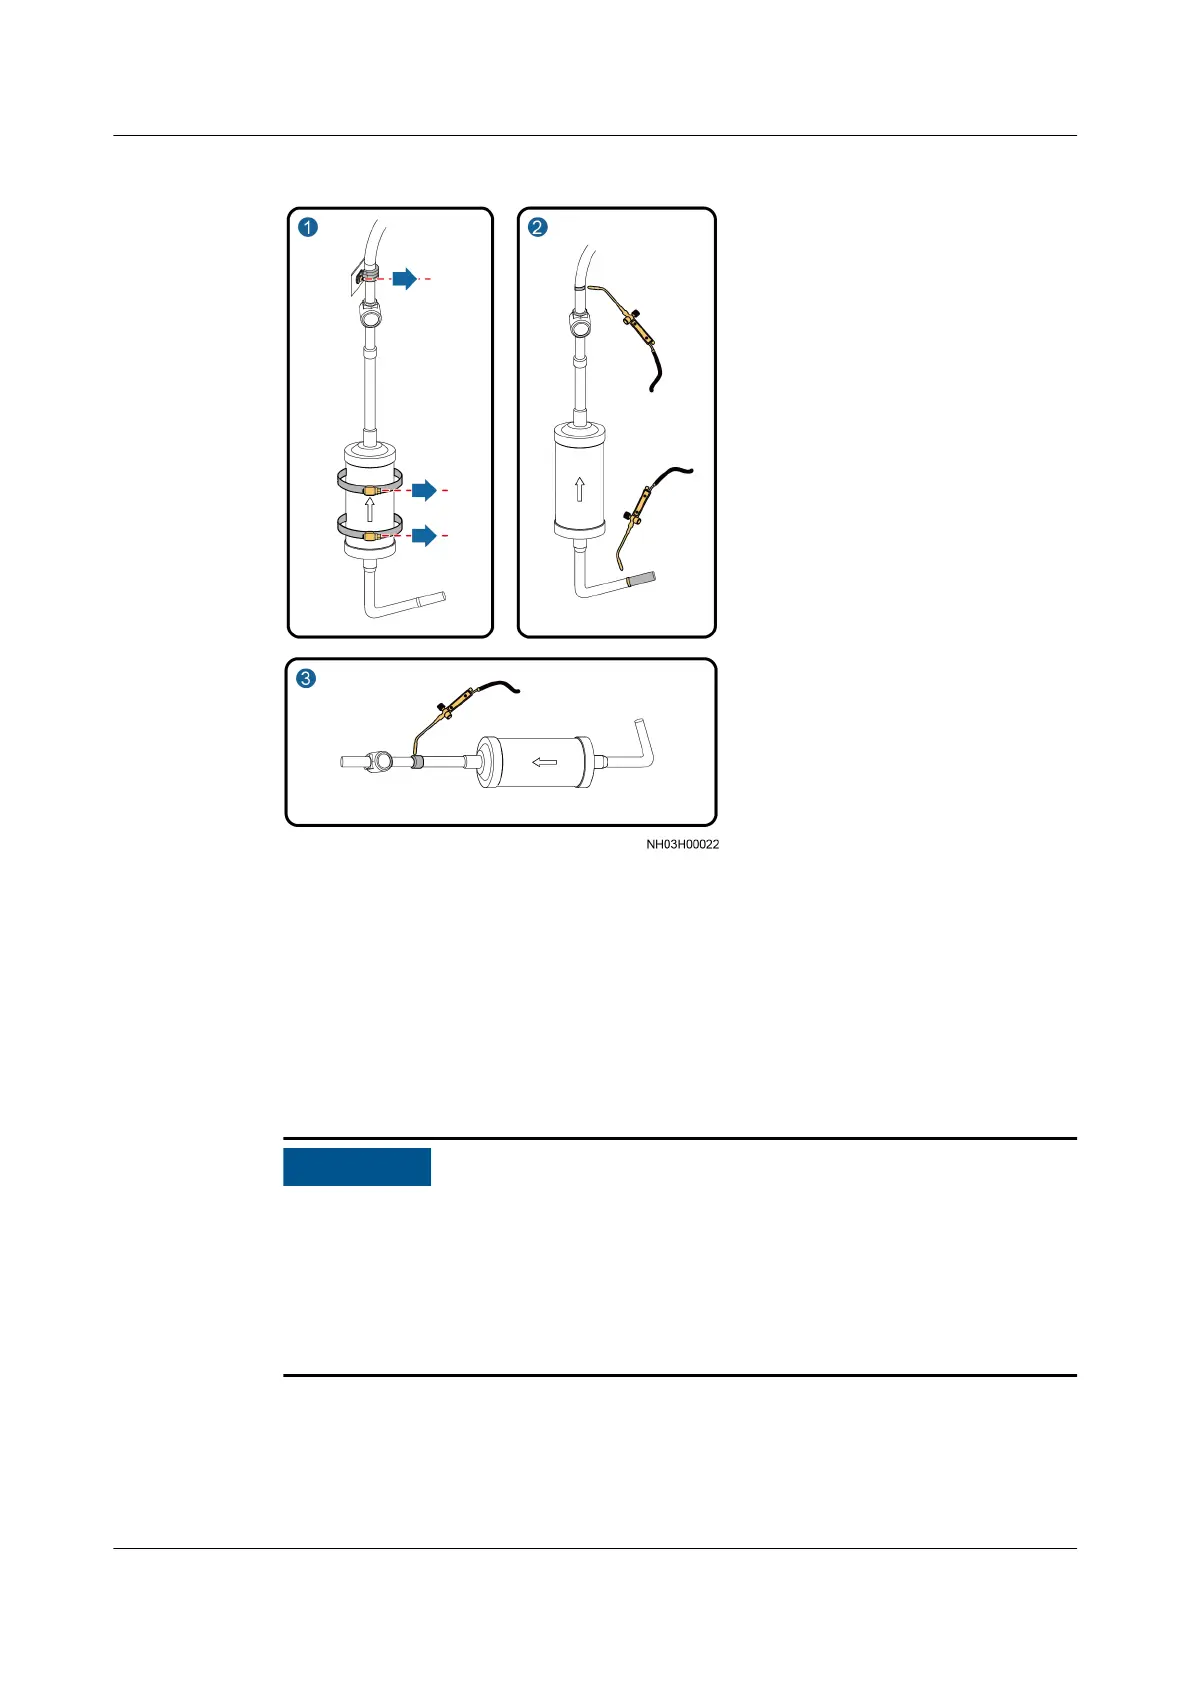
Figure 6-15 Removing a welded lter dryer
1. Remove the hold hoop from the lter dryer and the pipe clamp from the
above of the sight glass using a Phillips screwdriver.
2. Weld
o the entrance elbow below the lter dryer and the exit above the
sight glass, and remove the assembly of the
lter dryer and sight glass.
3. Weld o the entrance of the sight glass to remove the sight glass from the
assembly.
Step 5 Install the threaded
lter dryer, as shown in Figure 6-16.
● Weld the exit straight tube and the sight glass to form an assembly, which is
then welded to the original position in the smart cooling product. Weld the
entrance elbow to the smart cooling product. Then install the threaded
lter
dryer on the smart cooling product. Note that the arrow direction on the lter
dryer identies the ow direction of the refrigerant.
● Do not use face-down bonding.
NetCol5000-A025 In-row Air Cooled Smart Cooling
Product
User Manual (300 mm Width) 6 System Operation and Maintenance
Issue 15 (2020-12-10) Copyright © Huawei Technologies Co., Ltd. 242