2-3
2. ADVANCED OPERATIONS
Operating CW (ADVANCED)
DUsing the Memory Keyer function (KEYER)
You can send preset characters using the
Memory Keyer function.
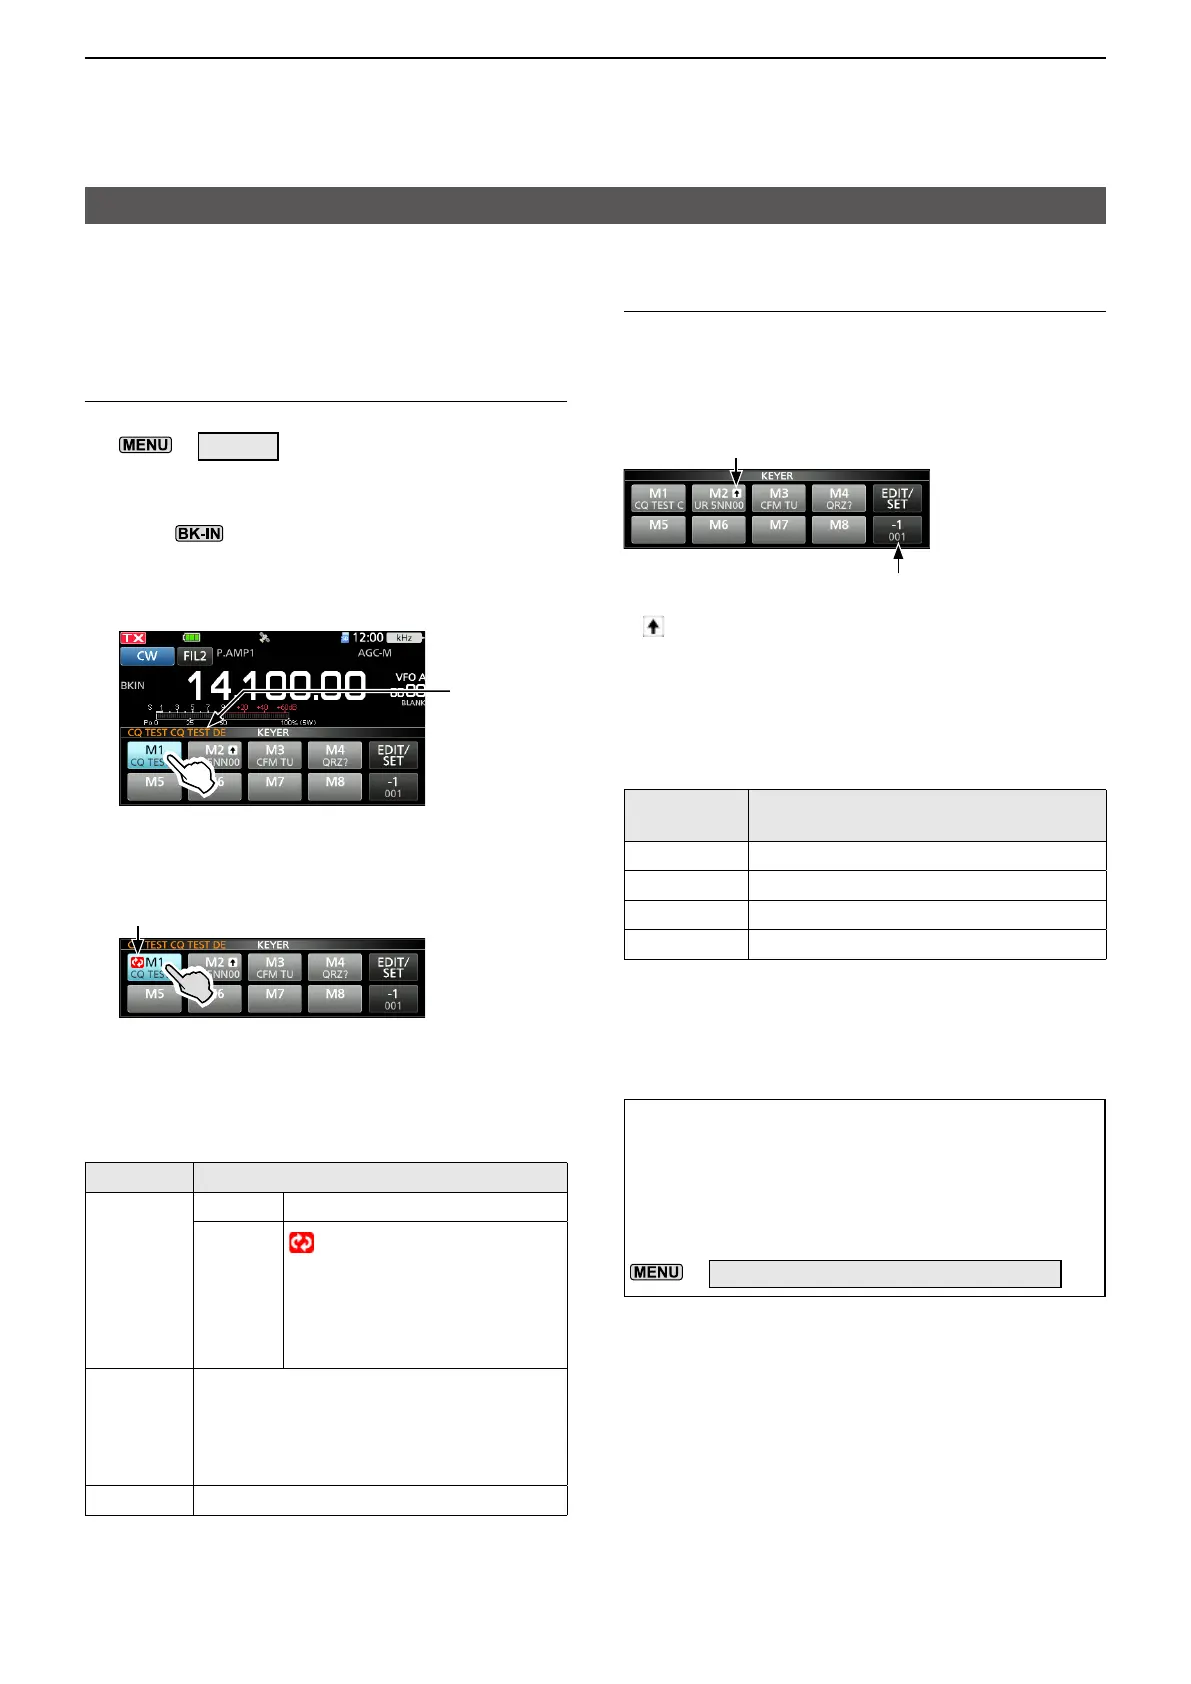
Sending
1. Display the KEYER screen.
»
KEYER
LThe [KEYER] key is displayed only in the CW
mode.
2. Push to turn ON the Break-in function.
(Basic Manual)
3. Touch a Memory Keyer key between [M1] and
[M8]. (Example: [M1])
Sending
memory
contents
• The touched memory contents are sent.
4. To repeatedly send the memory contents,
touch the Memory Keyer key for 1 second.
Repeat icon
LThe memory contents will be repeatedly sent,
according to the setting in “Keyer Repeat Time.”
LTo stop sending, touch the Memory Keyer key
again.
Key Action
M1 ~ M8
Touch Sends the memory contents.
Touch for
1 second
is displayed and repeatedly
sends the memory contents.
You can change the repeat
interval setting in “Keyer Repeat
Time” in the CW-KEY SET menu.
(p. 2-6)
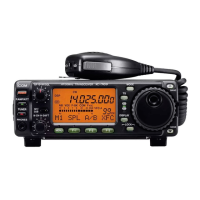
–1
001
Reduces the contest number counter by 1
(001).
• You can change or reset the number in
“Present Number” in the KEYER 001
menu. (p. 2-5)
EDIT/SET Displays the EDIT/SET screen.
Count-up trigger
The Count-up trigger enables the serial number
to be automatically increased after each
complete serial number exchange is sent.
(Default: M2)
Present number counter
Count-up trigger icon
L is displayed on the Memory Keyer set to the
Count-up trigger.
LYou can change the Count-up trigger setting in the
KEYER 001 menu. (p. 2-5)
Preset Keyer memory contents
Keyer
memory
Contents
M1 CQ TEST CQ TEST DE ICOM ICOM TEST
M2 UR 5NN 001 BK
M3 CFM TU
M4 QRZ?
L“001” is the CW contest number.
If you want to set the Count-up trigger to a different
keyer, delete the “*” (asterisk) from the Memory
Keyer M2. (p. 2-4)
When an external keypad is connected:
You can transmit the preset contents in the
Keyer memory (M1 ~ M8) from an external
device by setting the “External Keypad,” and
then connecting an external keypad to [KEY] on
the IC-705.
»
SET > Connectors > External Keypad