Invacare®LiNX
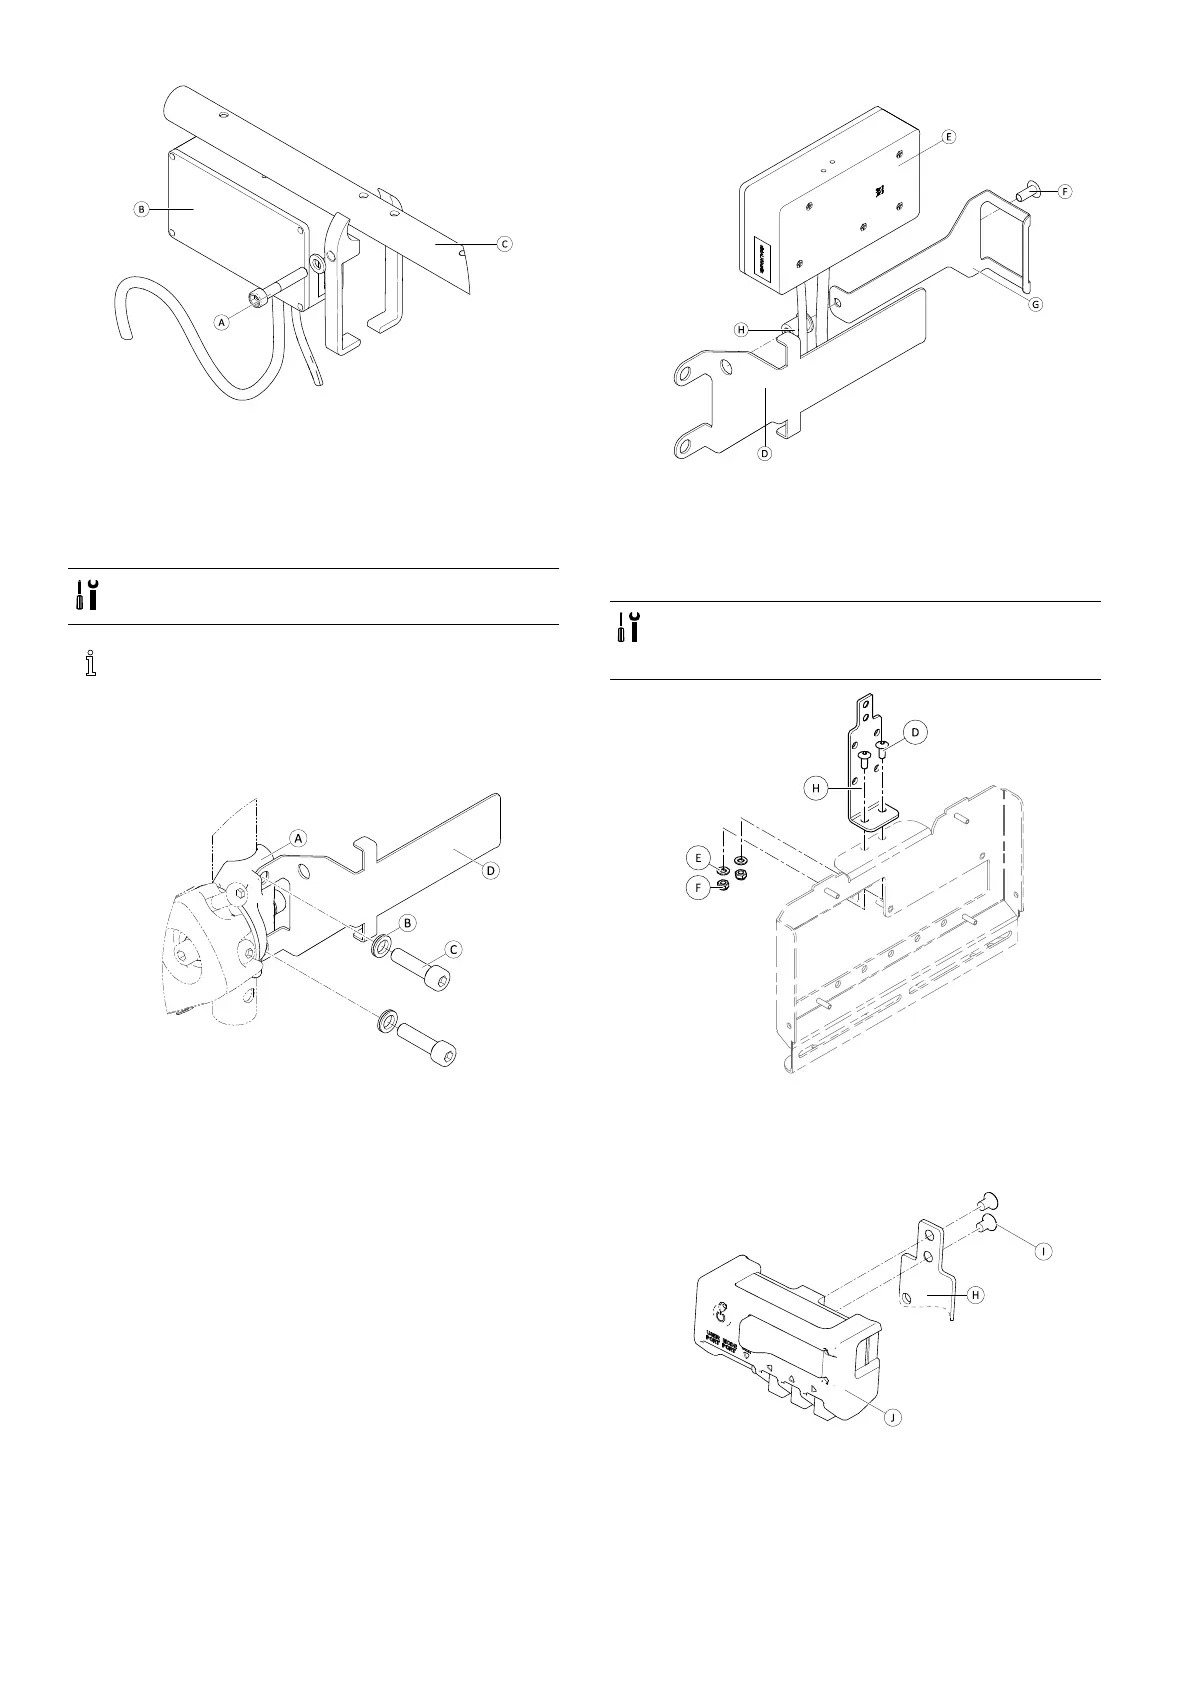
Fig.3-50
1.LoosenscrewA.
2.InstallInterfaceBoxB.
3.PlacebothpartsontoarmresttubeCandre-tighten
screwA.
MountingASLJoystickInterfaceBoxforModulite
•3mmAllenkey
•6mmAllenkey
Illustrationbelowshowsleft-handmountedholder
onseatwithmountedip-uparmrest.Armrest
holderAcanbereplacedbysaddlewasherand
alsomountingpositioncanvarify.Installationorder
isthesame.
1.
Fig.3-51
LoosenandremoveupperscrewCandwasherB.
2.InstallbaseholderD.Ensurethatarmrestholder
(saddlewasher)Aisinstalledincorrectwayandboth
holesareinline.
3.Re-insertscrewandwasher.
4.Repeatstepsonetothreeforsecondscrew.
5.TightenbothscrewsCto6Nm.
6.
Fig.3-52
InstallwellnutH,interfaceboxEandholderG.
7.TightenboltFto0.3Nm.
MountingASL106InterfaceBoxforUltraLowMaxx
(ManualRecline)
•1/8inchAllenkey
•3mmAllenkey
•8mmwrench
Fig.3-53
1.InsertboltsD.
2.InstallholderH,washersEandnutsF.
3.TightennutsF.
4.
Fig.3-54
TighteninterfaceboxJtoholderHwithscrewsI.
44
1605129-G