4. Tighten the thumbscrews at each end of the Routing Engine.
5. You can verify correct Routing Engine functioning by issuing the
show chassis routing-engine command, described in “Maintaining the M7i Routing
Engine” on page 192.
Figure 42: Installing the Routing Engine
See Also Preventing Electrostatic Discharge Damage to an M7i Router on page 228•
• M7i Chassis Description on page 11
• M7i Routing Engine Description on page 17
• Removing an M7i Routing Engine on page 141
Related
Documentation
Preventing Electrostatic Discharge Damage to an M7i Router on page 228•
• M7i Chassis Description on page 11
• M7i Routing Engine Description on page 17
• Maintaining the M7i Routing Engine on page 192
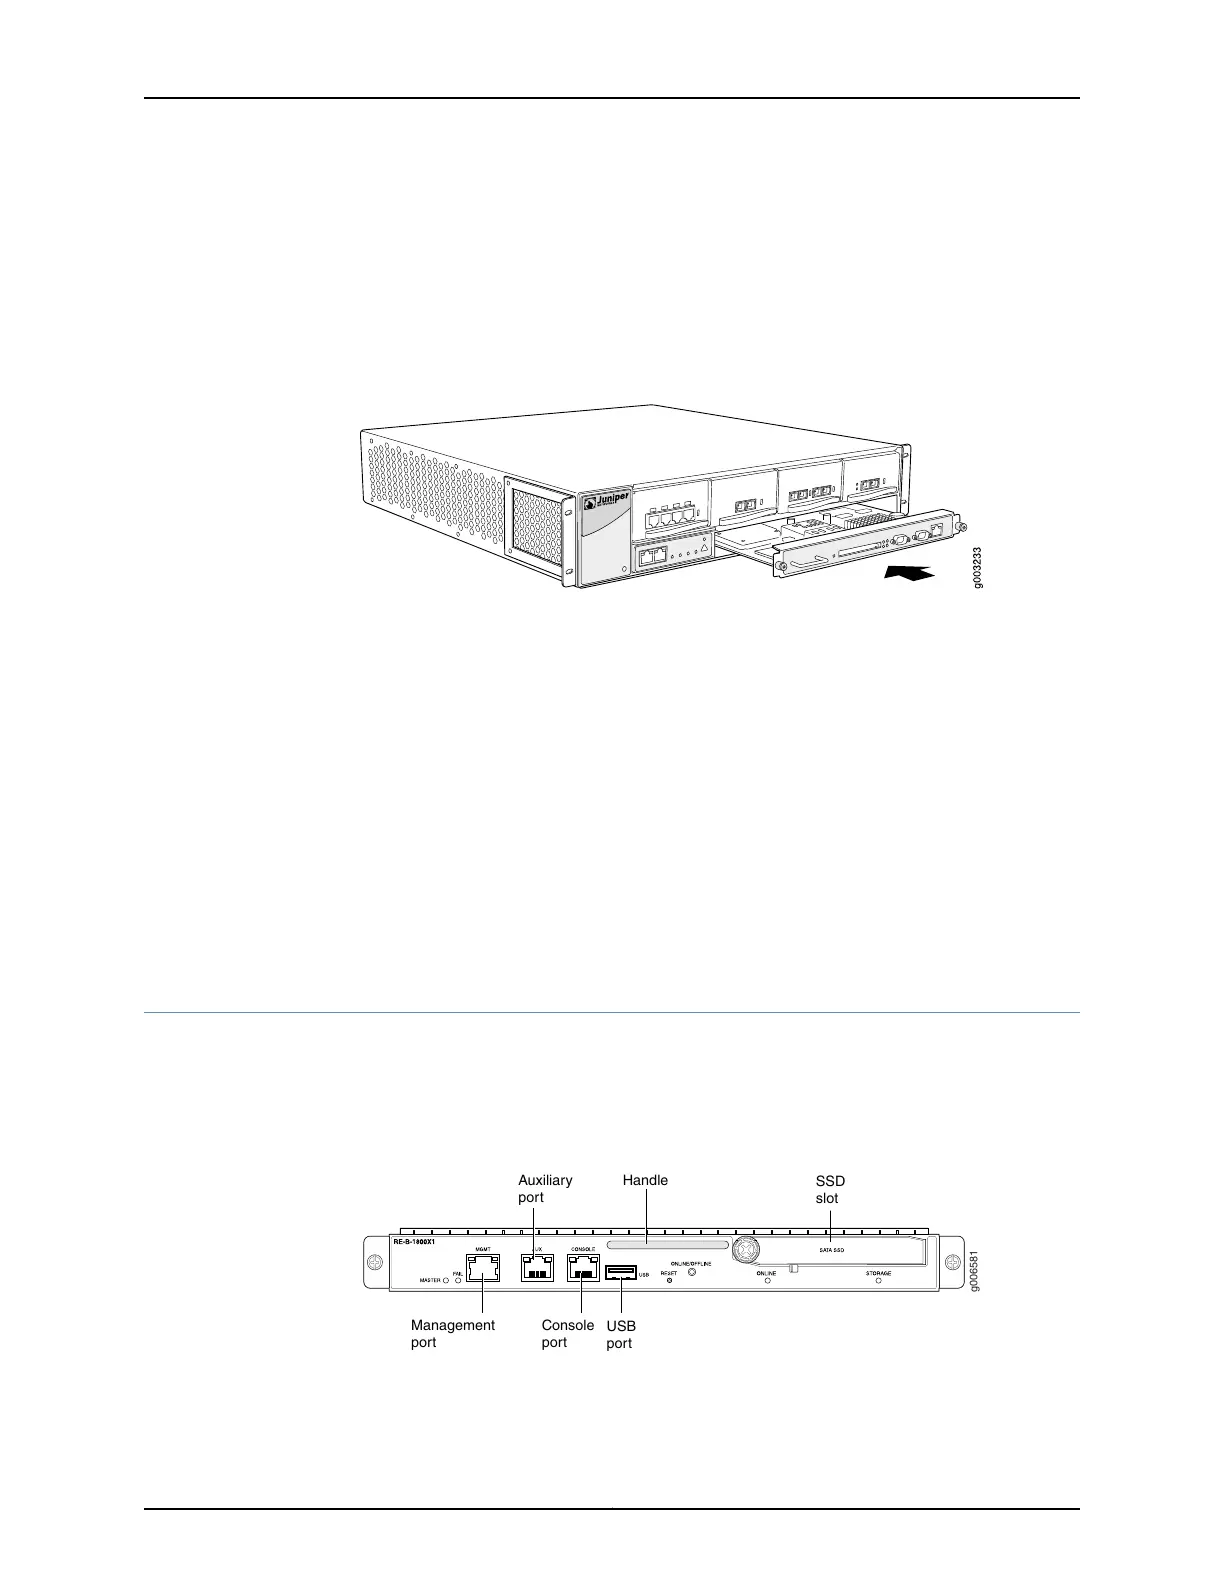
Replacing the SSD on an RE-B-1800 Routing Engine
The RE-B-1800 Routing Engine supports a solid-state drive (SSD) specified by Juniper
Networks and ships with one SSD installed. Figure 43 on page 143 shows the arrangement
of storage drive slots on an RE-B-1800 Routing Engine.
Figure 43: RE-B-1800 Storage Drive Slots
g006581
USB
port
SSD
slot
Console
port
Management
port
Auxiliary
port
Handle
143Copyright © 2019, Juniper Networks, Inc.
Chapter 23: Replacing Host Subsystem Components