3. Label the cable connected to the SFP so that you can later reconnect it to the correct
SFP.
4. Disconnect the cable from the SFP. Immediately cover the transceiver and the end
of the cable with a rubber safety cap.
5. Arrange the cable to prevent it from dislodging or developing stress points. Secure
the cable so that it is not supporting its own weight as it hangs to the floor. Place
excess cable out of the way in a neatly coiled loop. Placing fasteners on the loop helps
to maintain its shape.
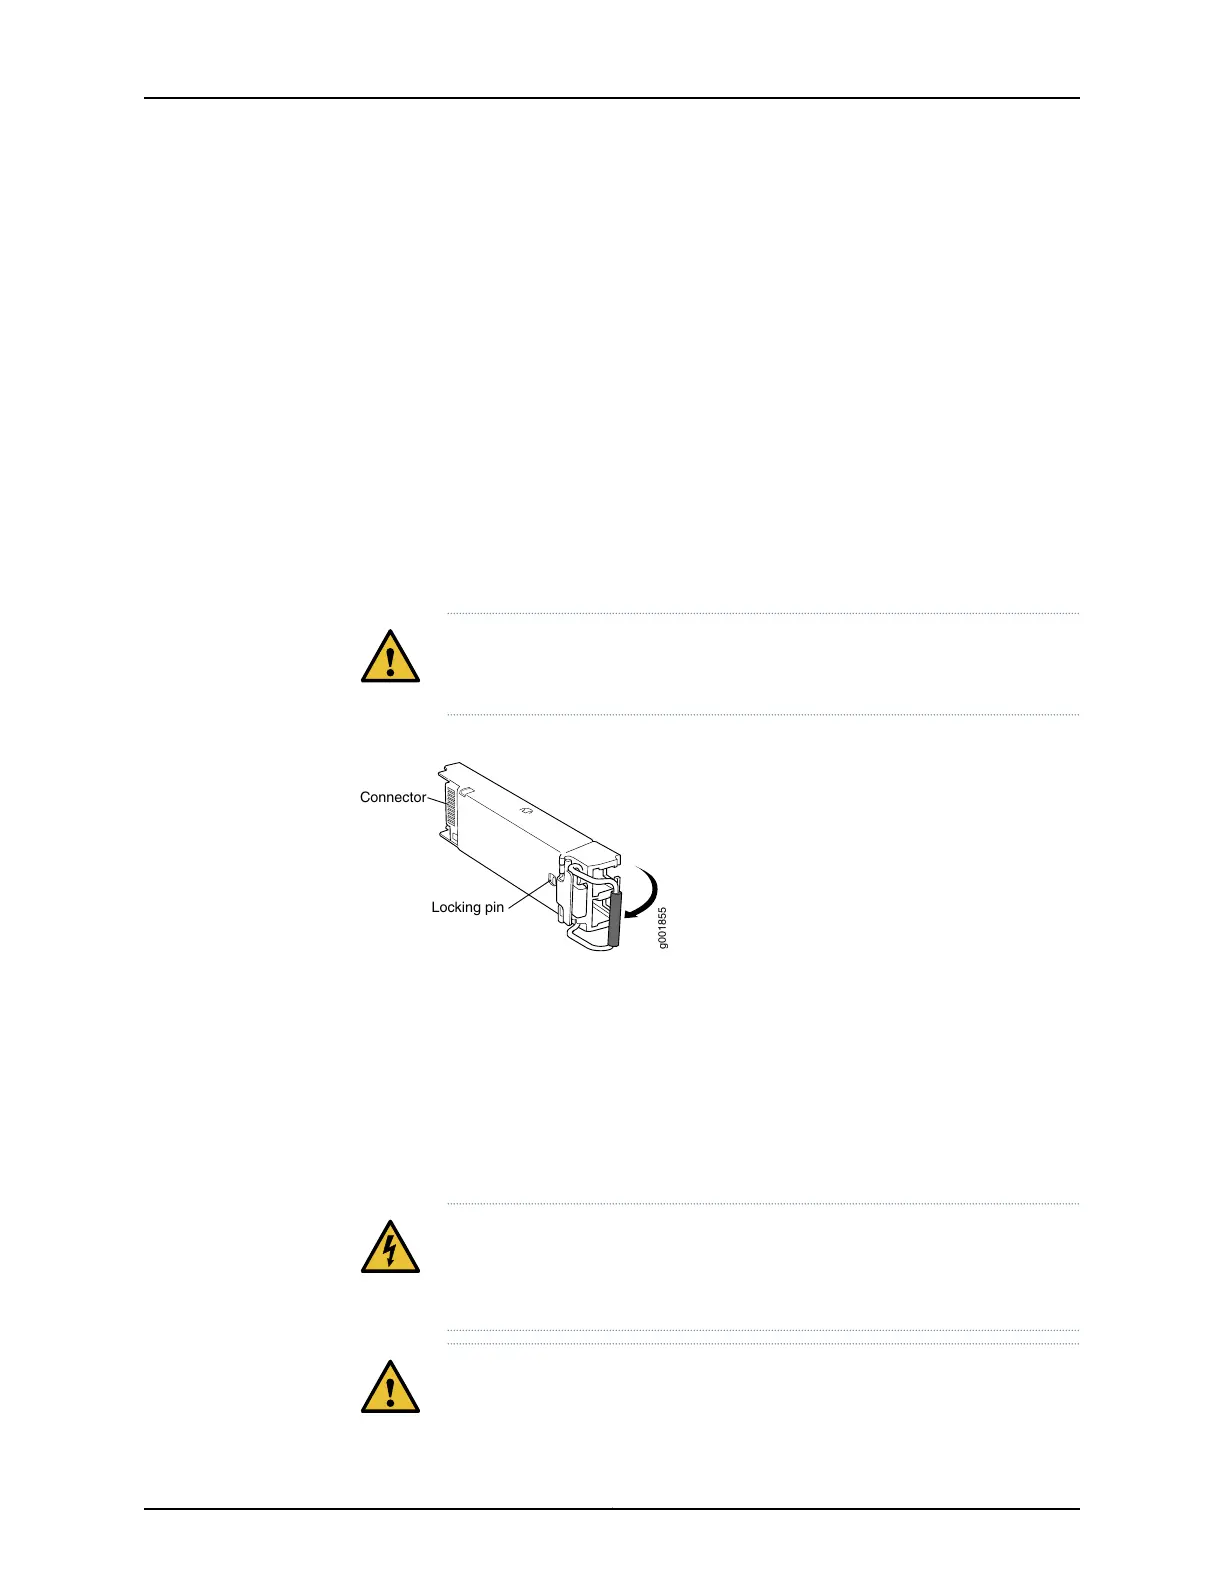
6. Pull the ejector handle away from the SFP faceplate to unseat the SFP from the PIC.
Pull the SFP out of the PIC and place it on the antistatic mat or in the electrostatic
bag.
CAUTION: After removing a transceiver from the chassis, wait at least 30
seconds before reinserting it or inserting a transceiver into a different slot.
Figure 60: Small Form-Factor Pluggable (SFP)
g001855
Connector
Locking pin
See Also Preventing Electrostatic Discharge Damage to an M7i Router on page 228•
• M7i Chassis Description on page 11
• M7i Router Physical Specifications on page 74
• Installing an SFP into an M7i Router on page 167
Installing an SFP into an M7i Router
WARNING: Do not look directly intotransceivers or into the ends of fiber-optic
cables connected to a transceiver. Fiber-optic transceivers emit laser light
that can damage your eyes.
CAUTION:
167Copyright © 2019, Juniper Networks, Inc.
Chapter 24: Replacing Line Card Components