5: Getting started
45
to the connector on the antenna.
To access the receiver via Ethernet, USB, Bluetooth or WLAN, refer to:
• Setup via Web Interface over Ethernet and DHCP
• Setup in a non-DHCP network
• Install USB drivers
• Setup via Web Interface over USB
• Setup via Web Interface over Bluetooth (GR25)
• Setup via Web Interface over WLAN (GR25)
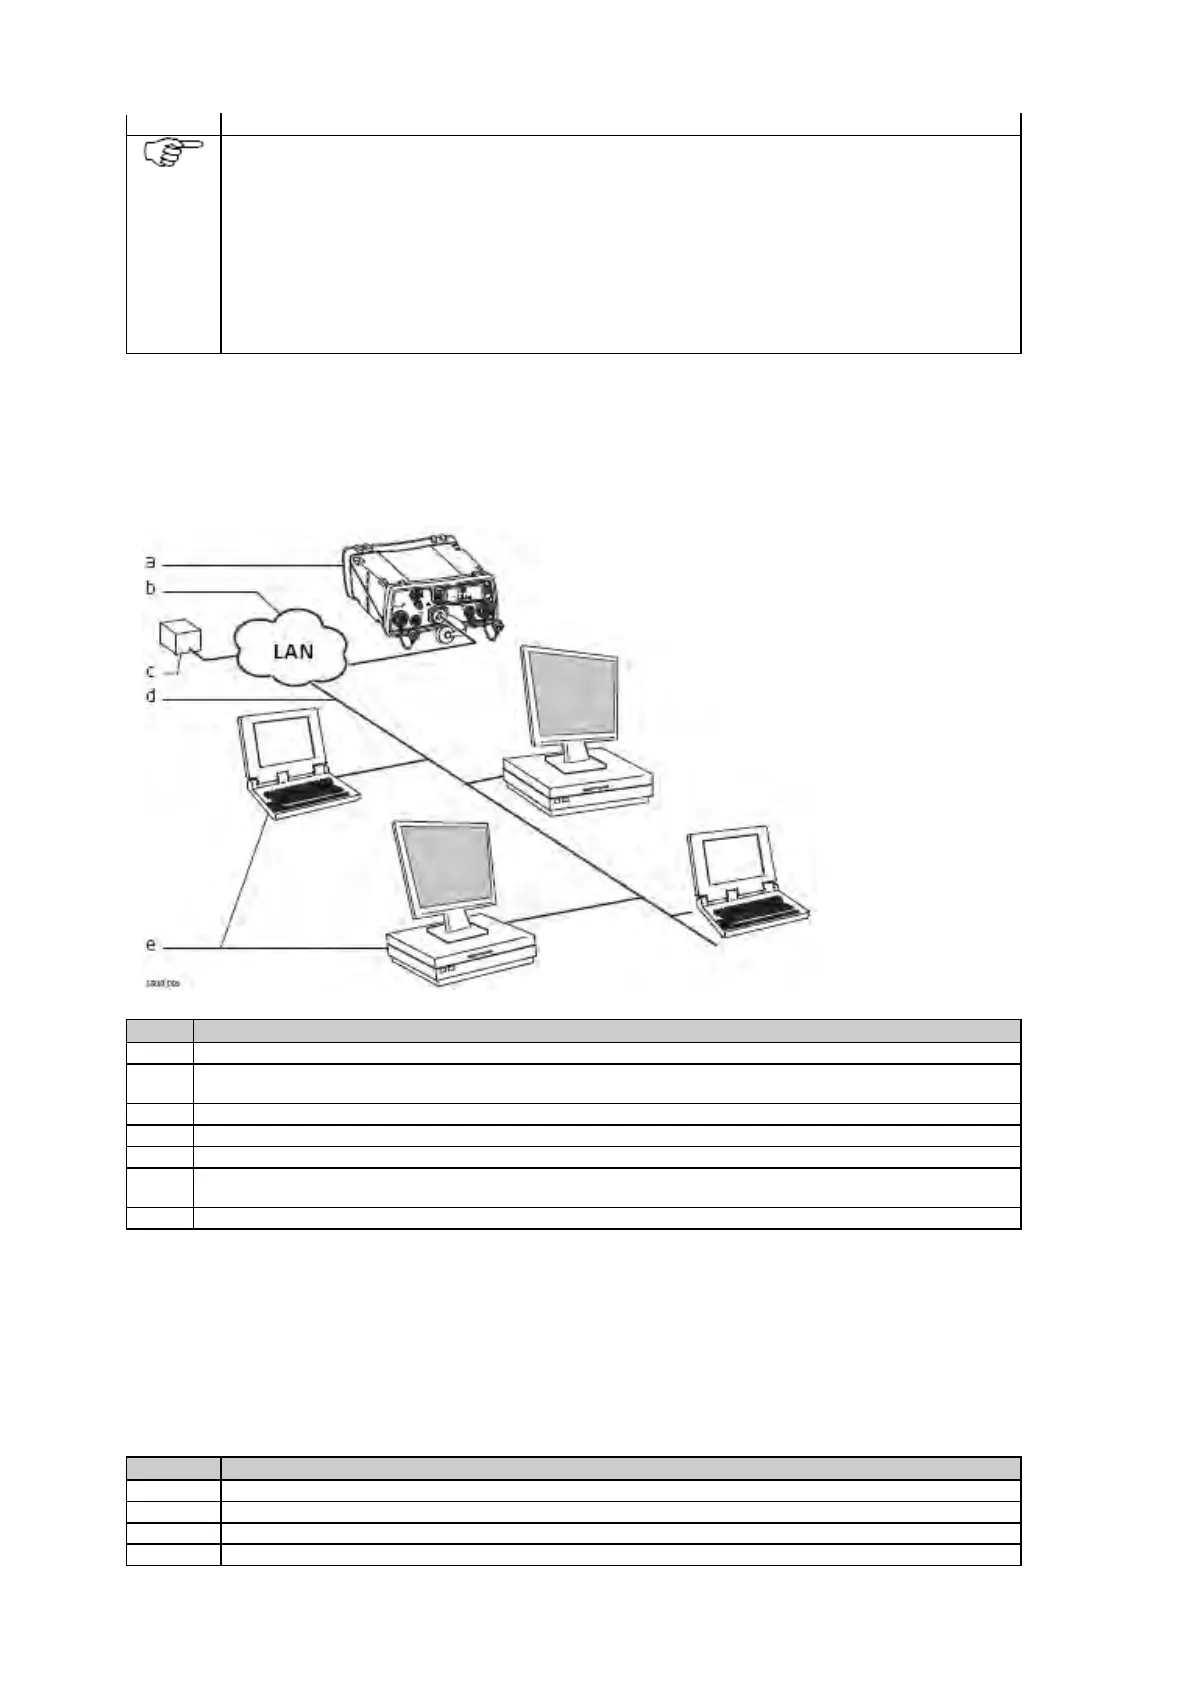
Setup via Web Interface over Ethernet and DHCP
Setup via Web Interface over Ethernet and DHCP
a. GR/GM receiver
b. Local network
(LAN)
c. DHCP server
d. Ethernet cable
e. Computers with
Web interface
To connect the instrument to the local LAN supporting DHCP, plug an Ethernet cable with a RJ45 connector into
the RJ45 Ethernet port on the back of the instrument.
Connect the other end of the cable with a network device of your LAN, e.g. hub, switch or router.
Open a browser window on your computer.
Type "GR*******" or "GM******* into the browsers address field, with ******* being the serial number of the
receiver. For example, GR1700001 or GM1700001.
The Web interface will now be available. Configure the instrument for all required settings.
Setup in a non-DHCP Network
Setup in a non-DHCP network
If the instrument is setup in a non-DHCP network, the web interface can still be accessed using a crossed Ethernet cable.
Connect the crossed Ethernet cable to the computer and the Ethernet port on the back of the receiver.
On the computer go Start / Control Panel / Network Connections.