FLIR Client 12 for PC / Mac
13
10. Enter the PTZ ID number in the field next to Address.
NOTE
If connecting multiple PTZ cameras, you cannot use the same ID number for more than one PTZ
camera.
11. Click Save. You will now be able to control your PTZ camera using the DVR.
For details on using and controlling the PTZ camera, see 13.4.3 PTZ Controls, page
96.
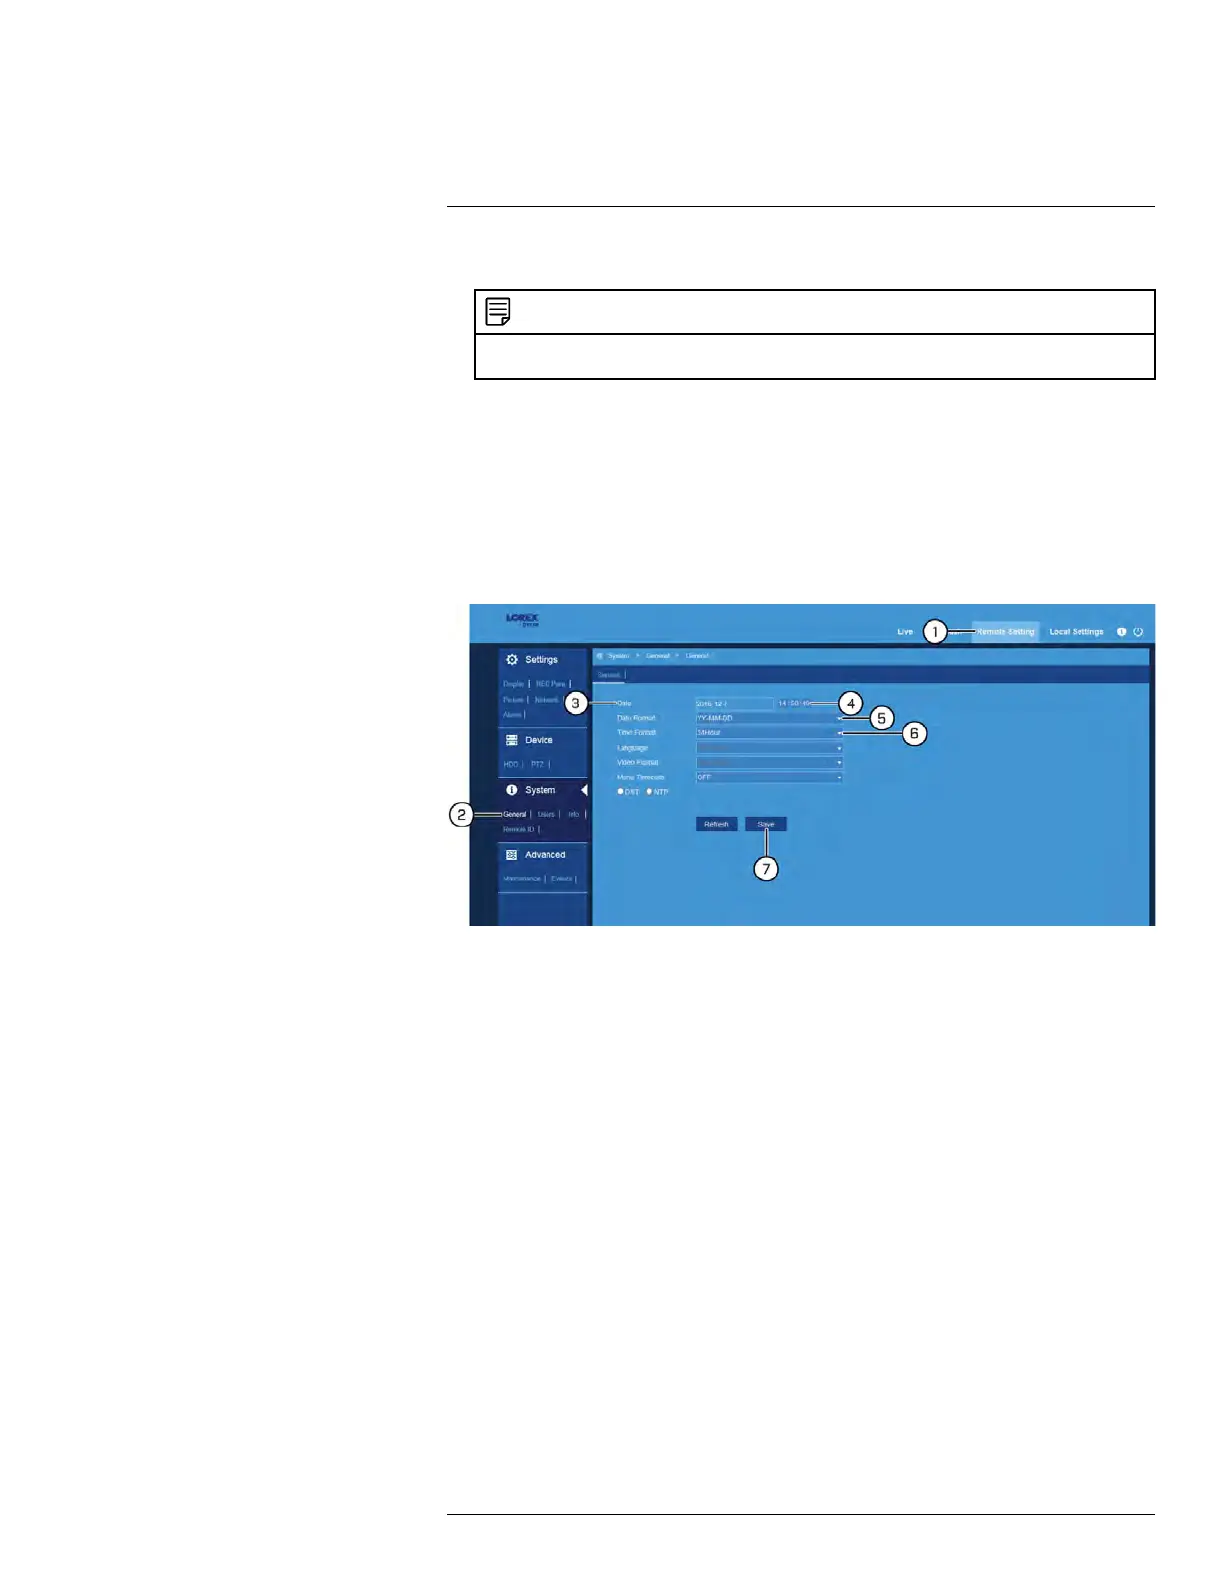
13.6.19 Changing the Date and Time
If you need to change the date and time after completing the setup wizard, follow the steps
below.
To change the DVR’s date and time:
1. Click Remote Setting in the top-right corner of the window.
2. Under System, click General to open the General tab.
3. Click the field next to Date to select the correct date from the calendar.
4. Click to enter the correct time. Use the dropdown to select AM or PM if using 12-hour
time format.
5. Select how you want the date to appear from the dropdown next to Date Format.
6. Select how you want the time to appear from the dropdown next to Time Format.
7. Click Save.
13.6.20 Configuring Menu Time-out Option
By default, system menus are set to time-out after a set time period, taking you back to the
main menu if there is no activity.
To configure or disable menu time-out:
#LX400086; r. 1.0/39246/39246; en-US
115