Using the Main Menu12
7. (OPTIONAL) Use the Copy function to copy your settings to another or all connected
cameras. See 12.1.1 Copying Channel Settings to Another Channel, page 49 for de-
tails on using the copy function.
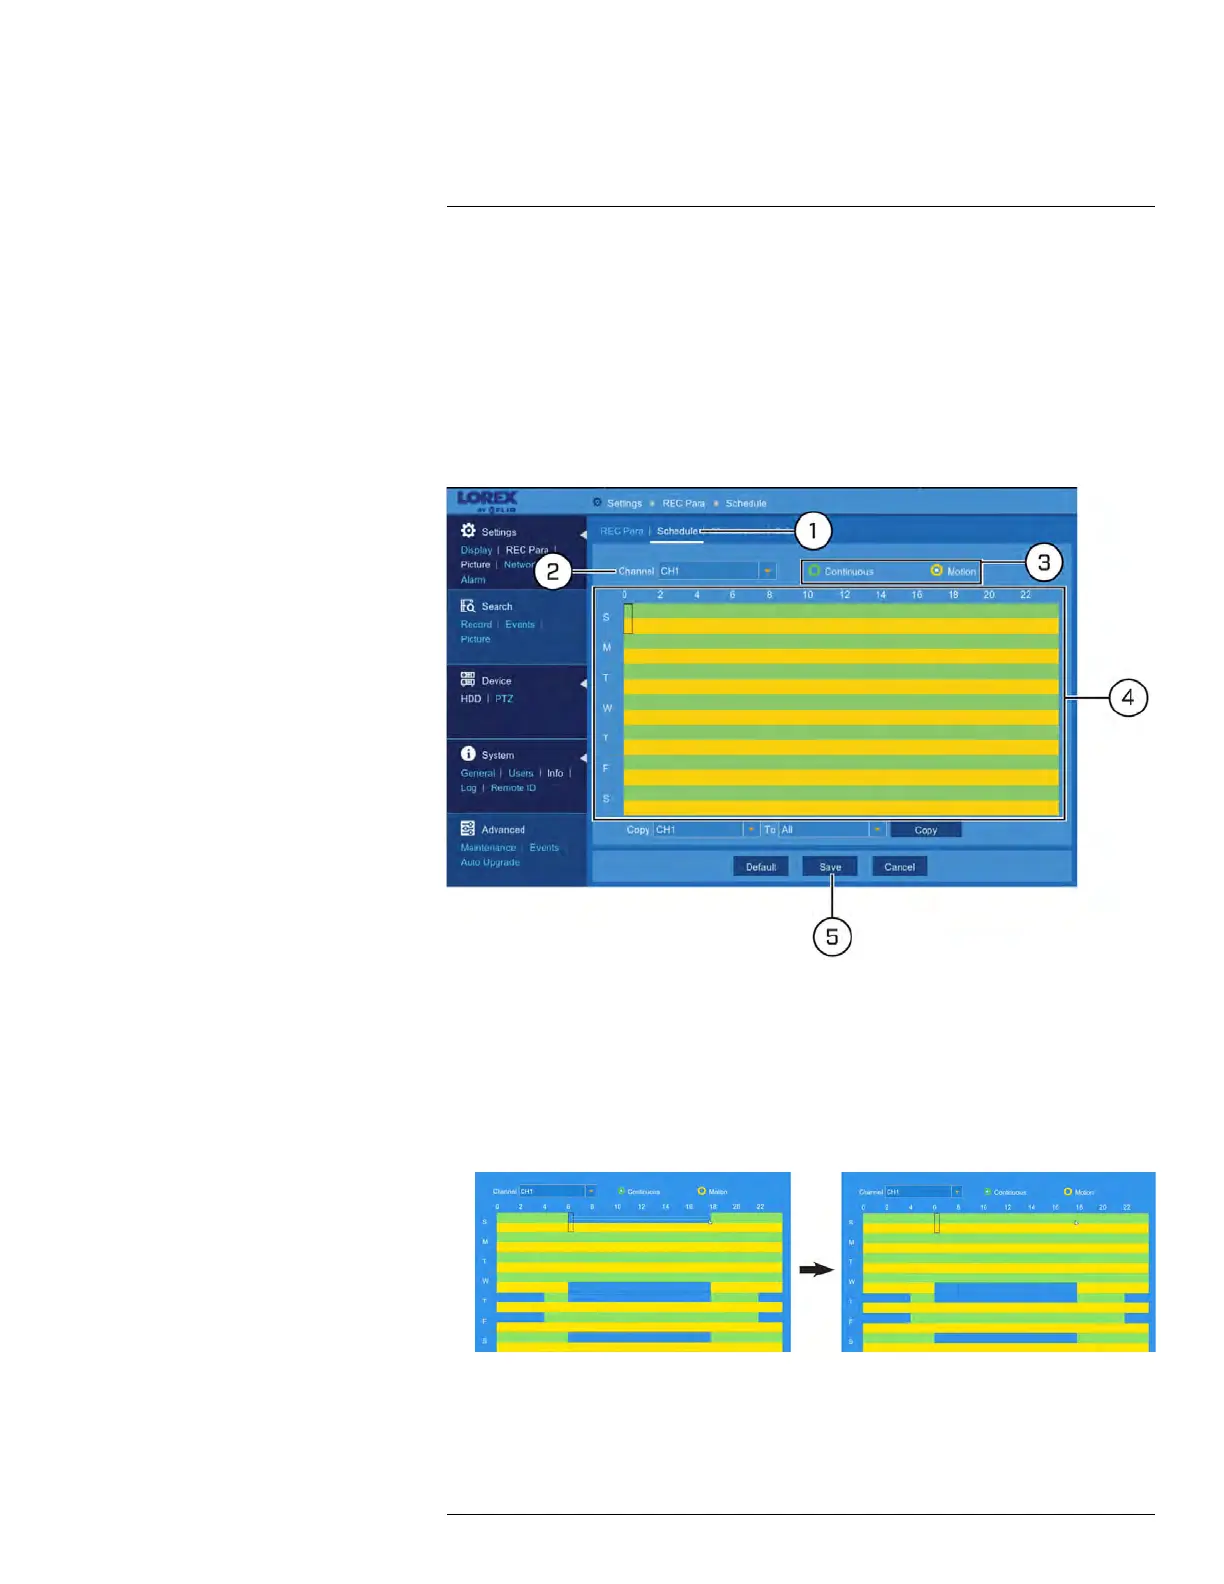
12.2.10 Setting the Recording Schedule
The recording schedule determines the time periods that the system will record video dur-
ing. You can set separate schedules for continuous and motion recording within the same
channel.
To set a recording schedule:
1. Under Settings, click REC Para, then click on the Schedule tab.
2. Use the dropdown next to Channel to select a channel to set the recording schedule
for.
3. Select Continuous to edit the continuous recording schedule (represented by green
bars), or Motion to edit the motion recording schedule (yellow bars).
4. Click or click-and-drag over existing bars to remove sections from the recording sched-
ule. For blank areas of the schedule, click or click-and-drag to add sections to the re-
cording schedule.
5. Click Save.
6. (OPTIONAL) Use the Copy function to copy your settings to another or all connected
cameras. See 12.1.1 Copying Channel Settings to Another Channel, page 49 for de-
tails on using the copy function.
#LX400086; r. 1.0/39246/39246; en-US
59