Using the DVR’s On-Screen Display
7
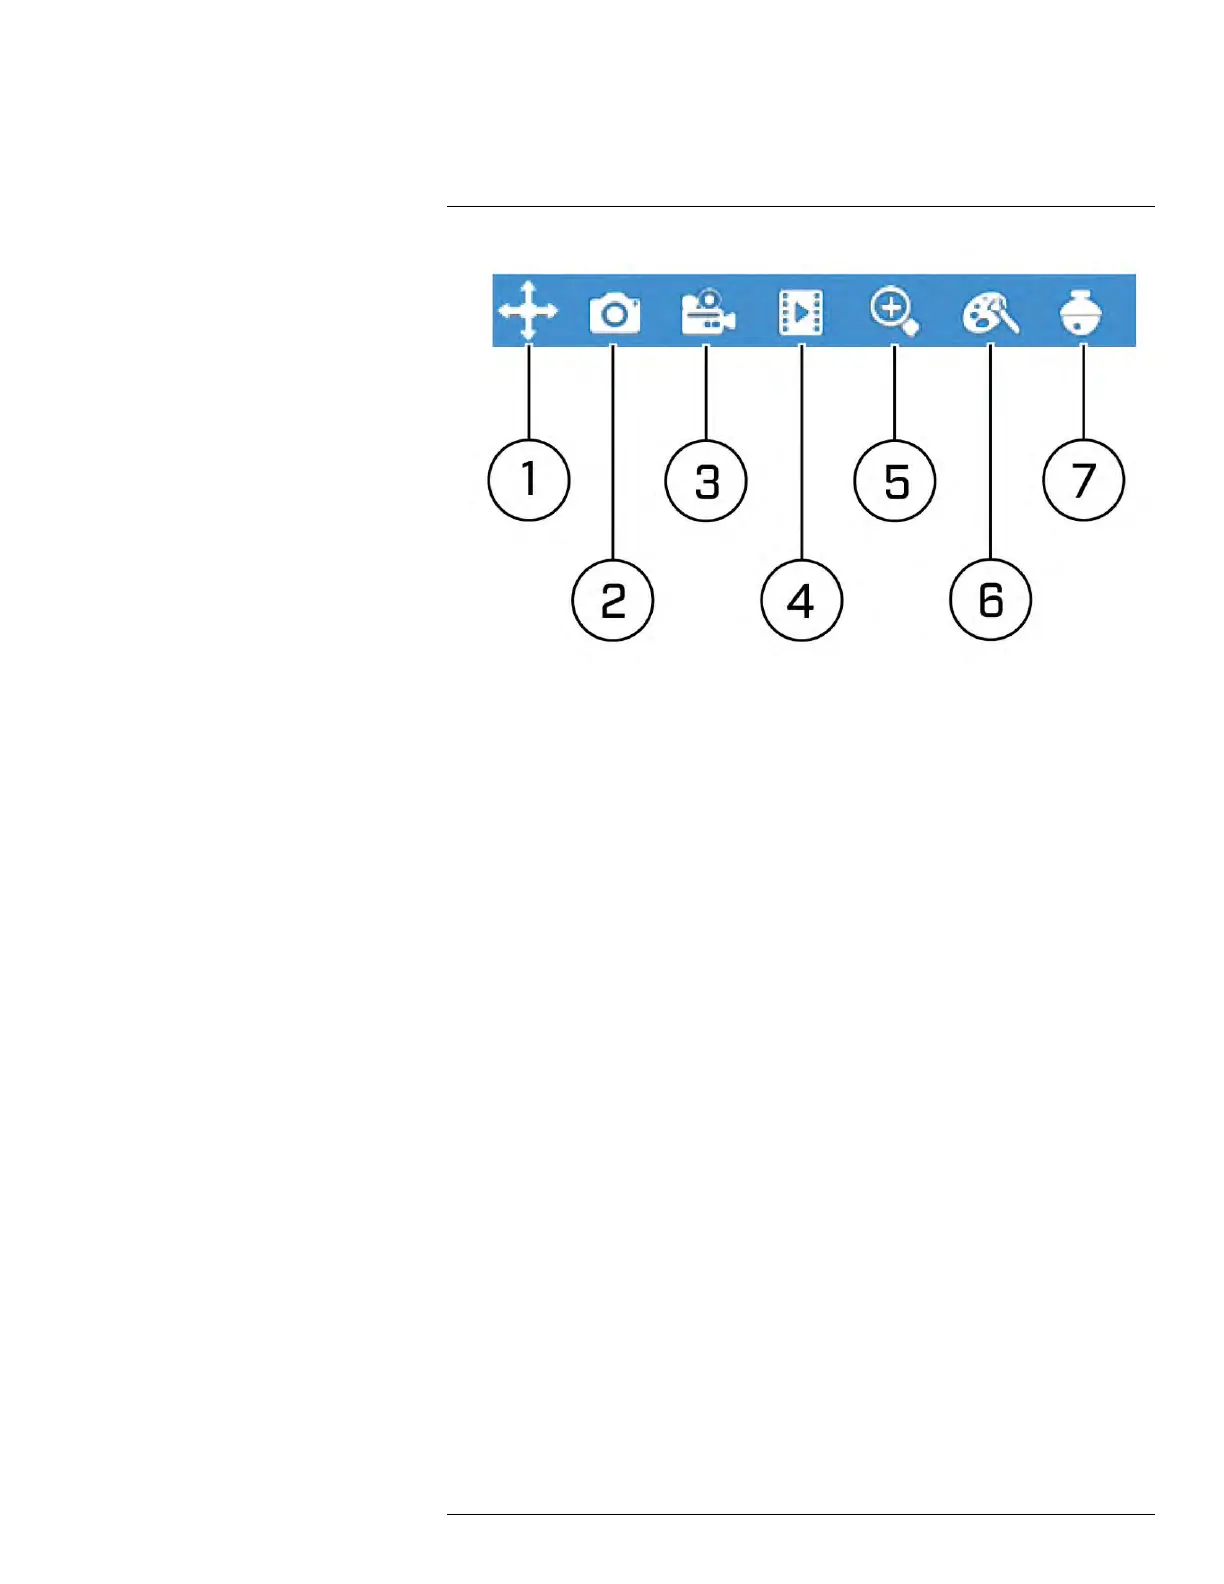
1. Move Mini Menu: Click-and-drag to move the Mini Menu to a different part of the
screen.
2. Manual Capture: Click to save a snapshot of the current camera image. Manual Cap-
ture must be enabled to use this feature. For details on enabling Manual Capture, see
12.2.14 Enabling Manual Capture, page 63.
3. Manual Recording: Click to manually record video from the selected channel. Pass-
word entry required.
4. Instant Playback: Plays back up to 5 minutes of the most recently recorded video
from the selected channel.
5. Digital Zoom: Click, then click-and-drag on an area of the camera image to view it in
greater detail. For full instructions, see 7.6 Using Digital Zoom, page 22.
6. Color Adjustments: Adjust the hue, brightness, contrast and saturation of the camera
image. For details, see 12.2.2 Adjusting Camera Image Color, page 51.
7. PTZ Controls: Click to open PTZ controls. Password entry required. For more details
on using PTZ controls, see 7.5 Using PTZ Controls, page 20.
7.4 Using the On-Screen Keypads
The Full Keypad is used to input alphanumeric characters, such as in user name or pass-
word fields. The Number Keypad is used to input numeric characters only, such as in the
time or date fields.
To use the Full Keypad:
#LX400086; r. 1.0/39246/39246; en-US
18