Using the Main Menu12
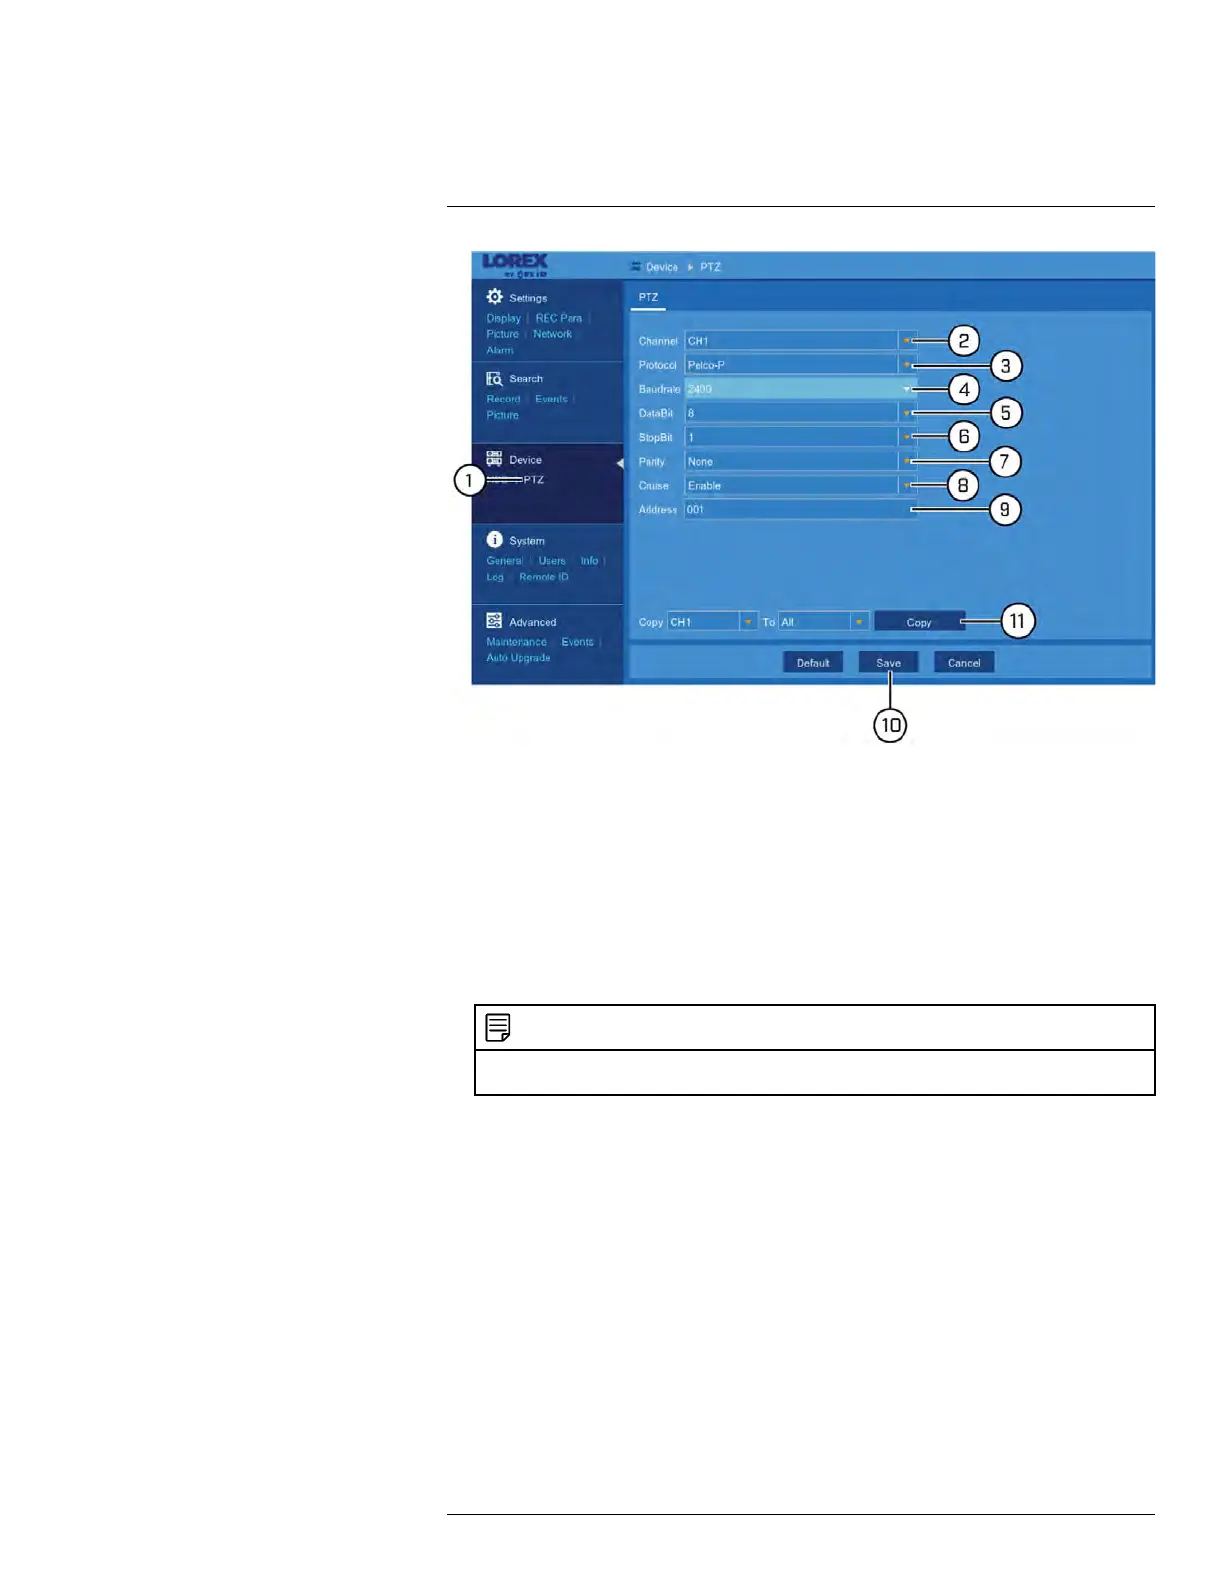
1. Under Device, click PTZ to open the PTZ tab.
2. Use the dropdown next to Channel to select the channel your PTZ camera is con-
nected to.
3. Select the PTZ camera’s protocol from the dropdown next to Protocol.
4. Select the PTZ camera’s baud rate from the dropdown next to BaudRate.
5. Select the PTZ camera’s data bit from the dropdown next to DataBit.
6. Select the PTZ camera’s stop bit from the dropdown next to StopBit.
7. Select the PTZ camera’s parity from the dropdown next to Parity.
8. Select Enable from the dropdown next to Cruise.
9. Enter the PTZ ID number in the field next to Address.
NOTE
If connecting multiple PTZ cameras, you cannot use the same ID number for more than one PTZ
camera.
10. Click Save. You will now be able to control your PTZ camera using the DVR.
For details on using and controlling the PTZ camera, see 7.5 Using PTZ Controls,
page 20.
11. (OPTIONAL) Use the Copy function to copy your settings to another or all connected
cameras. See 12.1.1 Copying Channel Settings to Another Channel, page 49 for de-
tails on using the copy function.
12.5 System Menu
Change general system information such as date, time and region, edit passwords and
permissions, and more.
12.5.1 Changing the Date and Time
If you need to change the date and time after completing the setup wizard, follow the steps
below.
#LX400086; r. 1.0/39246/39246; en-US
76