Replacing the Hard Drive
16
The system comes with a pre-installed SATA hard drive. You can expand the hard drive
with a replacement 2.5” or 3.5” SATA hard drive up to 6TB.
NOTE
It is recommended to use surveillance or security-certified hard drives, which are designed to be reliable
over long periods of time while recording 24/7. Security-certified hard drives are available at
www.lorextechnology.com.
16.1 Removing the Hard Drive
WARNING
Make sure that the power cable has been disconnected from the DVR before changing the hard
drive.
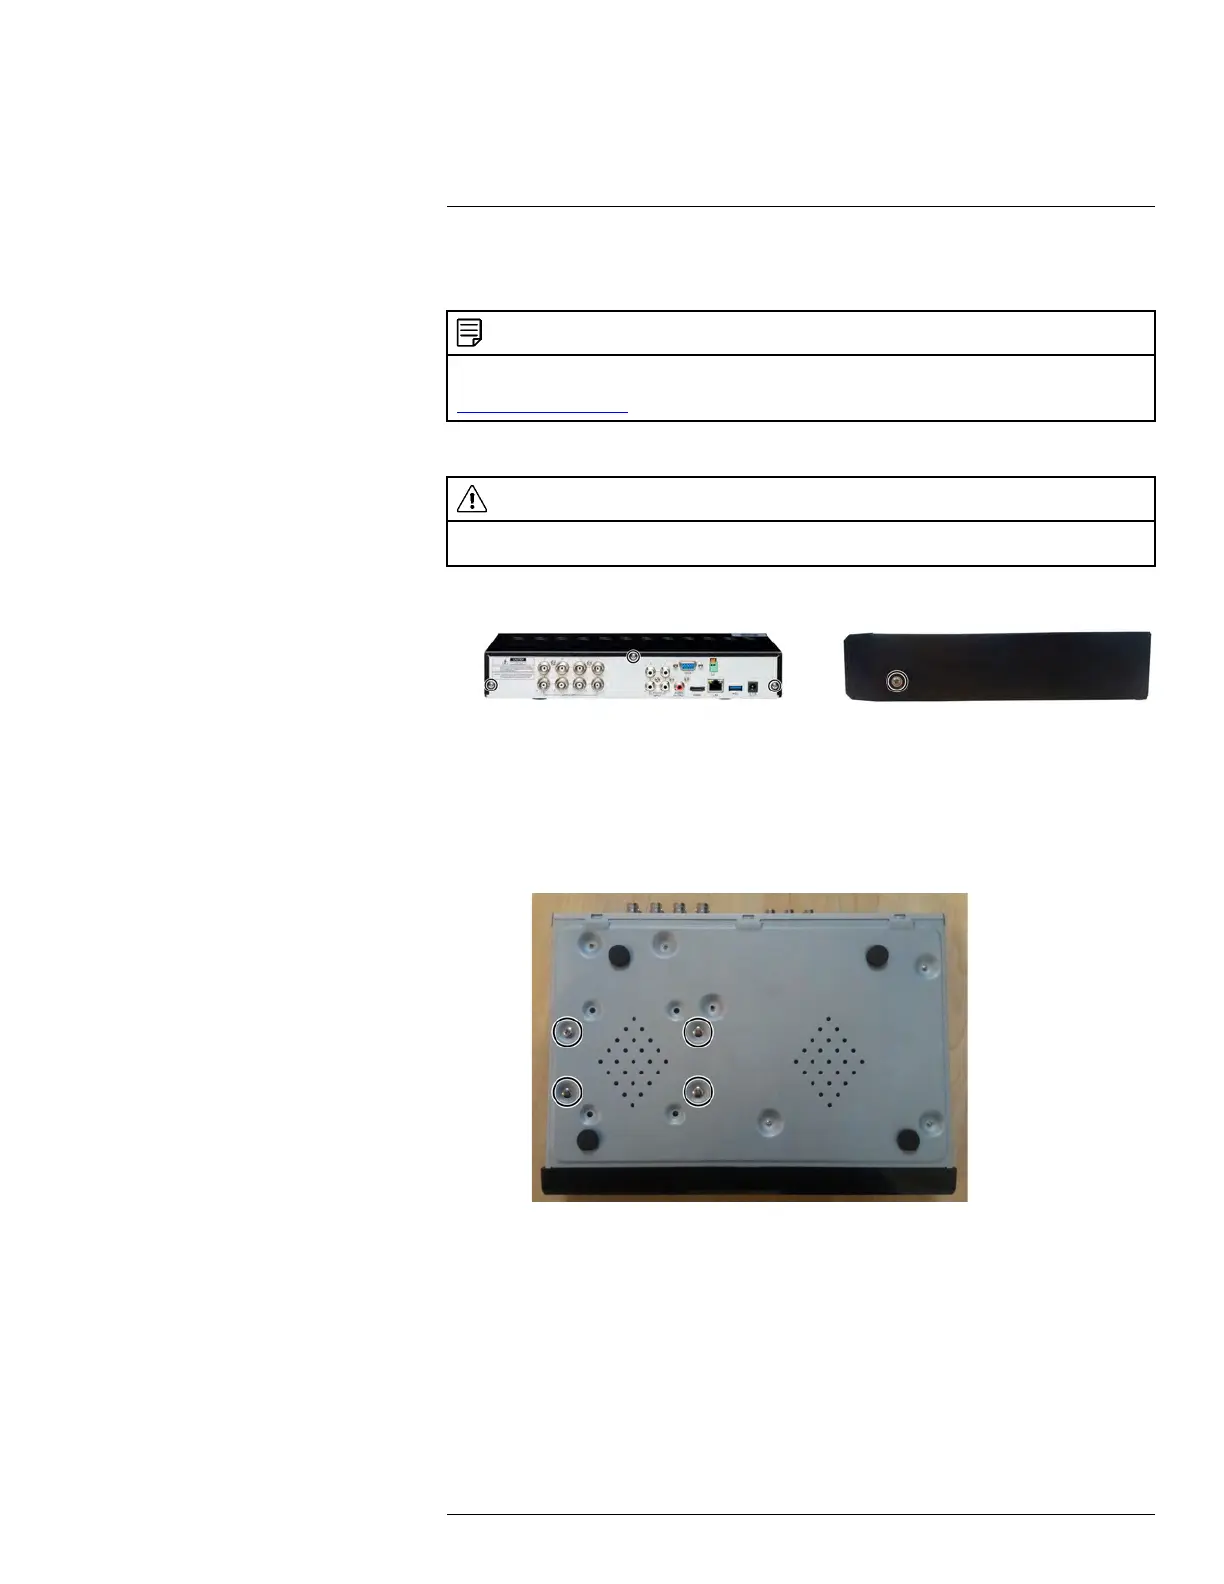
1. Remove the screws from the rear panel (×3) and the side panels (×2) of the DVR.
2. Gently slide the cover away from the rear panel and lift off. Be careful of sharp edges.
3. Next, you must remove the hard drive from the housing so you can access the data
and power cables running to the hard drive.
3.1. Turn the DVR over carefully.
3.2. Hold the hard drive securely in place while removing the hard drive screws (×4)
on the bottom panel of the DVR.
#LX400086; r. 1.0/39246/39246; en-US
135