REAR SUSPENSION – On-vehicle Service
34-3
ON-VEHICLE SERVICE
1. REAR WHEEL ALIGNMENT CHECK AND
ADJUSTMENT
(1) The rear suspension and wheels should be serviced to
the normal condition prior to measurement of wheel
alignment.
(2) Measure the wheel alignment with the vehicle parked
on level ground.
1-1 CAMBER
Standard value: –1_00’ ± 30’
(The difference between the left and right wheels
should be 30’ or less.)
NOTE
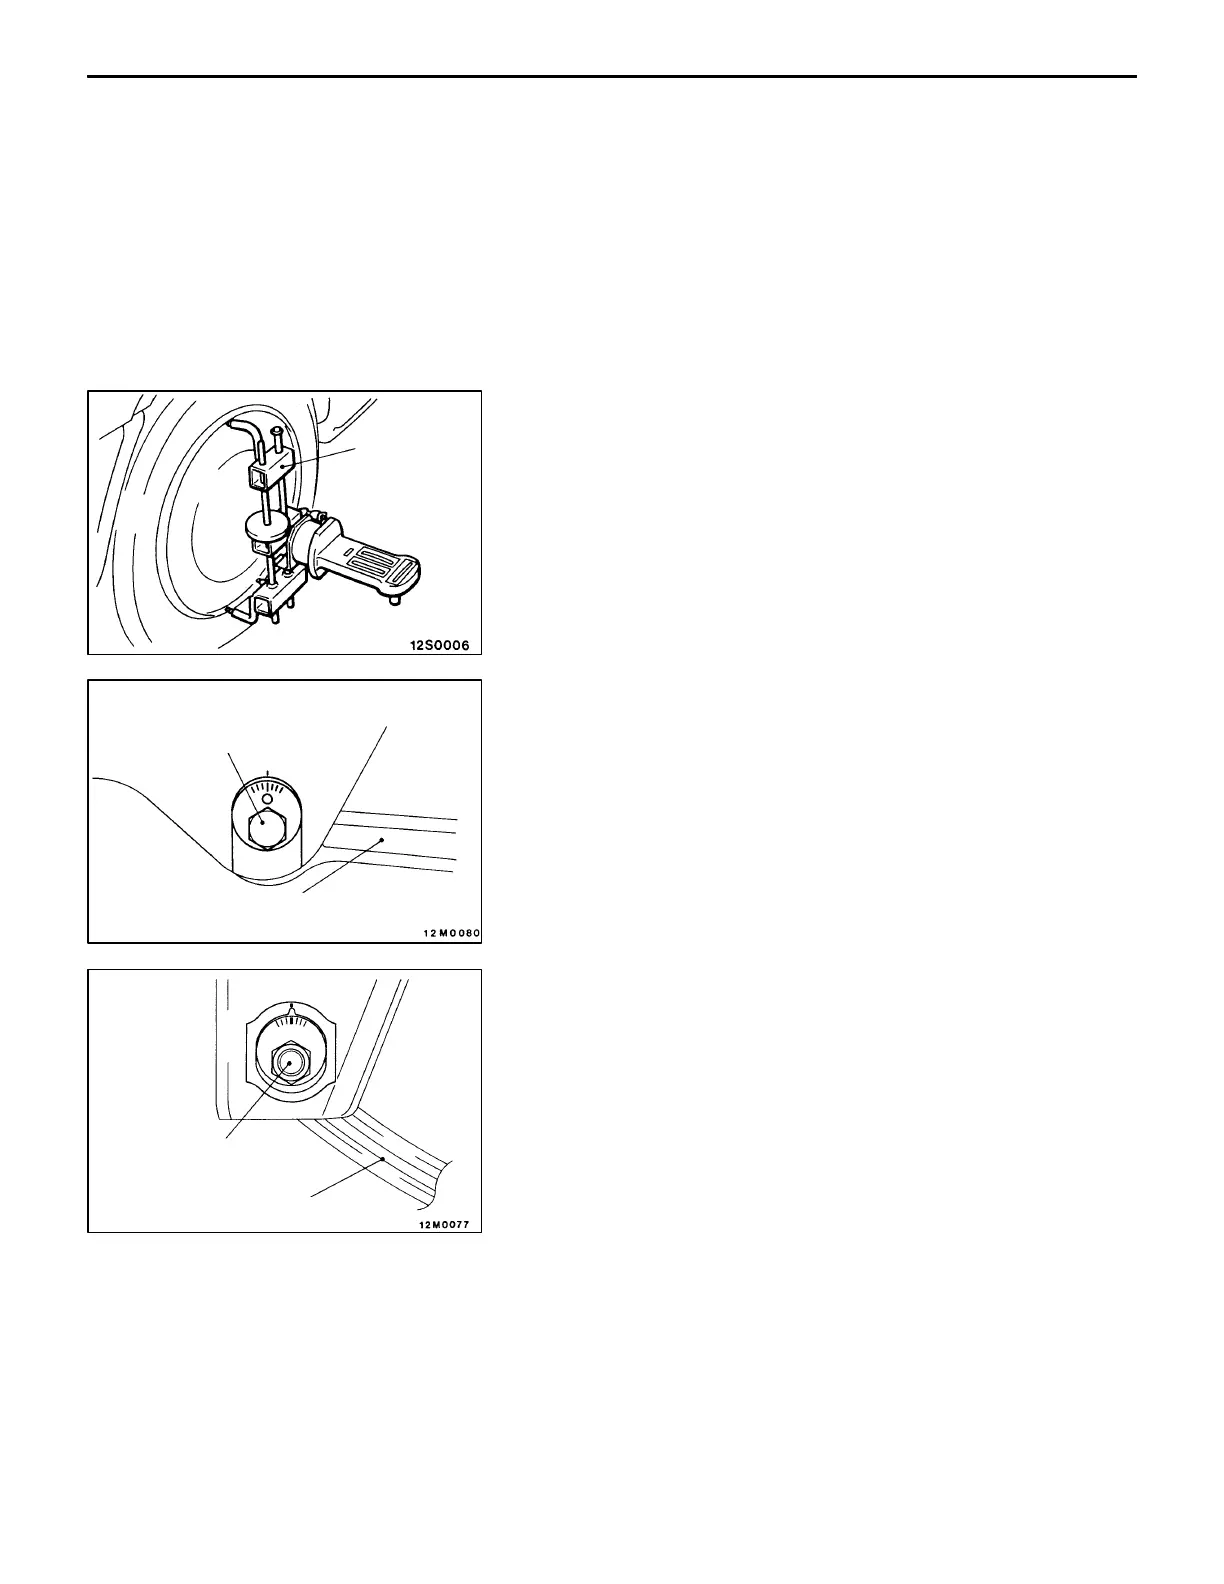
For vehicles equipped with aluminium wheels, measure the
camber using a compensator. If no compensator is available,
measure the camber after tightening the special tool
(MB991004) to the specified torque 196 – 255 Nm {20.0
– 26.0 kgf@m}.
Caution
Never subject the wheel bearings to the full vehicle load
when the flange nuts/drive shaft nuts are loosened.
If outside the standard value, adjust by the following
procedure.
(1) Adjust by turning the camber adjusting bolt (mounting
bolt for the lower arm and rear crossmember).
Left wheel: clockwise + camber
Right wheel: clockwise – camber
The scale has gradations of approximately 14’.
(2) After adjusting the camber, be sure to adjust the toe-in.
1-2 TOE-IN
Standard value:
At the centre of tyre tread 3 ± 2 mm
If outside the standard value, adjust by the following
procedure.
(1) Be sure to adjust the camber before adjusting the toe-in.
(2) Adjust by turning the toe adjusting bolt (inner mounting
bolt toe control arm).
LH: Turning clockwise → toe-in direction
RH: Turning clockwise → toe-out direction
The scale has gradations of approximately 3.3 mm (single
side toe angle equivalent to 19’).
2. BALL JOINT DUST COVER CHECK
(1) Check the dust cover for cracks or damage by pushing
it with finger.
(2) If the dust cover is cracked or damaged, replace the
appropriate suspension arm assembly or stabilizer link.
NOTE
Cracks or damage of the dust cover may cause damage
of the ball joint.
Compensator
Camber adjusting bolt
Lower arm
Toe-in adjusting bolt
Control link
 Loading...