FRONT SUSPENSION – Stabilizer Bar
33A-9
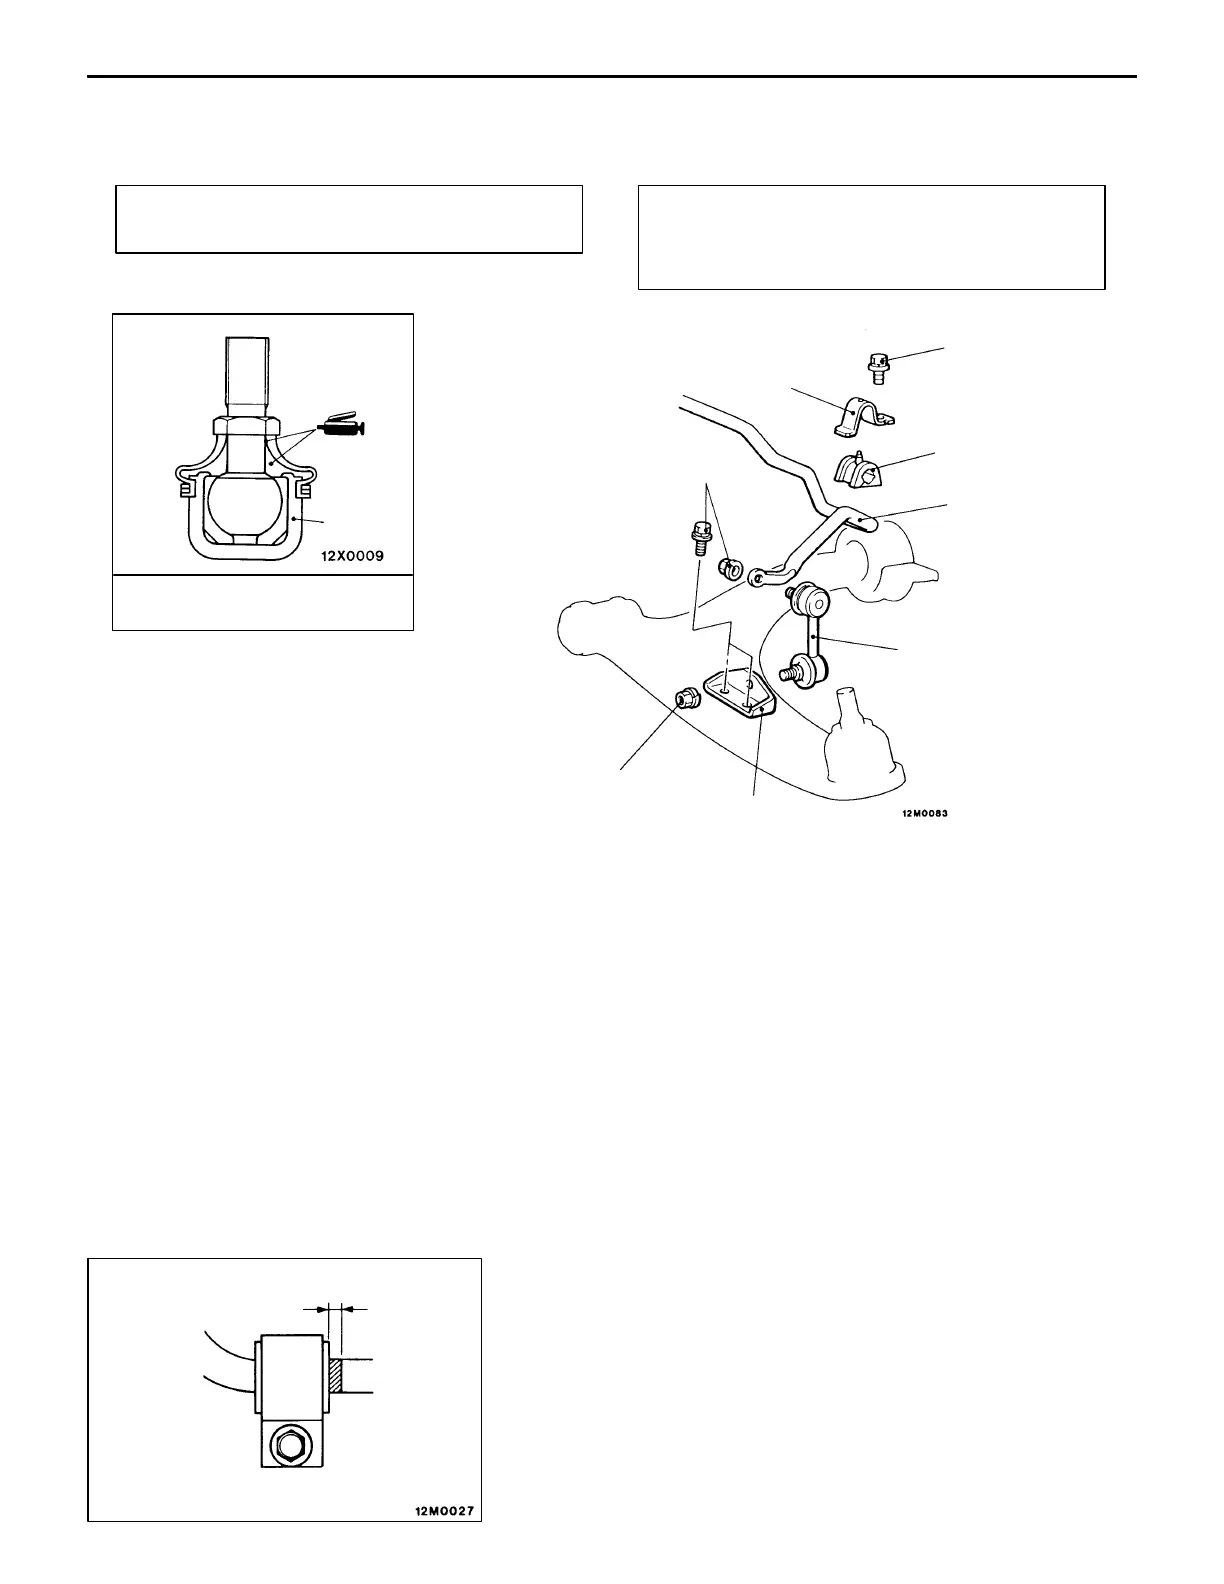
STABILIZER BAR
REMOVAL AND INSTALLATION
Pre-removal Operation
D Crossmember Removal
Post-installation Operation
(1) Crossmember Installation
(2) Check the Stabilizer Link Ball Joint Dust Cover for
Cracks or Damage by Pushing it with Finger.
1
2
3
4
5
Unit: Nm {kgf@m}
22 {2.2}
SHOWA SHELL SEKIYU
VARIANT R-2 or equivalent
39 {4.0}
39 {4.0}
1
Removal steps
1. Stabilizer link
2. Stabilizer bar bracket
"AA 3. Fixture
"AA 4. Bushing
5. Stabilizer bar
INSTALLATION SERVICE POINT
"AA FIXTURE / BUSHING INSTALLATION
Install the stabilizer bar so that the identification mark is
positioned at left. Fit the bushing so that the mark may protrude
about 10 mm from the inner end of the bushing, then secure
it with the fixture.
Approx. 10 mm
 Loading...