REAR SUSPENSION – Lower Arm and Toe Control Arm AssembliesREAR SUSPENSION – Lower Arm and Toe Control Arm Assemblies
34-10
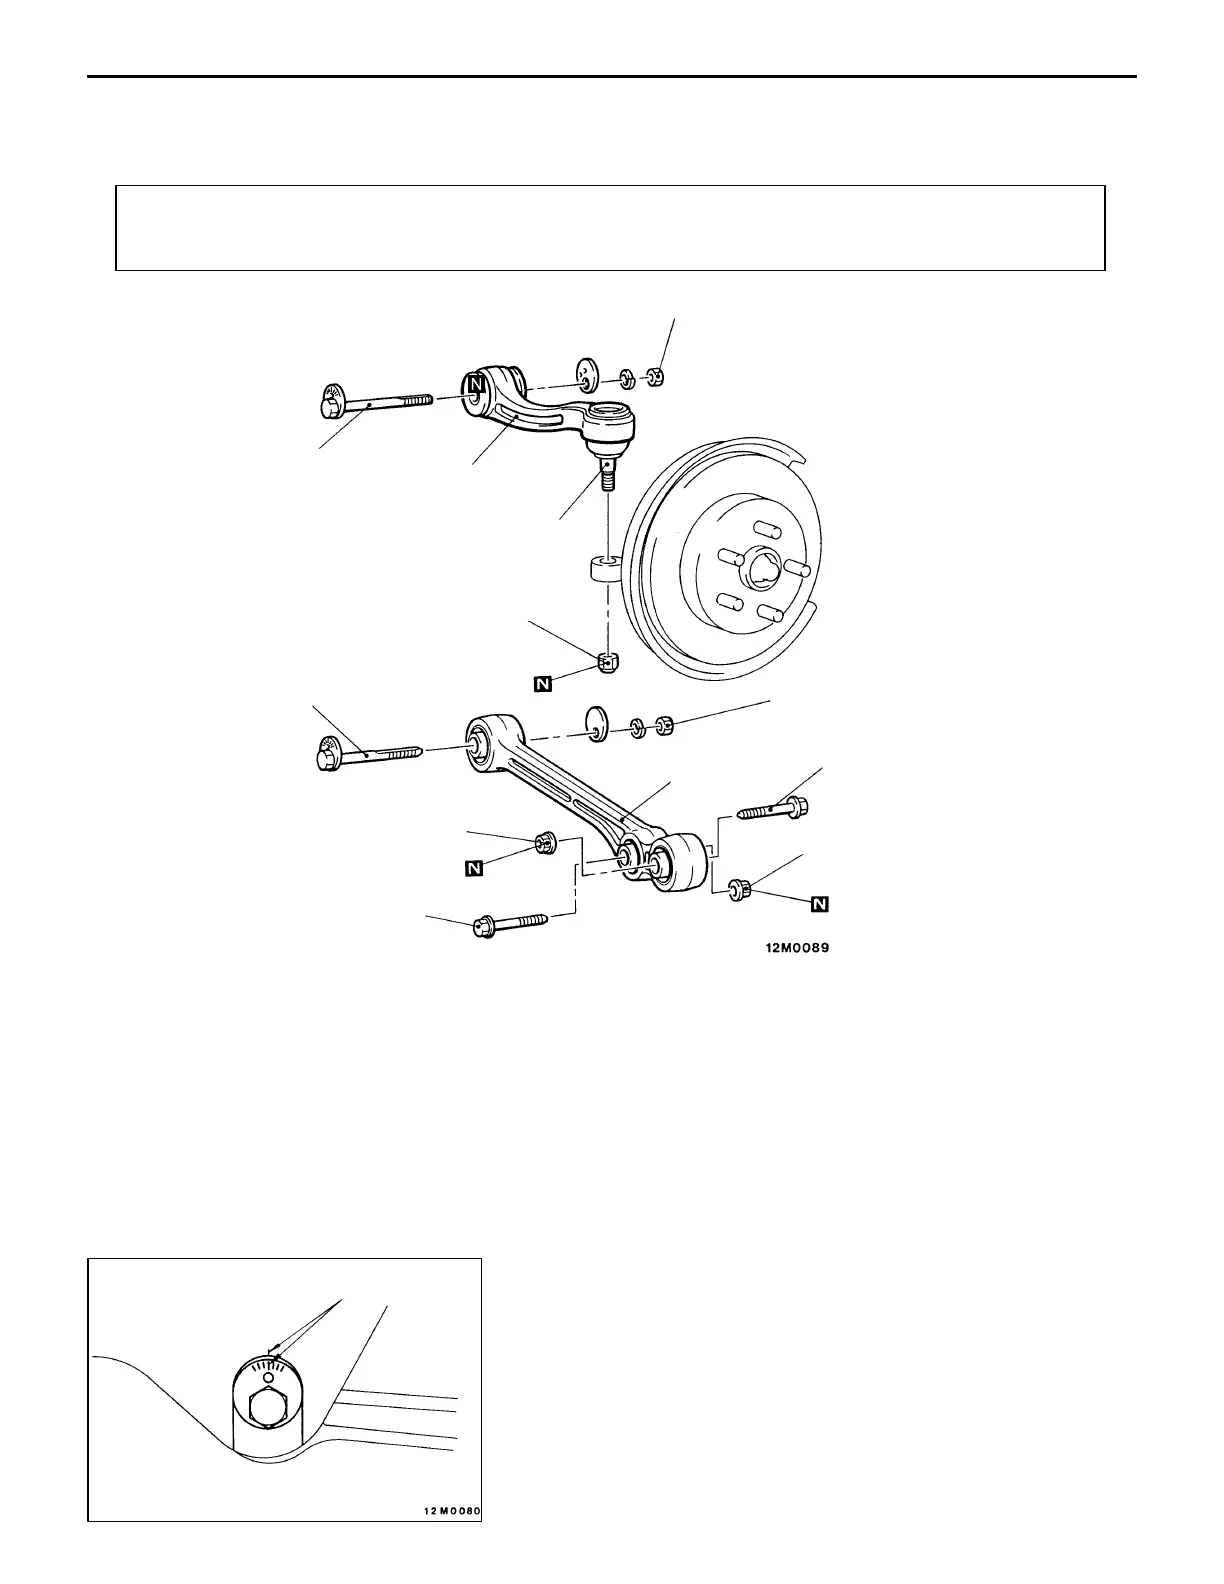
LOWER ARM AND TOE CONTROL ARM ASSEMBLIES
REMOVAL AND INSTALLATION
Post-installation Operation
(1) Check the Toe Control Arm Ball Joint Dust Cover
for Cracks or Damage by Pushing it with Finger
(2) Wheel Alignment Check and Adjustment
(Refer to P.34-3.)
1
2
3
4
5
6
Unit: Nm {kgf@m}
93 {9.5}*
88 {9.0}*
74 – 87 {7.5 – 8.9}*
88 {9.0}*
93 {9.5}*
2
Lower arm assembly removal steps
1. Lower arm assembly and shock
absorber connecting bolt
AA" 2. Lower arm assembly mounting bolt
"AA 3. Lower arm assembly
Toe control arm assembly removal
steps
AB" 4. Toe control arm and knuckle
connection
AC" 5. Toe control arm assembly mounting
bolt
6. Toe control arm assembly
Caution
The part marked with * should be first temporarily
tightened, then torqued to specification with the
vehicle on the ground in unloaded condition.
REMOVAL SERVICE POINTS
AA" LOWER ARM ASSEMBLY MOUNTING BOLT
REMOVAL
Place mating marks on the lower arm and the eccentric cam
bolt before removal.
Mating marks