Internal Assemblies — Rear Case Assembly 4: Repair
111
Printer Assembly
The Printer Assembly is composed of the thermal Printer and the Printer Compartment.
Preparation
1 Open the Case. See “Opening the Case” on page 90.
2 Remove the Therapy Port. See “Therapy Port” on page 109.
Removal
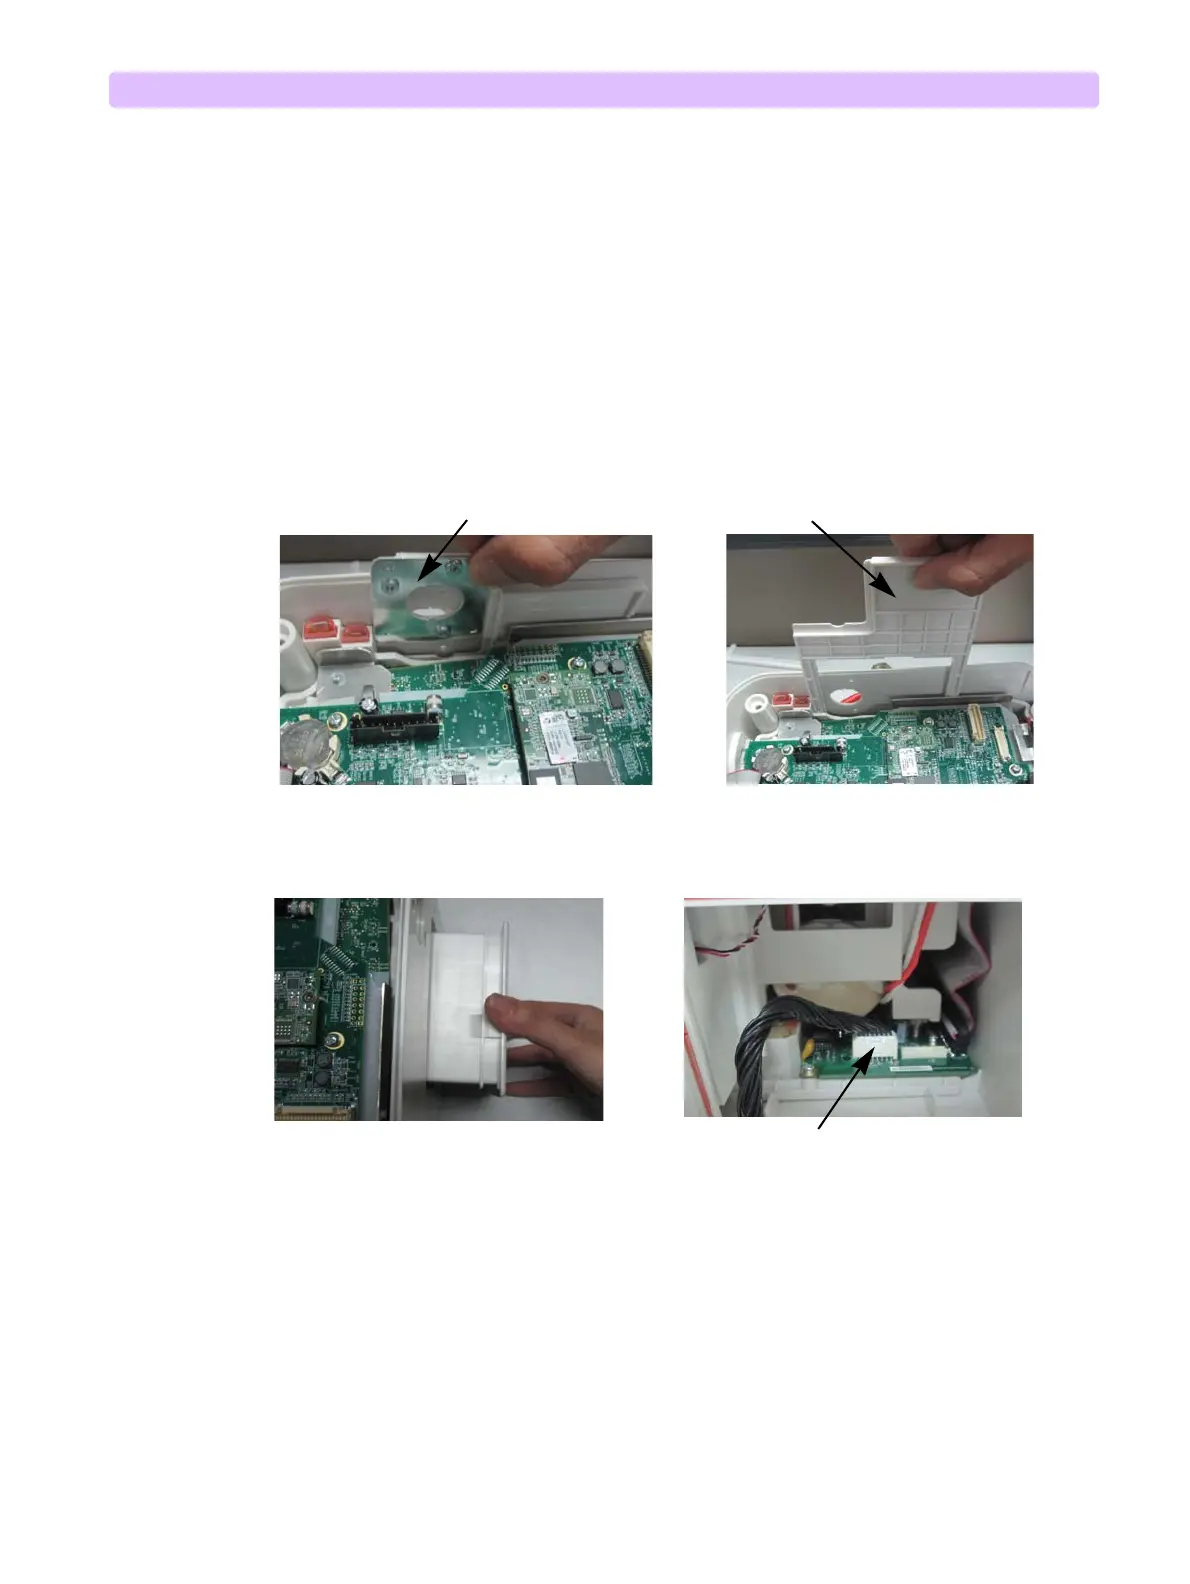
1 Remove the therapy port locking plate with the waterproof pad (left) and the printer locking bracket
(right), see Figure 80.
Figure 80 Unlocking Printer Assembly
2 Pull out the Printer Assembly and unplug the printer cable, see Figure 81.
Figure 81 Unplugging Printer Assembly
Replacement
1 Install the printer cable and insert the Printer Assembly into the correct position, see Figure 81.
2 Install the printer Locking Bracket to secure printer.
3 Install the Therapy Port, see “Therapy Port” on page 109.
4 Close the Case. See “Closing the Case” on page 149.
To Complete the Replacement
Run Performance Verification and Safety testing as described in the “Performance Verification”
chapter.
Therapy Port Locking Plate
Printer Locking Bracket
Printer Cable
Pull out the Printer Assembly