Internal Assemblies — Main Chassis 4: Repair
141
Fans
This procedure is written to replace both fans. You may need to replace one at time.
Read the fan descriptions before the repair:
You may need a flat head screw driver for this repair.
Preparation
1 Open the Case. See “Opening the Case” on page 90.
2 Remove the Main Chassis. See “Separating Main Chassis and Rear Case” on page 113.
3 Remove the Main PCA Module from the Main Chassis, See “Disassembling Main Chassis” on
page 115.
4 For Fan 1, cut the cable tie to loosen the magnet ring on the DC Power Output Cable. See
Figure 119.
Removal
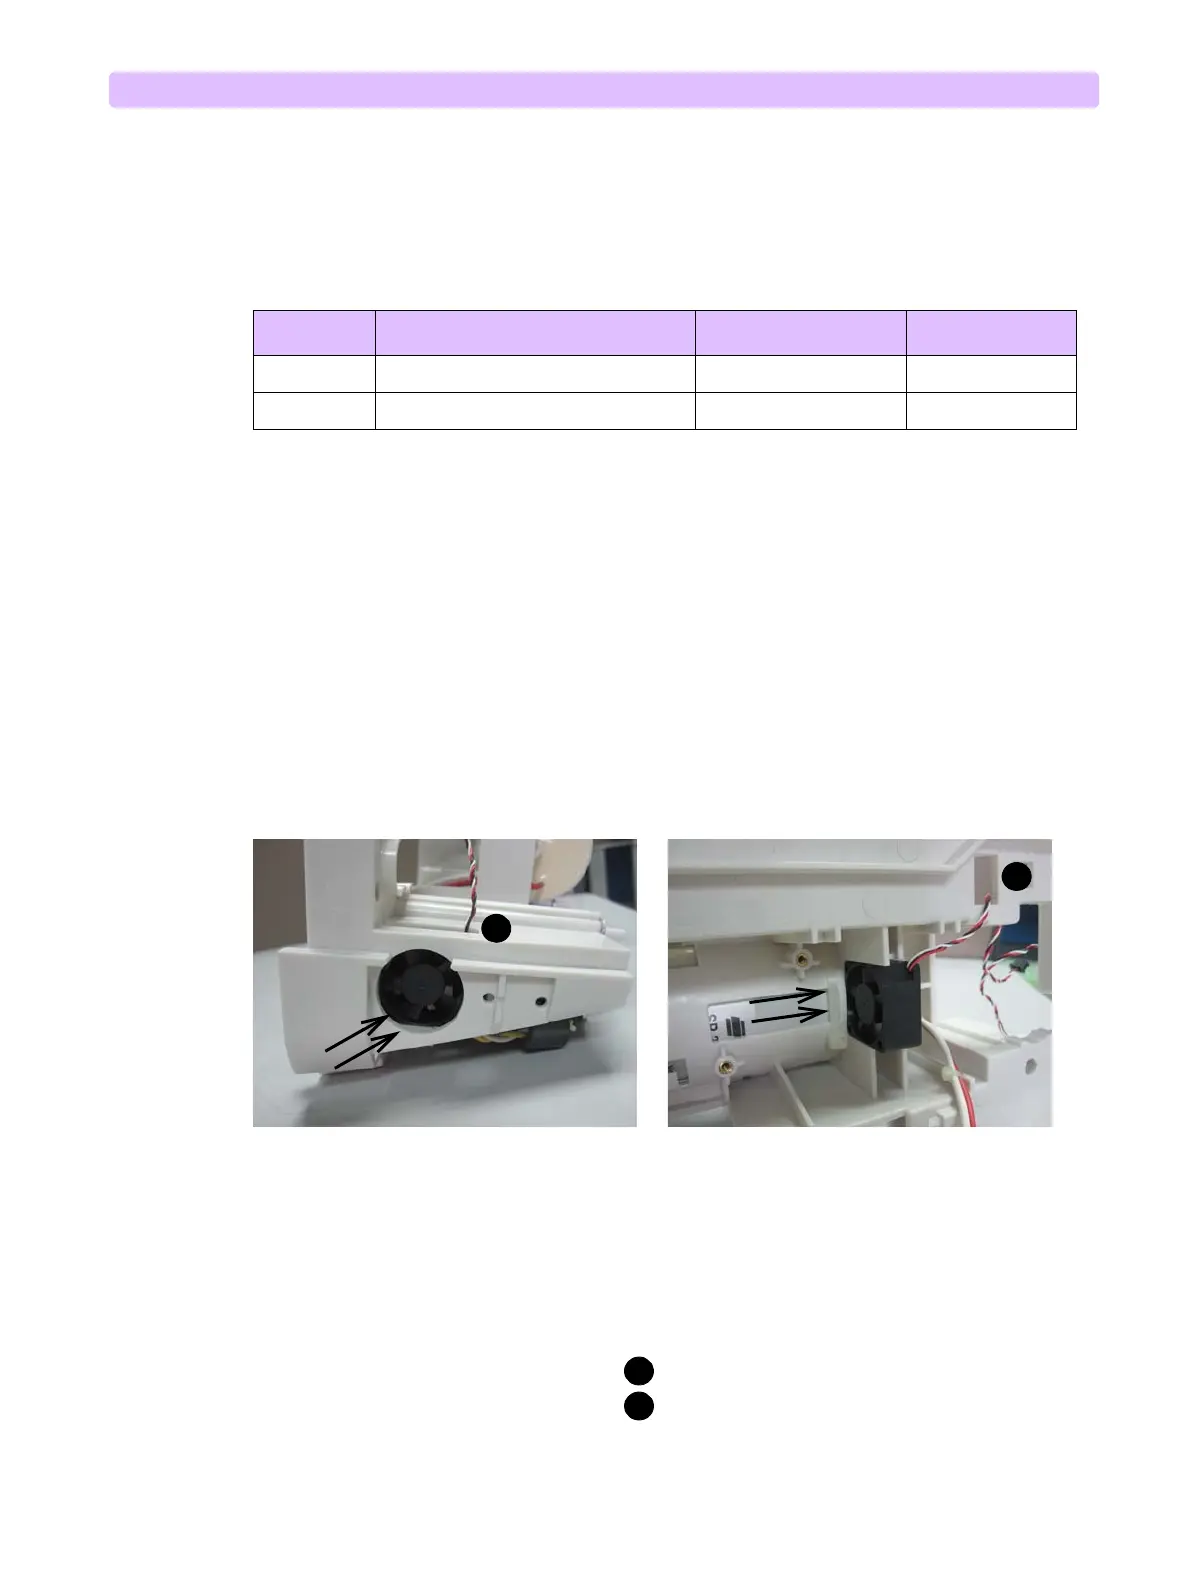
1 Pull out the fan, use a flat head screwdriver if necessary, see Figure 122.
Replacement
1 Clean off the residual adhesive pad, you may need to use isopropyl alcohol.
2 Install the new fan with new adhesive pad.
Note the installation directions of the fans. see Figure 122.
3 Make sure the new fan is seated firmly in its designated place.
4 Thread the Fan 2 cable through the hole , see Figure 122.
5 Thread the Fan 1 cable through the hole , see Figure 122.
6 For Fan 1, use the cable tie to secure the magnet ring, see Figure 121.
Table 31 Fan Descriptions
Name Location Therapy PCA Mark Disconnect By
Fan 1 Close to Power Supply Assembly J12 Gently unplug
Fan 2 Close to Internal Resistors J13 Gently unplug
Figure 122 Fan
1
2
Air in
Air in
Fan 1 Fan 2