Internal Assemblies — Main Chassis 4: Repair
121
Processor PCA
The Processor PCA contains the SOM PCA that stores the device software and configuration data.
When you install a new Processor PCA, you must also:
• Enter the device’s serial number and enable options using the Service Mode menus.
• Install the most recent software in the appropriate language using the Software Support tool. See
Table 35 on page 178 for part numbers.
Give the user the README document that contains instructions for downloading the most recent Efficia
DFM100 Instructions for Use from the Philips’ Documentation and Download web site
(
http://www.philips.co.in/healthcare/product/HCNOCTN294/efficia-dfm100).
CAUTION: Never touch the Processor PCA surface with your fingers, always use gloves.
Keep the new Processor PCA in an antistatic pouch until ready to install.
Do not attempt to reuse the old SOM PCA with the new Processor PCA.
Note that the edges of the metal chassis may be sharp. Take care not to cut yourself or shear the wires.
Preparation
1 Open the Case. See “Opening the Case” on page 90.
2 Remove the Measurement Module. See “Measurement Module” on page 107.
3 Remove the Therapy Port. See “Therapy Port” on page 109.
4 Remove the Printer Assembly. See “Printer Assembly” on page 111.
5 Remove the Main Chassis. See “Separating Main Chassis and Rear Case” on page 113.
6 Remove the Main PCA Module out of the Main Chassis. See “Disassembling Main Chassis” on
page 115.
7 Remove the SpO2 PCA. See “SpO2 PCA” on page 119.
Removal
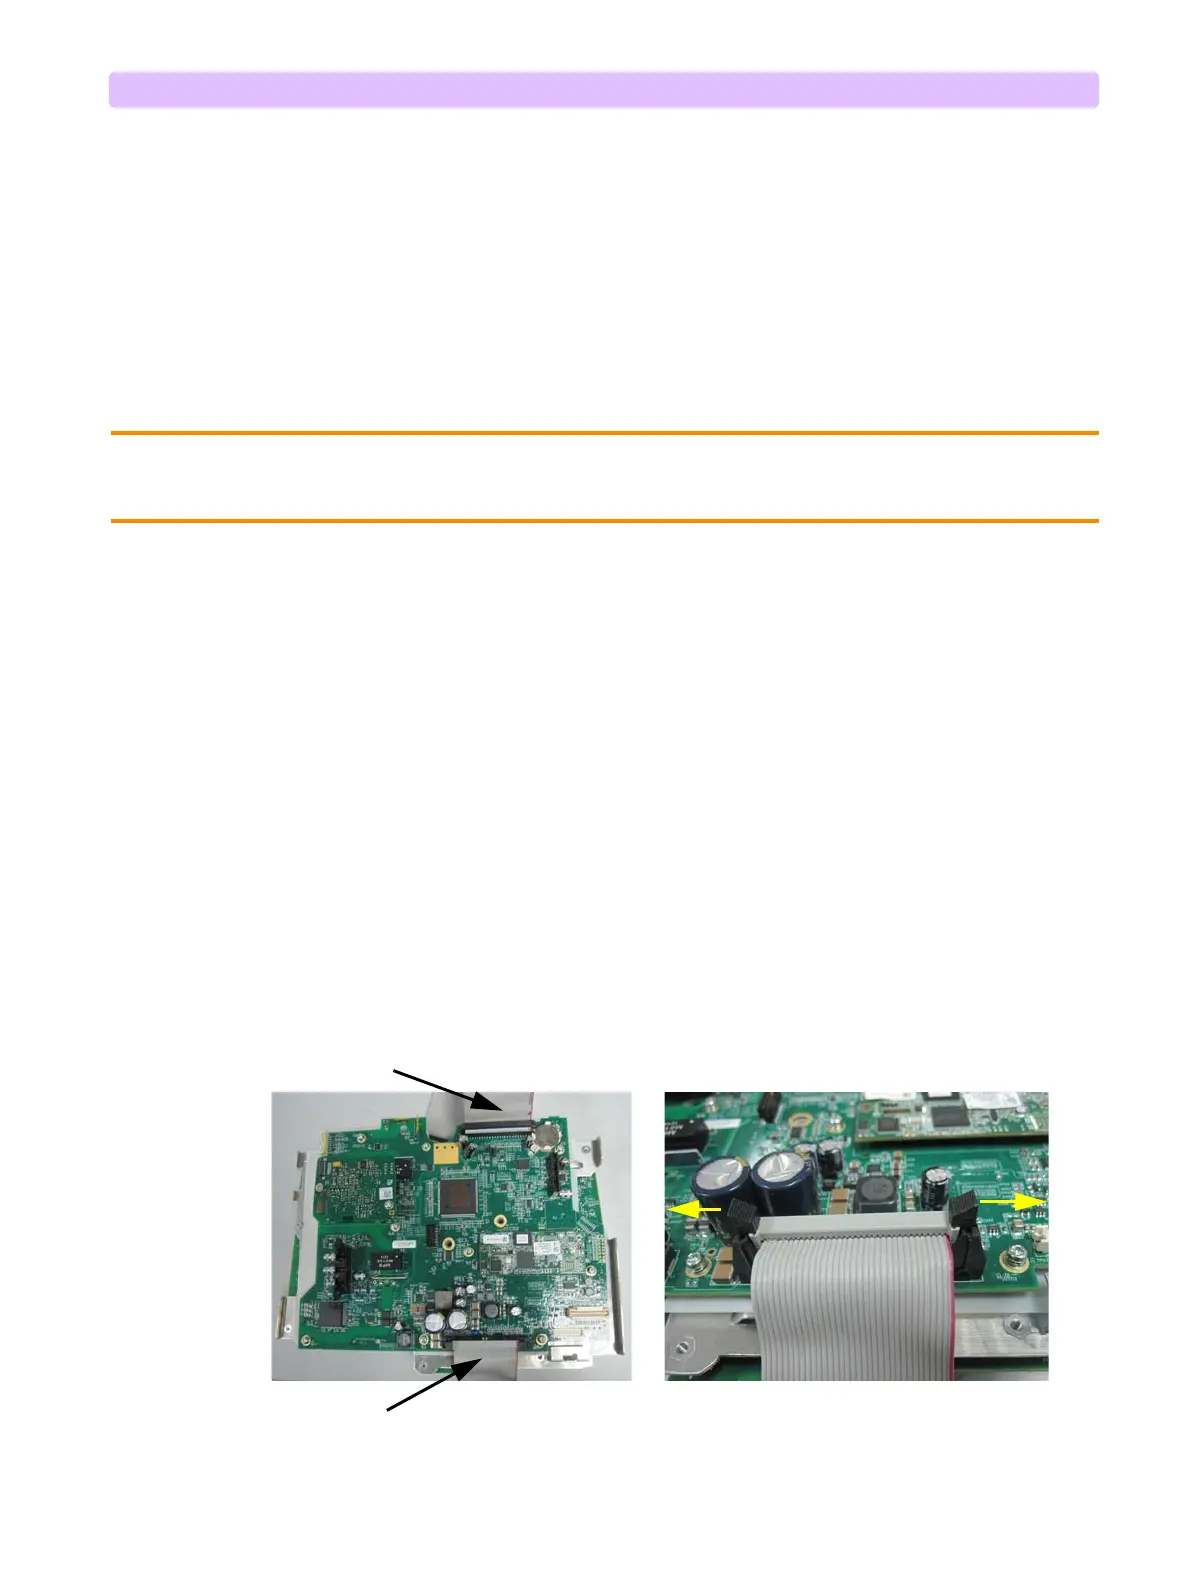
1 Unplug the I/O PCA Connector cable on Processor PCA and the Therapy PCA connector cable, see
Figure 96.
Figure 96 Processor PCA-1
I/O PCA Connector Cable
Therapy PCA
Connector Cable