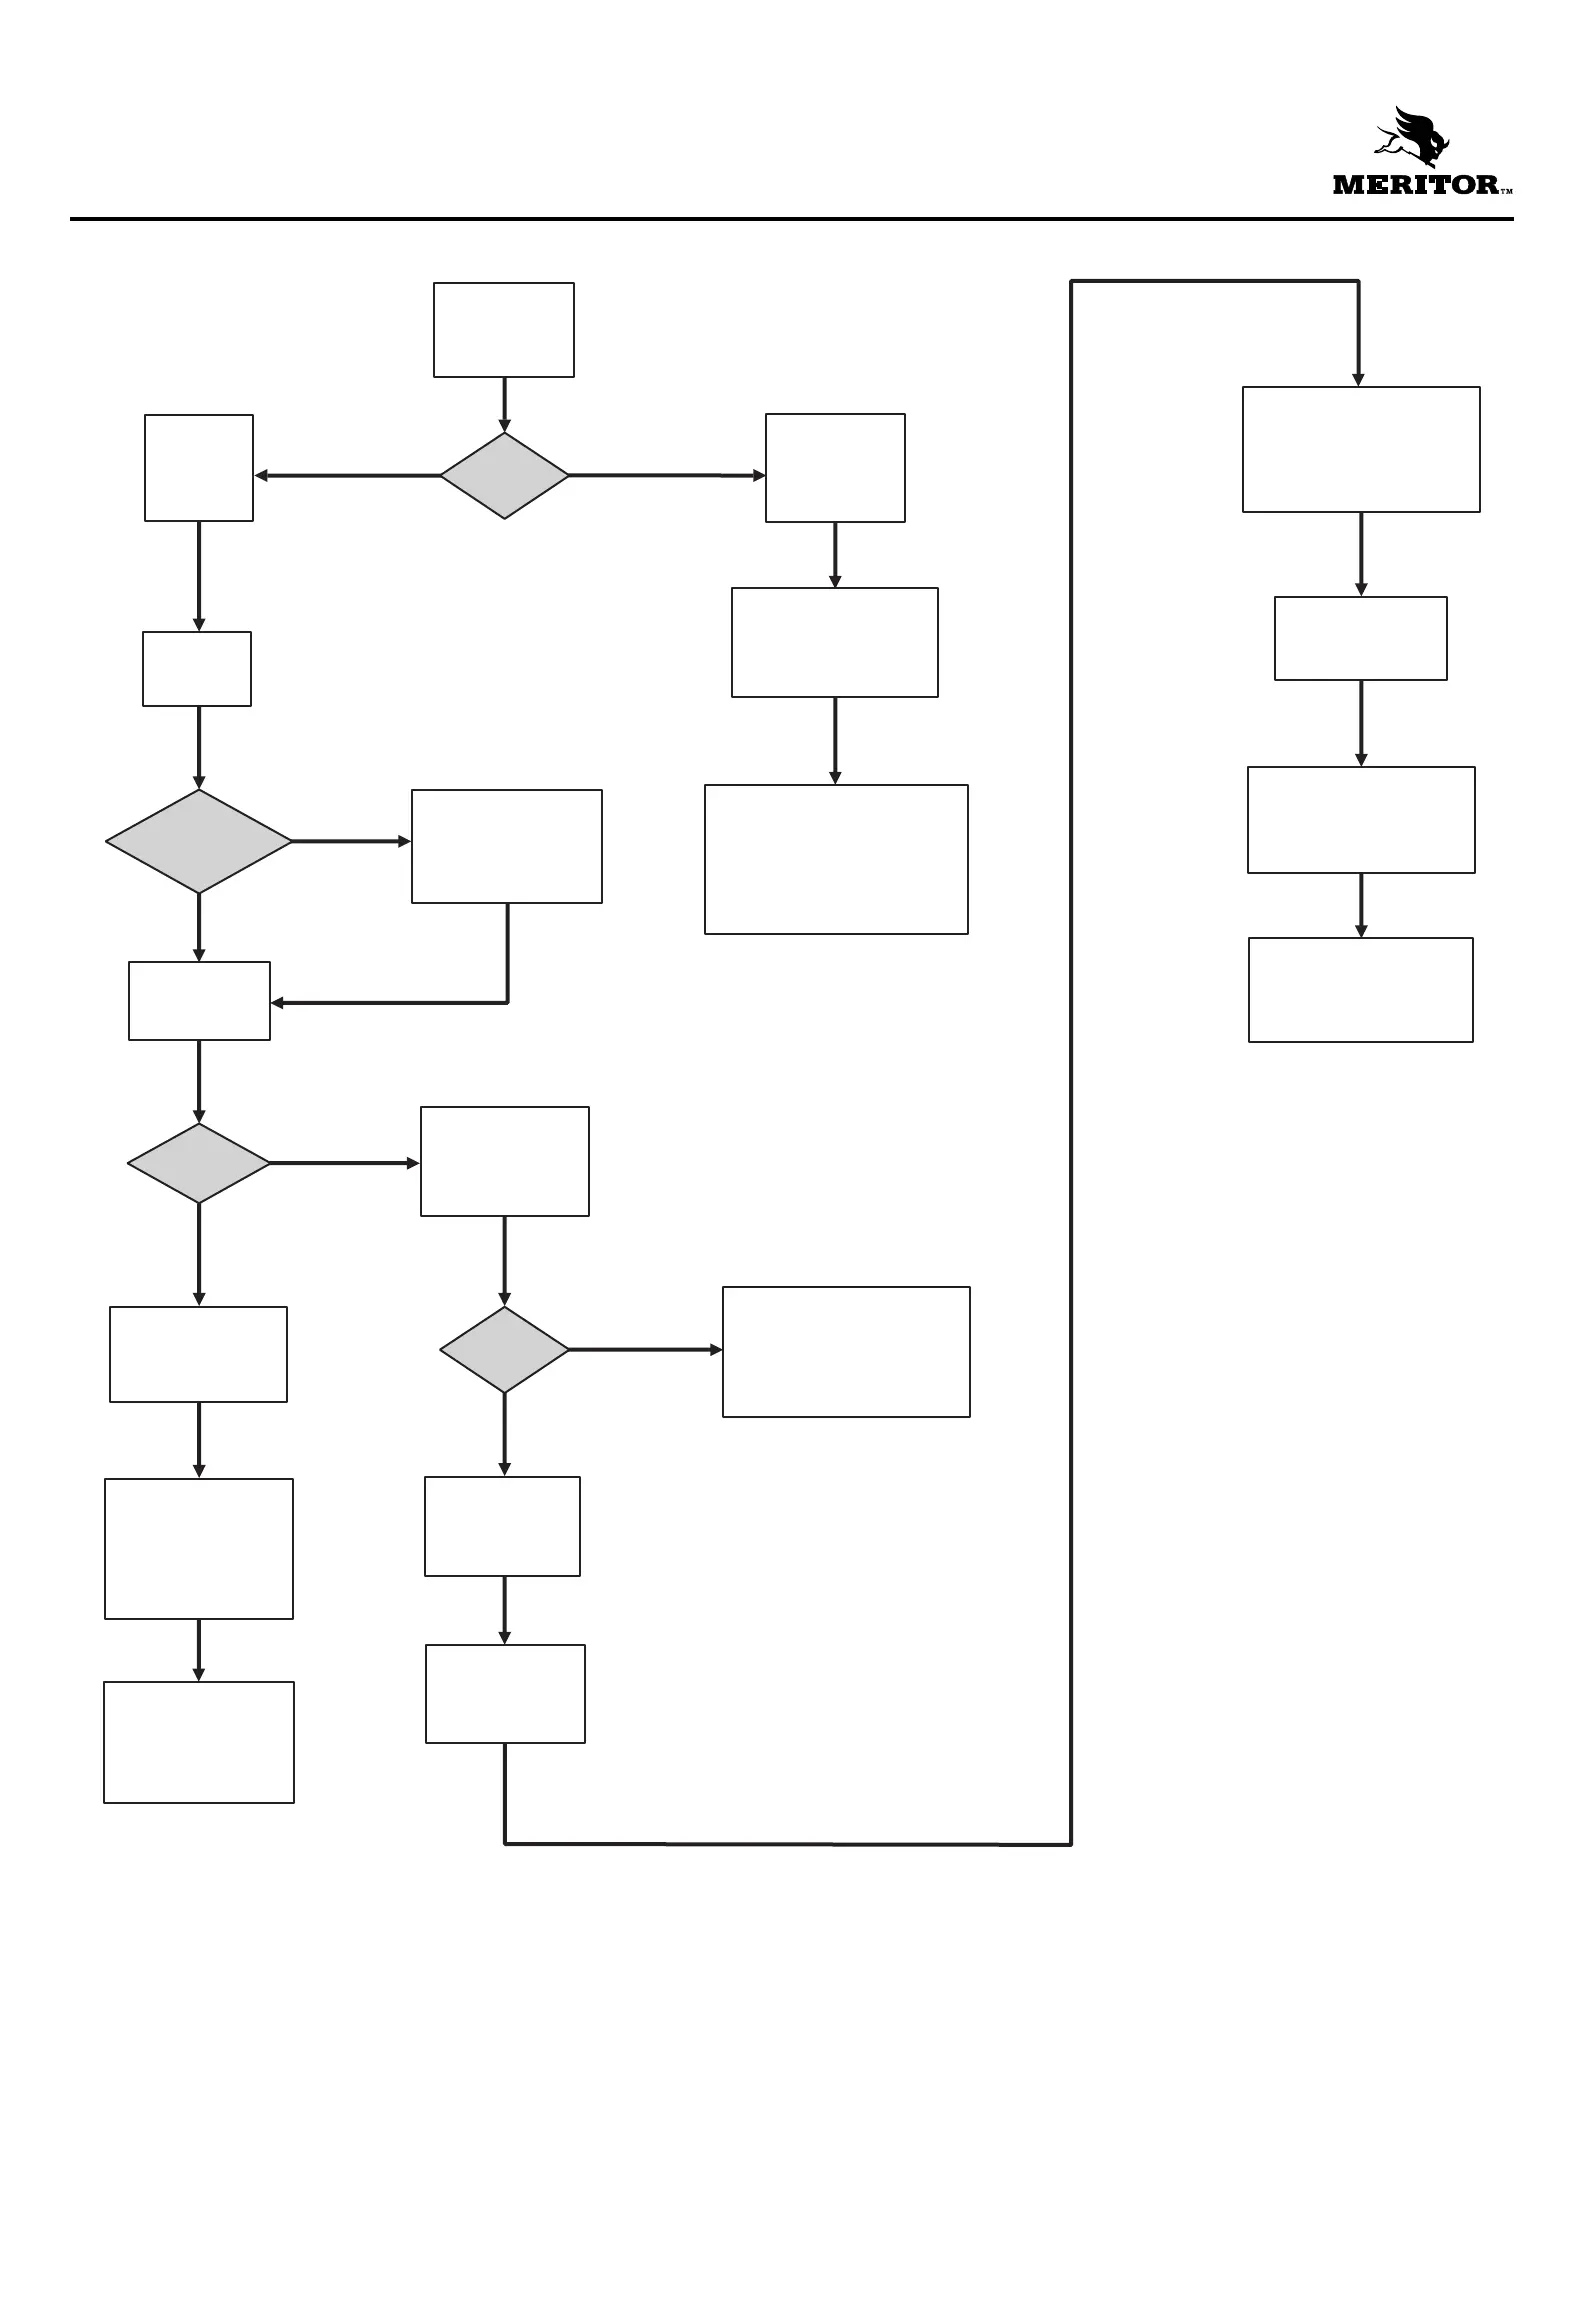
All Rear Axles
Contaminated Lubricant Found During Preventive Maintenance
TP-99125
16579/24240 Issued 12-99
Printed in the USA © Copyright Meritor Automotive, Inc., 1999 Page 10
All Rear AxlesContaminated Lubricant Found During Preventive Maintenance
Visually
inspect the
lubricant.
Lubricant
color?
Milky,
Brownish
Indicates
that water
is entering
the axle.
Silvery
Inspect the
breather.
Indicates
metallic
contamination.
Clean or replace the
breather. A clogged
breather can cause
a seal leak.
Breather
clogged?
No
Inspect the
carrier seals
for leaks.
If analysis results
indicate wear or
breakdown in the carrier,
refer to the “
Differential
Making Noise”
diagnostic
flowchart in this publication.
Yes
Seal
leaking?
Yes
Inspect the
carrier-to-housing
joint for leaks.
No
Remove the
carrier from
the axle. Refer to
MM 5 or 5L.
Drain and
inspect the
lubricant.
Refer to MM 1.
Replace the leaking
seal with a
unitized seal.
Joint
leaking?
No
Yes
Test drive the vehicle
to confirm that the
leak is repaired. Return
the vehicle to service.
Send out a lubrication
sample for analysis.
Advise the owner to
return for the results.
Inspect the axle housing
welds for cracks or leaks.
If you find weld cracks,
contact Meritor for
repair welding procedures.
Fill the carrier
with the correct
amount of the
specified lubricant.
Refer to MM 1.
Clean the seal area.
Test drive the
vehicle to confirm
that the leak is
repaired. Return the
vehicle to service.
Clean and prepare the
housing and carrier
flanges. Apply the correct
gasket or silicone.
Refer to MM 5 or 5L.
Install the carrier.
Refer to MM 5.
Fill the carrier with
the correct amount
of the specified lubricant.
Refer to MM 1.