4
WARNING Never use a volatile or flammable material, such as ether or gasoline, as an
aid to seating the tire beads on the wheel can lead to an uncontrolled pressure build-
up in the tire and may result in an explosion.
Explosive separation of the tire and wheel can occur while seating beads
in this manner, while adding air to the tire on or off the vehicle, or later on the road.
Loss of vehicle control can result, which can cause serious injury or death.
Only use approved mechanical or pneumatic bead seating devices.
21
Mounting
tubeless tires
4-2
NOTICE: Not all tire mounting/
demounting machines work alike.
Be sure to read the operating
or instruction manual for your
particular machine before
attempting to mount
or demount tires.
NOTICE: Do not exceed maximum
wheel load. Customer must
compare
OEM vehicle load rating
to maximum wheel load rating.
Refer to tire manufacturer’s
recommendation for proper tire
pressure. Be fore mounting the tire
perform a wheel fitment check to
insure proper clearance from any
obstructions.
NOTICE: When match mounting
tires on Alcoa wheels locate valve
stem adjacent to low point mark
on the tire.
NOTICE: Alcoa aluminum 19.5" non-
symmetrical wheels require tires to
be mounted and demounted over
the disc side of the wheel only.
NOTICE: Refer to tire
manufacturer’s recommendation
for proper tire pressure.
WARNING
WARNING A pressurized tire/wheel assembly can explode and separate violently.
This violent separation can cause serious injury or death.
Always contain the tire/wheel assembly in an inflation cage during inflation.
WARNING
Recommendations for
mounting tubeless
tires
(continued)
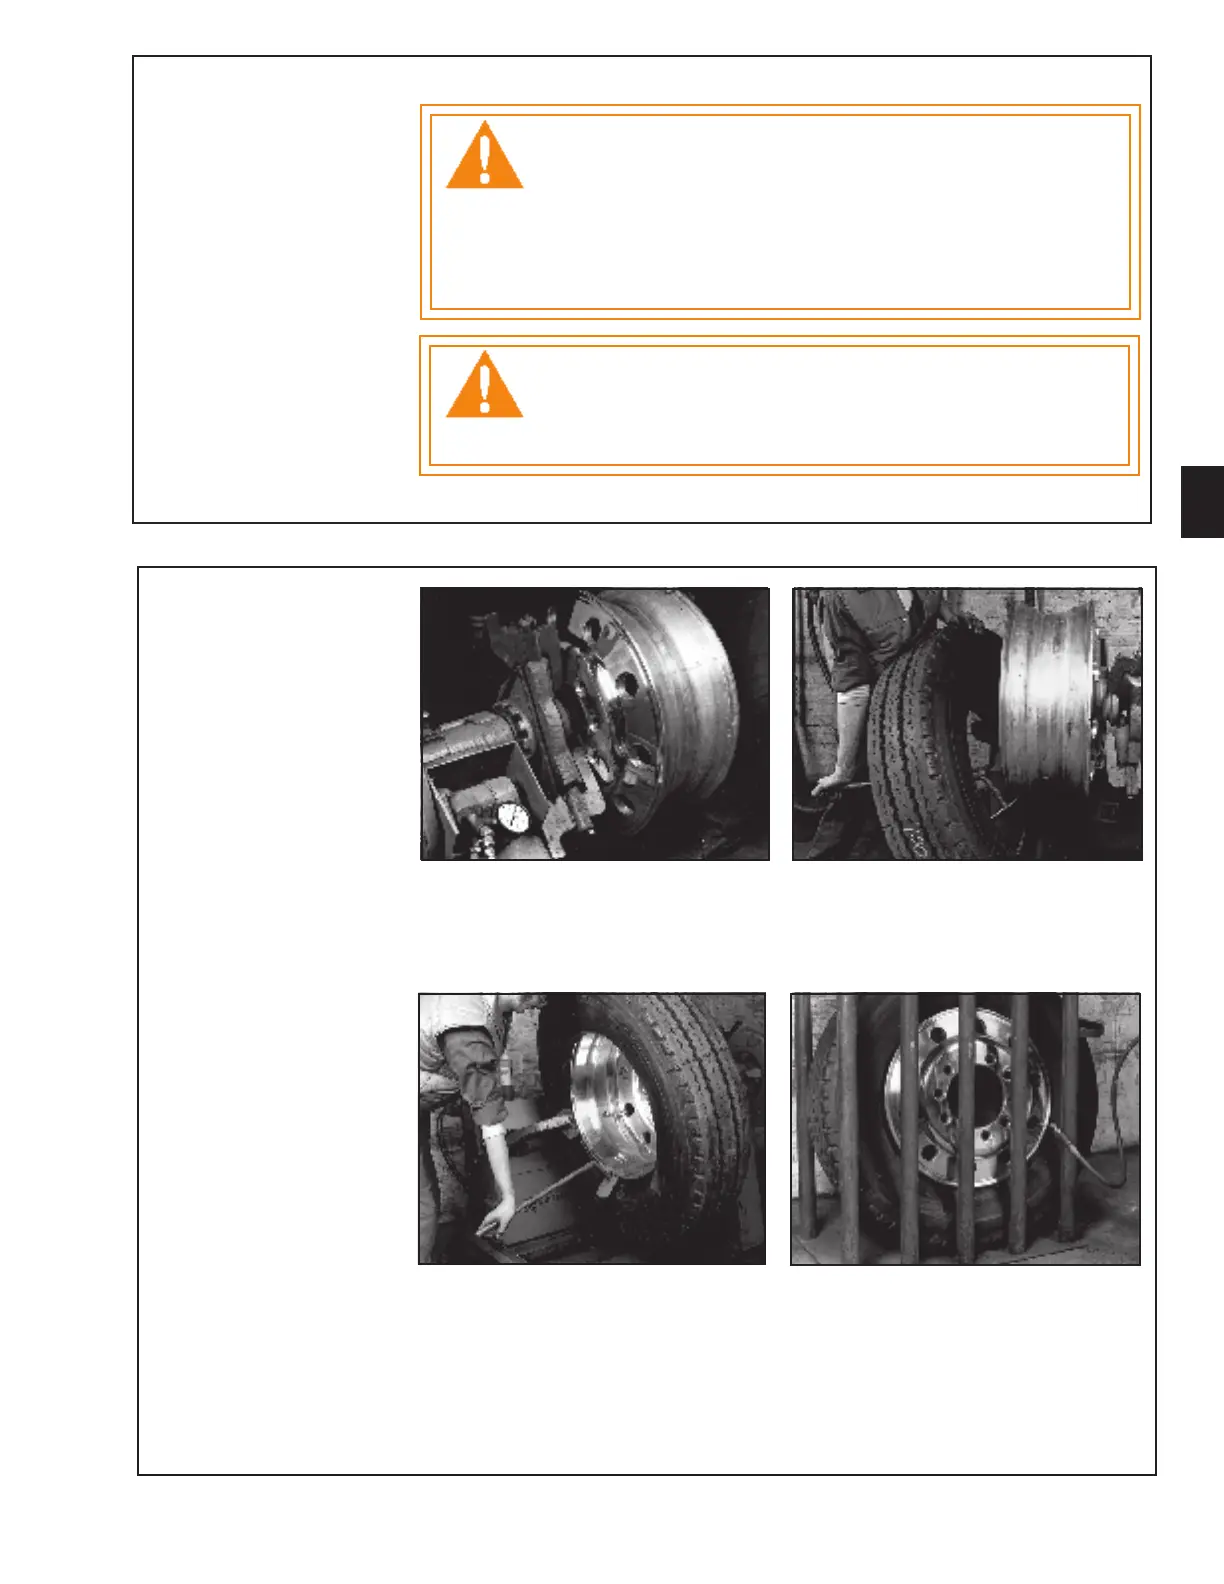
Position wheel on machine. Lubricate wheel (entire
air chamber surface) and tire bead using approved
lubricant. Tire beads should be mounted over the rim
flange closest to the wheel well. Push bead over flange
as far as possible.
Insert curved end of tool between bead and wheel
flange with tool stop against flange. In circular
motion, use short successive bites to work the bead
over the flange. Push down on tool as bead is worked
over flange.
1 2
Lubricate the second tire bead. Start second bead into
the well, holding it in position with the clamp to the
rim flange. Lubricate bead half way around. With
curved end of tool between tire bead and flange, and
the stop towards the wheel, push tool outward to work
tire over flange. Continue to pry bead over flange
using the tool until remaining bead is over flange. Seat
the tire bead using an air ring or other mechanical
bead seating aid.
Place tire/wheel assembly inside safety cage or other
suitable restraint (refer to OSHA rule 1910.177,
paragraph b, see Section 7). Refer to tire manufacturer’s
recommendation for proper tire pressure. Using a clip-
on air chuck or a self-locking straight chuck with remote
valve and pressure gauge, inflate the tire/wheel assembly
to proper pressure. If air escapes, roll tire or use bead
expander to force tire beads against rim. Be sure to
stay out of the path of potential exploding parts or air
blasts.
3 4