Section 06: ELECTRICAL
PA1562
41
NOTE
The headlight aim must be checked and
adjusted even if it was properly adjusted
before the sealed beam unit was replaced.
9.1.5 Front Turn Signal
The front turn signal is part of the front headlight
assembly. The turn signal is a sealed unit (LED)
located on each front corner and should be
replaced as an assembly. Turn signal is visible
from both front and side.
Removal and Replacement
1. Pull the release handle located inside the
front service compartment to tilt down the
entire bumper assembly.
2. Remove the headlight screw fixing the
headlight assembly, then tilt headlight
assembly down (Fig. 24 and 25).
3. Partially unfasten back plate fixing screws,
then remove signal lamp.
4. Remove socket from signal lamp.
5. Install wiring connector on back of new
signal lamp then install signal lamp.
6. Fasten back plate fixing screws then tilt
headlight assembly up into its housing then
secure using fixing screw.
NOTE
Make sure headlight assembly is properly
positioned into its housing before securing
using fixing screw.
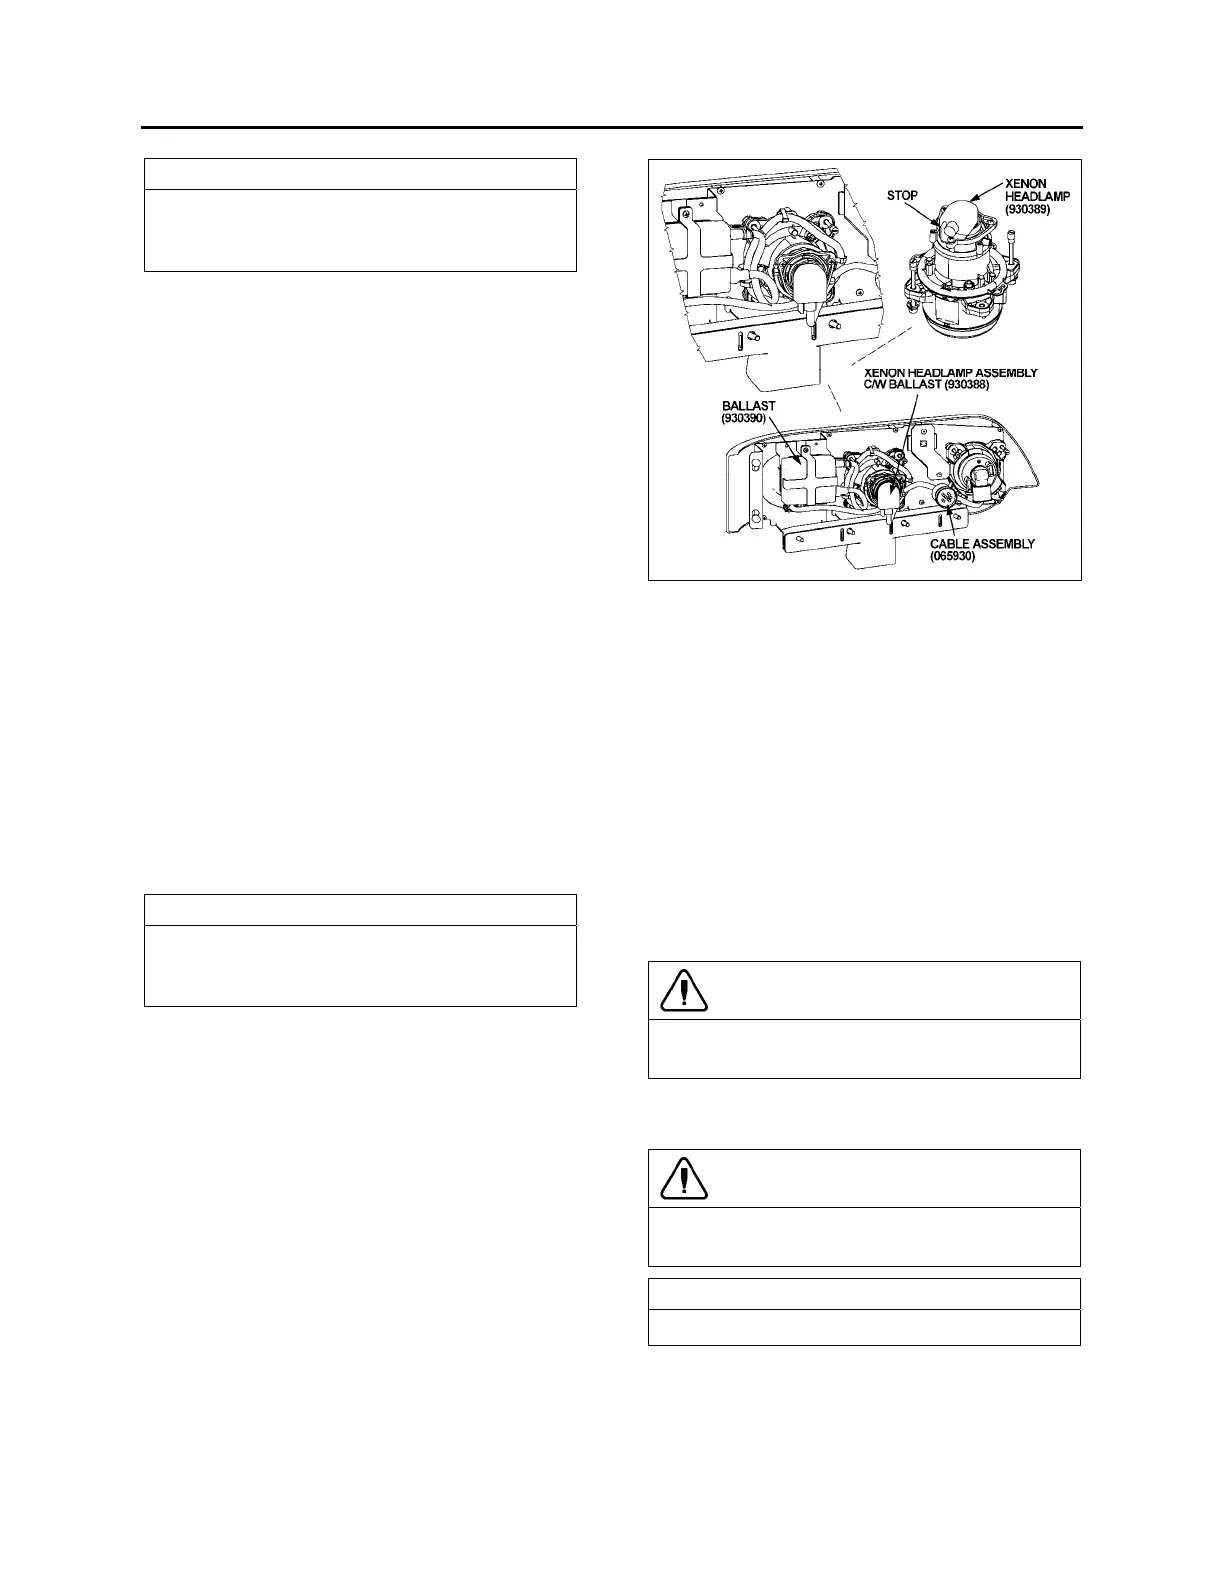
9.1.6 Optional Xenon Headlamp
The outer lamps of each headlight assembly
may be equipped with the optional Xenon lamps.
These lamps improve visibility and provide
better lifespan.
FIGURE 31: XENON HEADLAMP LOCATION 06549
Bulb Removal and Replacement
1. Pull the release handle located inside the
front service compartment to tilt down the
entire bumper assembly.
2. Remove the headlight screw fixing the
headlight assembly, then tilt headlight
assembly down (Fig. 24 and 25).
3. Remove main cable connector (066011).
4. Remove connector from headlamp bulb by
turning counterclockwise.
5. Unscrew the three Phillips head screws, pull
the retainer and bulb out.
CAUTION
To avoid breaking the bulb, make sure the
socket is in proper position against the stop.
6. Install the new bulb by reversing the
previous procedure.
CAUTION
During this step, avoid contacting the bulb
with the fingers not to alter the bulb life.
NOTE
Do not disrupt headlight adjustment screws.