Servicing Work
Fig. 7
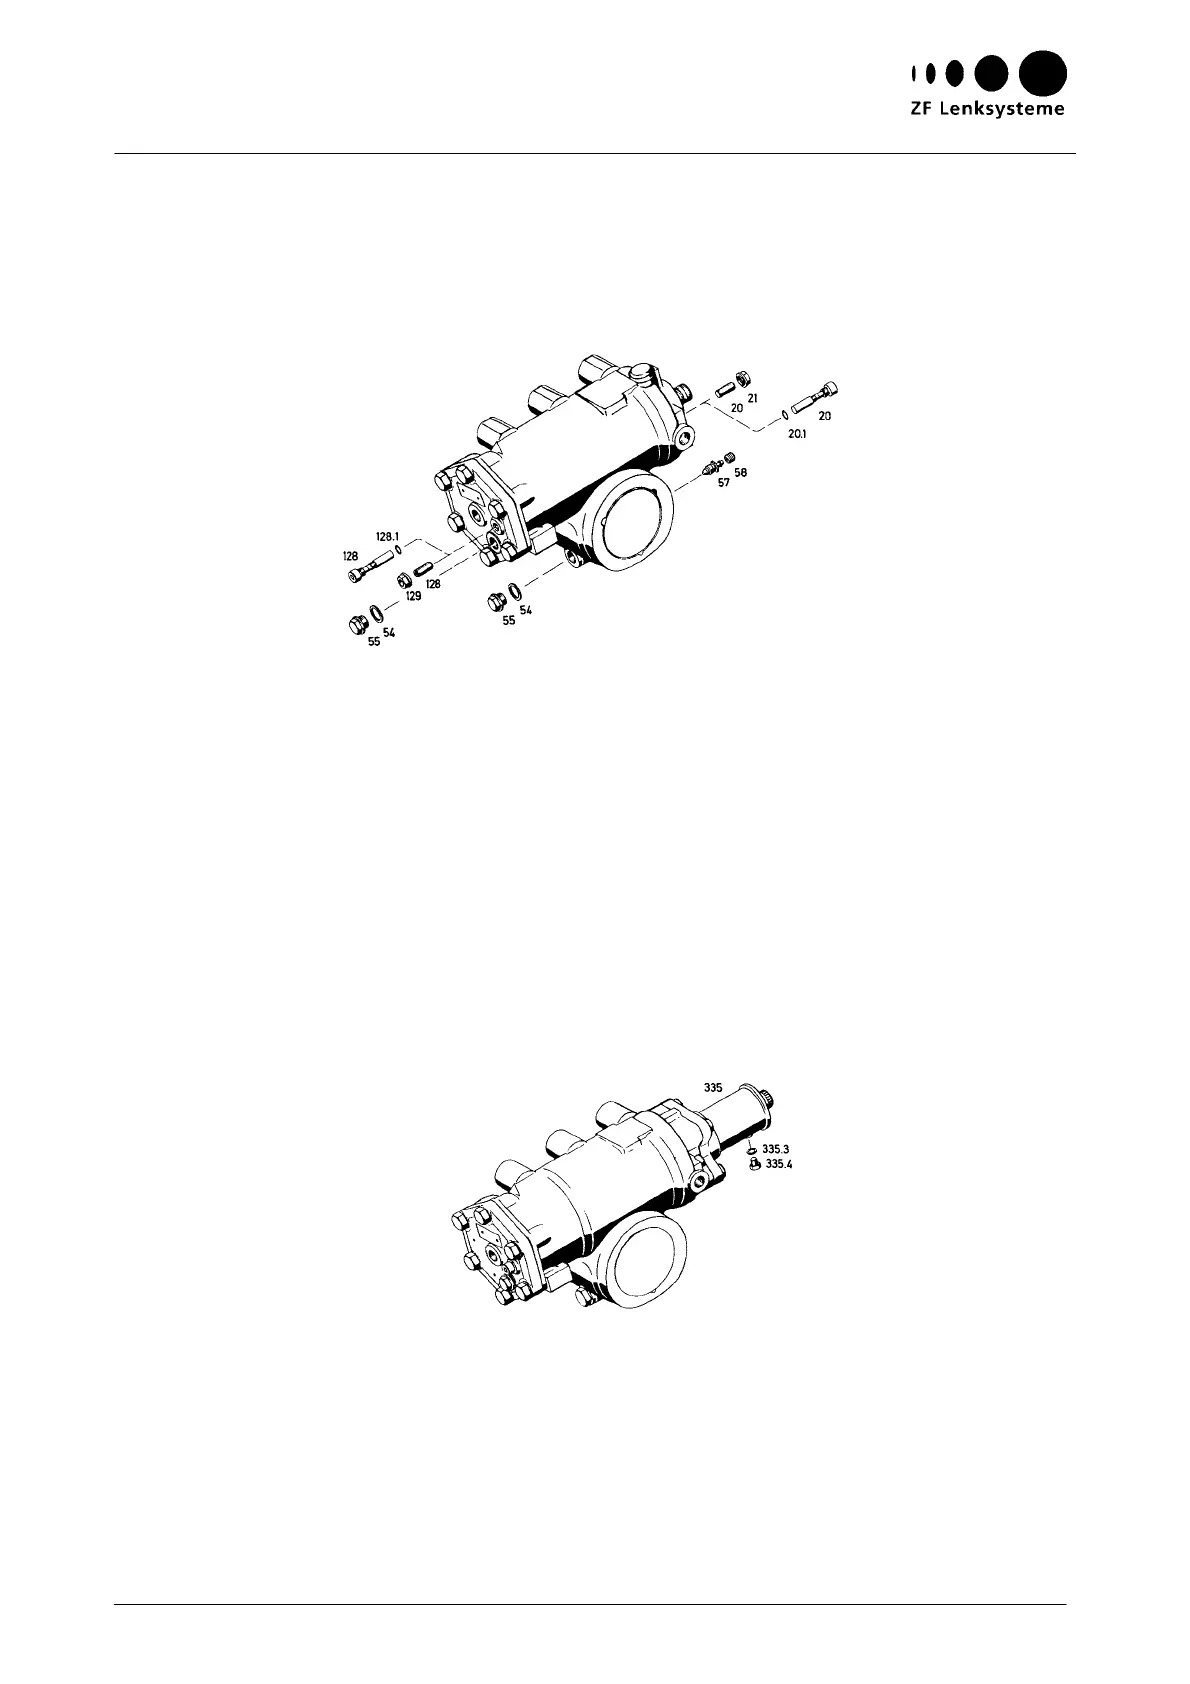
Fig. 8
16 Instructions on Design, Operation, Maintenance and Inspection
V
ersions with bleeder (57):
With the engine running, open the bleeder (57) until nothing but oil is coming out (Fig. 7).
Afterwards, close the bleeder again until it is oil-tight.
On versions without automatic bleeding (installed position horizontal, steering output shaft in the
bottom position) the topmost screw/set screw (20 and 128, respectively) can be used for bleeding.
Versions with screw (20 and 128):
Open the topmost screw (20 and 128, respectively) until nothing but oil is coming out.
Re-tighten the screw (20 or 128) using a torque of 12+3 Nm.
Versions with set screw (20 and 128):
Slacken the collar nut (21 or 129) of the topmost set screw (20 or 128) until nothing but oil is
coming out.
Re-tighten the collar nut (21 and 129) using a torque of 20+10 Nm.
The hydraulic steering limitation must be checked after bleeding.
For versions with flange (335), in addition:
Open the screw plug (335.4) until nothing but oil is coming out (Fig. 8).
Then close the screw plug again.
Tightening torque: 8+1 Nm (M8x1)
If bleeding was done correctly, the oil level in the tank must not rise by more than 1 to 2
cm when the engine is stopped.
Turn the engine off and lower the jacked-up steered axle or drive axle to the ground.