Rockwell Automation Publication 2094-UM001D-EN-P - May 2010 49
Mounting the Kinetix 6000 Drive System Chapter 3
Mount Modules on the
Power Rail
Follow these steps to mount the IAM, AM, shunt, and slot-filler modules.
1. Remove the protective boots from the power rail connectors.
2. Determine the next available slot and module for mounting.
3. Remove the label (applied to back and side of module) covering the pins
that mate with the power rail.
The IAM module must be positioned in the leftmost slot of the power rail.
Position your AM modules, shunt module, and slot-filler modules to the
right of the IAM module.
The shunt module must be installed to the right of the last AM module.
Only slot-filler modules may be installed to the right of the shunt module.
Do not mount the shunt module on power rails with a follower IAM
module. Common-bus follower IAM modules will disable the internal, rail
mounted, and external shunt modules.
SHOCK HAZARD: To avoid personal injury due to electrical shock, place
a 2094-PRF slot-filler module in all empty slots on the power rail. Any
power rail connector without a module installed will disable the Bulletin
2094 system; however, control power will still be present.
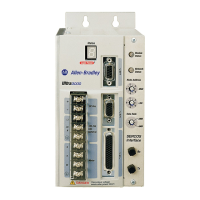
All modules mount to the power rail by using the same technique;
however, only the IAM module is shown.
The IAM module must be positioned in the leftmost slot of the
power rail. Position your axis modules, shunt module, and
slot-filler modules to the right of the IAM module.
ATTENTION: To avoid damage to the pins located on the back of
each IAM, AM, shunt, and slot-filler module and to make sure that
module pins mate properly with the power rail, hang modules as
shown in steps
4…7.
The power rail must be mounted vertically on the panel before
hanging modules on the power rail. Do not mount modules if the
power rail is horizontal.
 Loading...