Ultritouch
The 2RU rack mountable Ultritouch adaptable system
control panel allows you to control some aspects of
switcher operation using a DashBoard interface.
The DashBoard interface on Ultritouch provides control
over aux bus source selections. You must connect to the
switcher from Ultritouch to be able to control the switcher
functions. Refer to the Ultritouch documentation for
information on navigating the Ultritouch menu and
manually connecting to a device.
To Connect to the Switcher from
DashBoard
Ultritouch runs a simplied version of DashBoard that
is used to connect to the switcher.
Note: It is possible to connect to the switcher from a desktop
version of DashBoard, but the interface was designed for
Ultritouch and may not appear correctly on a desktop computer.
Refer to the Ultritouch documentation for information
on navigating the Ultritouch menu and manually
connecting to a device.
1. On Ultritouch, navigate to the Connected Devices
page.
2. Tap Add > TCP/IP DashBoard
Connect/openGear Device Connect.
3. Enter the IP address of the master switcher control
panel in the Device IP/Hostname eld.
4. Tap JSON.
5. In the Port eld, enter 5255.
6. Tap Add Device.
A new Acuity device will appear in the list. I may
take a few moments to connect to the switcher.
7. Tap the connected devices button to see a table of
all the devices Ultritouch is connected to.
8. Tap Acuity > Slot 0: Acuity and tap AUX to open
that tab.
Ultritouch is now connected to the switcher.
Ultritouch Operation
The DashBoard interface on Ultritouch allows you to
assign sources to aux buses
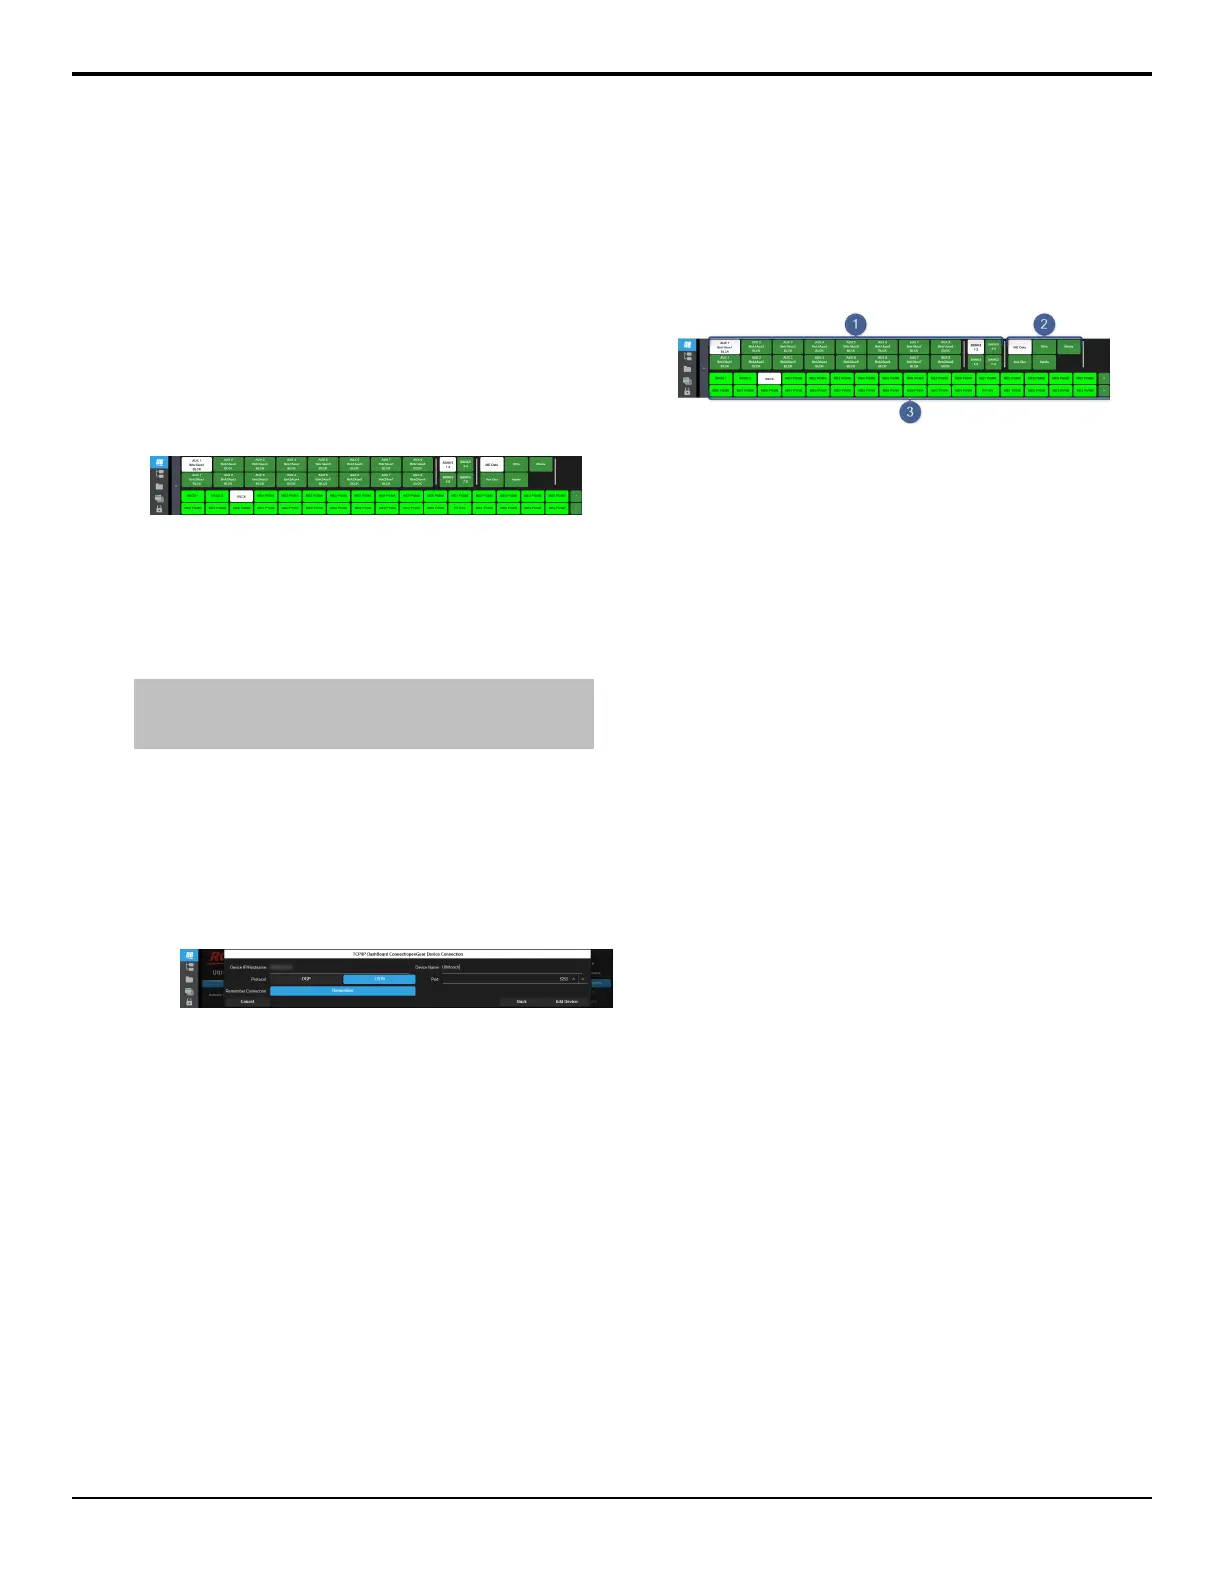
Aux Panel
1. Aux Bank/Bus — select the aux bus you want to
assign a video source to.
2. Source Buses — select the type or source of the
video source you want to assign to the aux bus.
3. Video Sources — select the video source you want
to assign to the selected aux bus. Additional sources
are available by tapping the < or > buttons at the
right of the row.
Acuity Operation Manual (v9.2) — Ultritouch • 107