Custom Controls
Custom controls are run from the Key/Aux/CC bus of
any panel row.
1. Press and hold the CC SEL button and press the
source button on the key bus for the Bank you want
to run the custom control on. The mnemonics show
the Bank numbers.
2. Press the source button on the key bus for the custom
control you want to run.
Tip: When you press the CC SEL button, all the key buses on
the panel switch to custom control buses.
Bus Selection
The Keyer/Aux/CC and Background buses are used to
select the ME, aux bus, keyer, or utility bus that the bus
or row is assigned to.
• Press and hold the SEL button and press the source
button on the program or key bus for the what you
want to assign the bus or row to. The mnemonics
show the selections.
• Key — press SEL and the source button on the
key bus for the keyer you want to assign that bus
to.
• Aux — press SEL and the source button on the
key bus for the aux you want to assign that bus
to.
• Utility — press SEL and the source button on
the key bus for the utility bus you want to assign
to the bus.
• ME — press SEL and the source button on the
background bus for the ME that you want to
assign the panel row to.
Menu Navigation
The four menu navigation buttons on the panel allow
you to navigate the menu system from the control panel.
• HOME — jumps to the Main Menu.
• UP ONE — navigates up one layer from a sub-menu.
For example, if you are on the Setup menu, press Up
One to go up to the Main Menu.
• TOP MENU — toggle the TOP MENU button on
to have the menu buttons apply to the top menu region
and toggle the button off to have the menu buttons
apply to the bottom menu region.
• HOLD — holds the menu region at the current menu.
This is often used if you want to ignore the menu
auto-follows and always remain on the current menu.
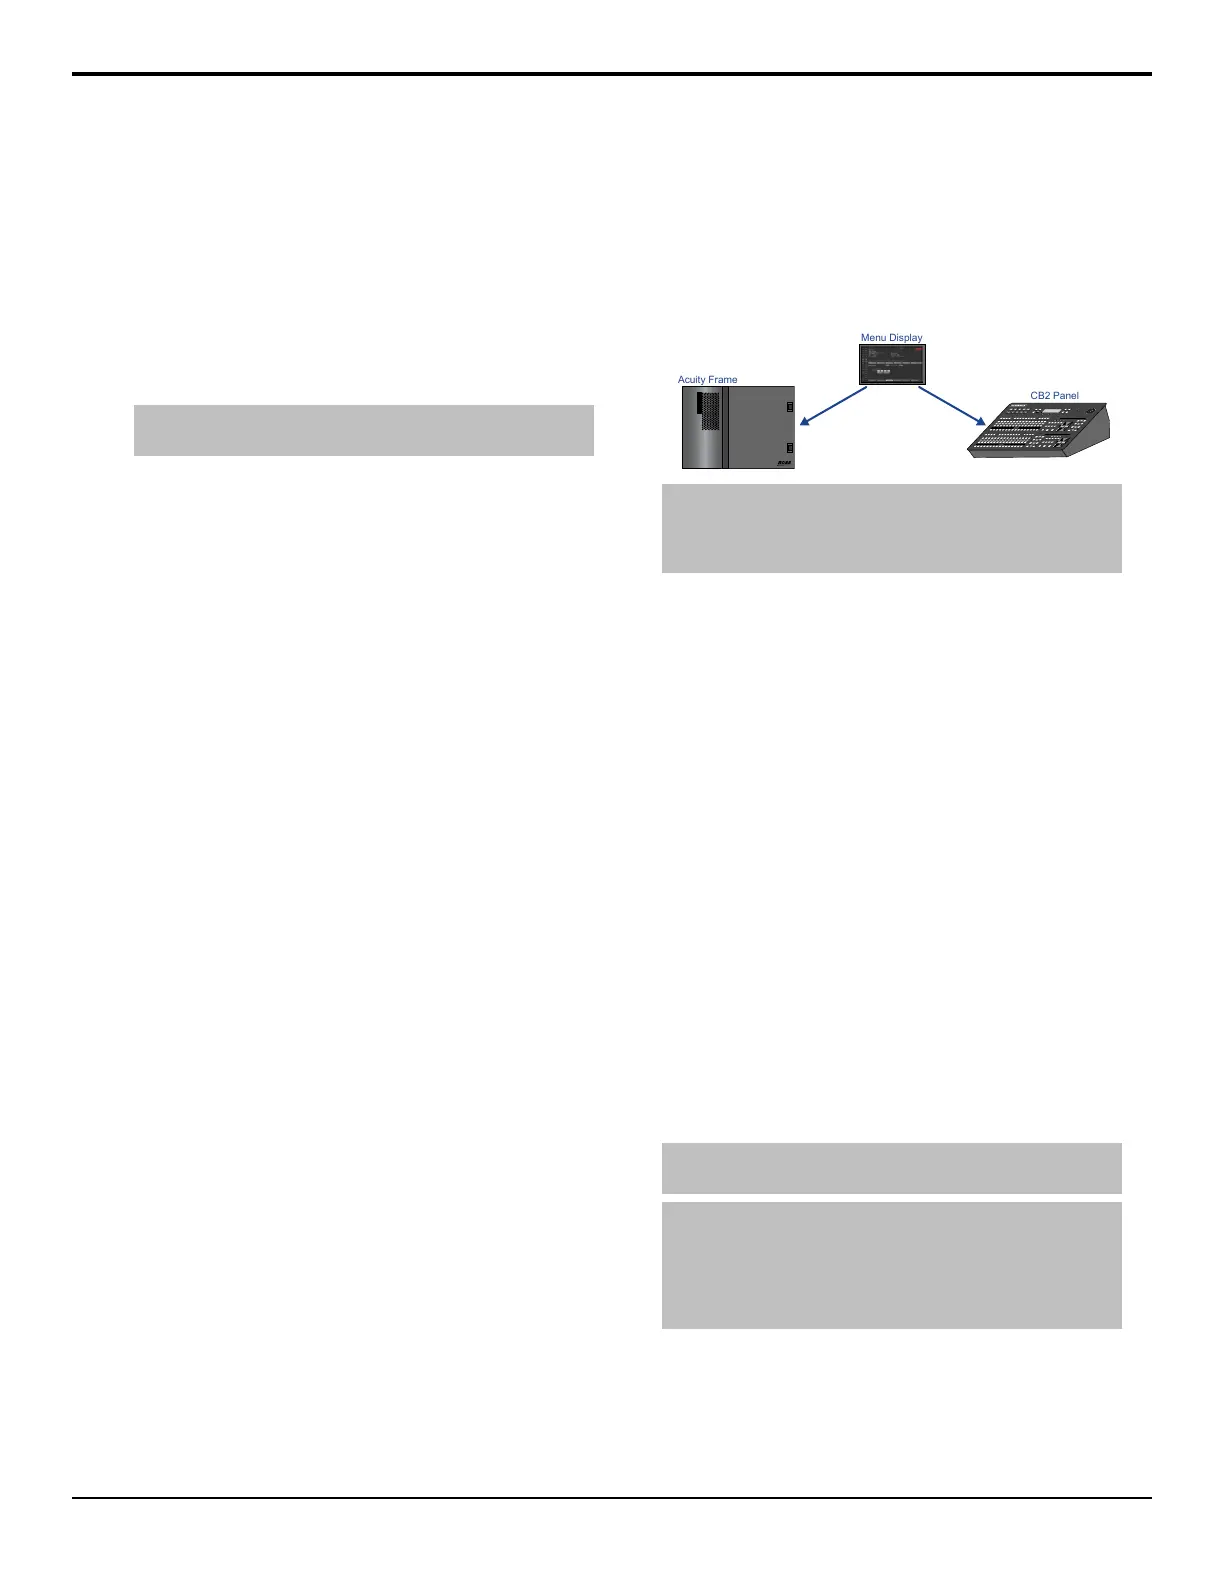
Control Panel Setup
The Carbonite Black control panel connects to the
Acuity
®
frame through the Menu Display over ethernet.
The Menu Display is a smaller version of the Acuity
Rack Panel (ARP) that can have the Carbonite Black
control panel connect to it over ethernet.
KEY/AUX/CUSTOM CONTROL
PROGRAM
PRESET
KEY/AUX/CUSTOM CONTROL
PROGRAM
PRESET
BKGD KEY 1 KEY2 KEY3 KEY4
DISS WIPE DVE MEDIA
TRANSITION3
ROLL
CLIP
CUT
AUTO
TRANS
KEY4
CUT
KEY3
CUT
KEY2
CUT
KEY1
CUT
KEY4
AUTO
KEY3
AUTO
KEY2
AUTO
KEY1
AUTO
TRANSITION2
BKGD KEY 1 KEY2 KEY3 KEY4
DISS WIPE DVE MEDIA
KEY4
CUT
KEY3
CUT
KEY2
CUT
KEY1
CUT
KEY4
AUTO
KEY3
AUTO
KEY2
AUTO
KEY1
AUTO
ROLL
CLIP
CUT
AUTO
TRANS
PUSH PUSH PUSH
HOME
TOP
MENU
UP
ONE
HOLD
RECALL
STORE
FUNC
USB
BANK
ENTER
KEY
PV
SHOW
ALPHA
SEL
CC
SEL
AUTO
KEY
SELF
KEY
PST
PATT
2D
DVE
CHROMA
KEY
3D
DVE
KEY
MEM
BORDER
CHNL
MGMT
KEY
INV
MASK
MATTE
FILL
KEY
PV
SHOW
ALPHA
SEL
CC
SEL
AUTO
KEY
SELF
KEY
PST
PATT
2D
DVE
CHROMA
KEY
3D
DVE
KEY
MEM
BORDER
CHNL
MGMT
KEY
INV
MASK
MATTE
FILL
Acuity Frame
Menu Display
CB2 Panel
Note: The Carbonite Black control panel can only connect to
the Acuity
®
frame through a Menu Display or Acuity Rack Panel.
The Menu Display is used to connect to the frame and then to
the control panel.
By default, the Carbonite Black control panel is
automatically detected in DashBoard and can be setup
to communicate with the Menu Display using the
DashBoard interface. Once the Carbonite Black control
panel has connected to the Menu Display, the software
is congured for Acuity
®
and the DashBoard interface
is no-longer available. You must use the DashBoard
interface to set the IP address of the Carbonite Black
control panel before connecting it to the frame.
The Menu Display connects to the frame in the same way
as a standard Acuity
®
control panel or Acuity Rack Panel.
Refer to Control Panel Network Setup for more
information.
Panel Network Initial Setup
The Carbonite Black control panel comes from the
factory set with a static IP address (192.168.0.129) but
can be set to use DHCP to automatically obtain an IP
address.
The control panel is automatically discovered in
DashBoard and appears as CarbonitePanel followed by
the MAC address of that particular panel.
Note: If the Carbonite Black control panel is able to connect to
the Acuity Rack Panel, the DashBoard menus are not available.
Tip: If you do not know the IP address of the control panel, you
can set DIP switches on the panel to lock the IP address of the
panel to 192.168.0.129 and the IP address that it expects the
frame at to 192.168.0.123. The panel must be re-started for the
new IP address to be applied. Refer to Control Panel DIP
Switches on page 24 for DIP settings.
To Configure the Initial Network Setting
Change the network setting of a Carbonite Black control
panel.
1. Double-click on the CarbonitePanel node and
click on the Ethernet tab.
Acuity Operation Manual (v9.2) — Carbonite Black Control Panel Overview • 23