9. Press Transparency and use the Transparency
knob, or the positioner, to adjust the transparency
of the key.
The Transparency area on the menu shows level
of transparency that is applied to the key. As
transparency is increased, the word Transparent
becomes more visible.
To Set Up a 3D DVE Fly Key
As you adjust the DVE key, the images on the DVE
Position/Crop menu update to show you how the key is
being changed.
1. On the Keyers Module, select the Keyer you want
to y and press 3D DVE.
2. Press Position and use the X Location, Y
Location, and Z Location knobs, or the positioner,
to adjust the location of the DVE key.
• X Location — move the key from side to side.
• Y Location — move the key up or down.
• Z Location — move the key towards or away
from you. Although the key appears larger or
smaller, it is the same size, just closer or further
from you in 3D space.
The Position area on the menu shows the location
of the key in the 3D world relative to the visible
area. If the key is moved out of the visible area, it
is still on-air, but is not visible on the screen.
3D World
Visible Area
DVE
Channel
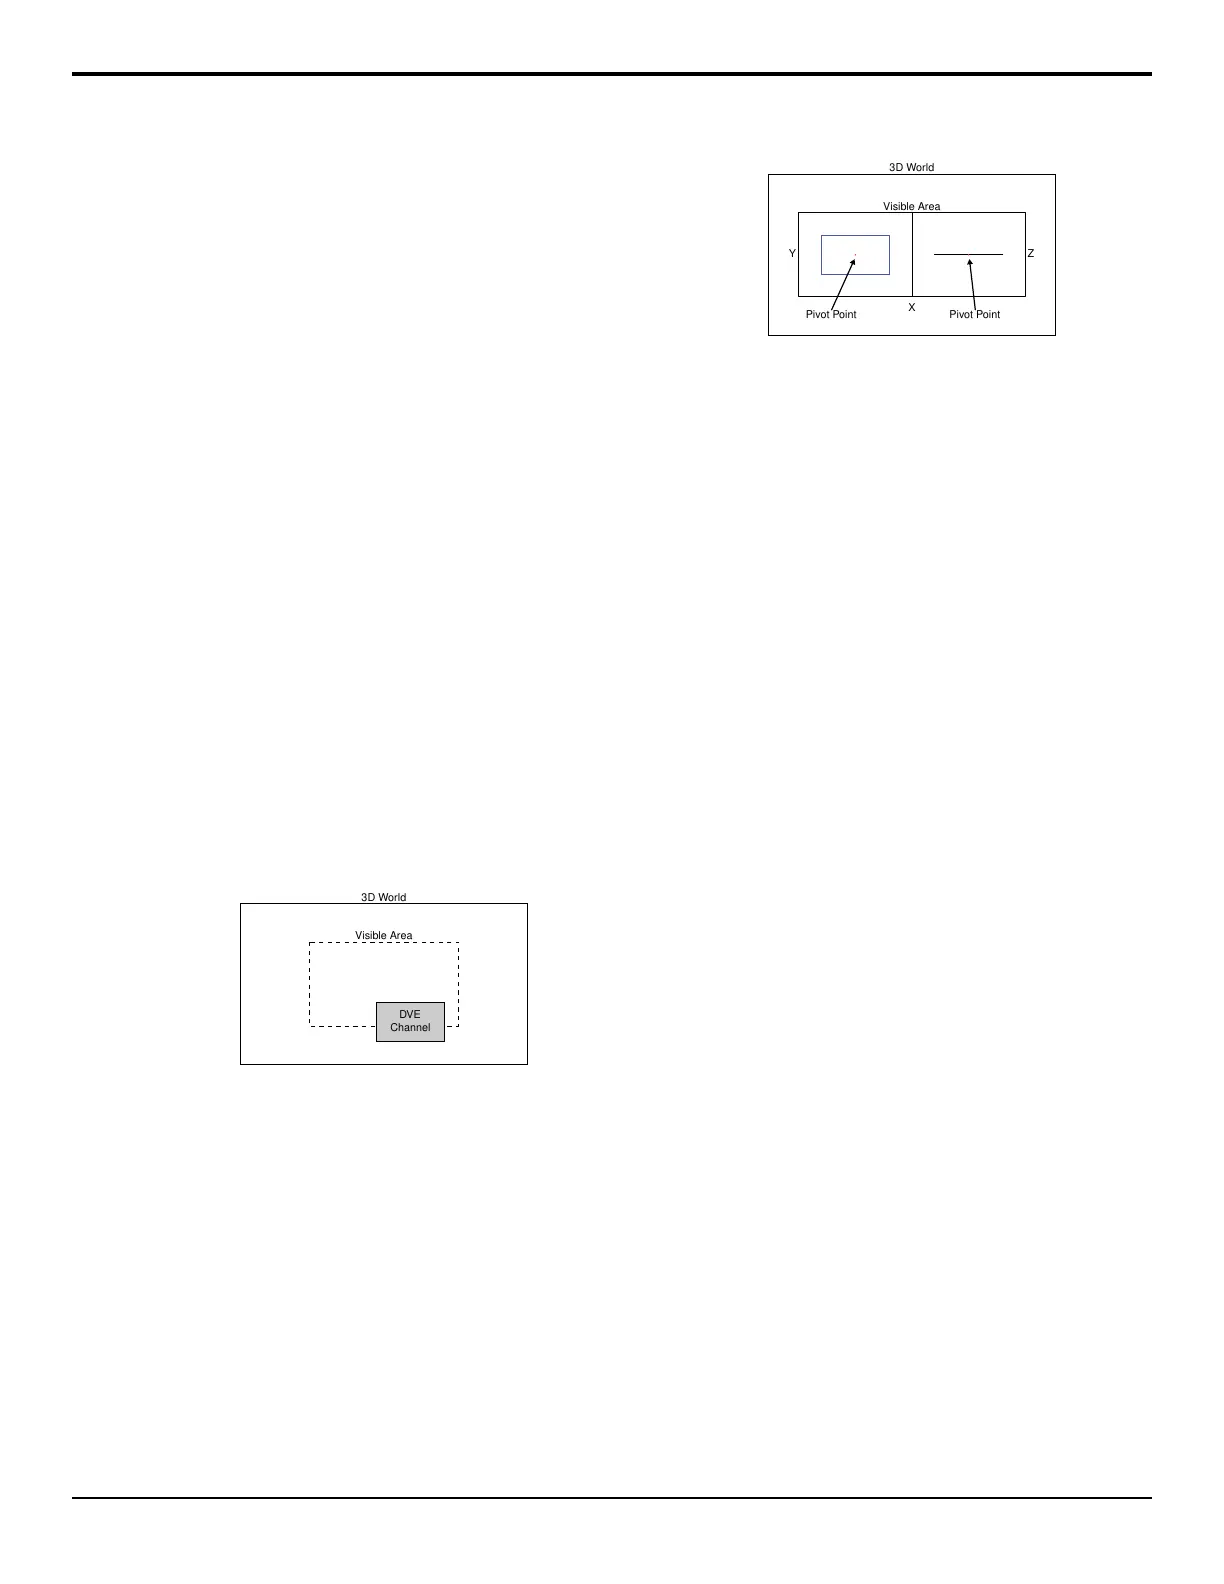
3. Press Pivot Position and use the X Pivot, Y
Pivot, and Z Pivot knobs, or the positioner, to
adjust the location of the pivot point used for
rotation.
• X Pivot — move the pivot point from side to
side.
• Y Pivot — move the pivot point up or down.
• Z Pivot — move the pivot point towards or
away from you.
The Point of Rotation area on the menu shows the
location of the pivot point in the 3D world relative
to the visible area. This is the point in 3D space
where the key rotates around when a rotation is
applied. The pivot point is unique to for each key.
Y
X
Z
3D World
Visible Area
Pivot Point Pivot Point
4. Press Rotation and use the X Rotation, Y
Rotation, and Z Rotation knobs, or the positioner,
to adjust the rotation of the key around the pivot
point.
• X Rotation — rotate the key from side to side
around the Y-axis.
• Y Rotation — rotate the key up or down around
the X-axis.
• Z Rotation — rotate the key clockwise, or
counter-clockwise around the Z-axis.
The Rotation area on the menu shows the rotation
of the key in the 3D world. If you rotate the key in
the X or Y plane past 90 degrees in either direction,
the back-side of the key is visible. This is the reverse
image of the front-side.
5. Press Aspect and use the X Aspect, Y Aspect,
and Size knobs, or the positioner, to adjust the
aspect ratio or size of the key.
• X Aspect — stretch or shrink the key
horizontally.
• Y Aspect — stretch or shrink the key vertically.
• Z Aspect — stretch or shrink the overall size
of the key.
The Aspect area on the menu shows the shape and
size of the key in the 2D world.
6. Press More.
7. Press Crop Horizontal and use the Left Edge,
Right Edge, and Both knobs, or the positioner, to
adjust the cropping of the left and right sides of the
key.
• Left Edge — crop the left side of the key.
• Right Edge — crop the right side of the key.
• Both — crop both the left and right sides of the
key.
The Cropping area on the menu shows the shape
and size of the key in the 2D world and the
proportion part of the key that has been cropped off.
8. Press Crop Vertical and use the Top Edge,
Bottom Edge, and Both knobs, or the positioner,
to adjust the cropping of the top and bottom sides
of the key.
Acuity Operation Manual (v9.2) — Key Modifiers • 53