Note: The Current DIP Switch field shows the state of
the DIP1 and DIP2 switches on the control panel. Some
settings do not allow you to change the IP settings from
DashBoard.
2. Click a Method button to select whether to use a
static IP address (Static), or obtain an IP address
(DHCP).
3. For a static IP address, enter the IP address (IP
Address), subnet mask (Subnet Mask), and
gateway (Default Gateway) you want to use.
4. In the Carbonite IP Address eld, enter the IP
address of the Menu Display you are connecting to.
5. Ensure that Master is selected for the Panel ID.
6. Click Apply Changes.
To Attach a Carbonite Black Panel
Attach the Carbonite Black control panel to the Menu
Display you are using to connect to the Acuity
®
frame.
Tip: The Menu Display can be directed to the IP address of the
Carbonite Black control panel again as needed.
1. Press HOME > Setup > Network Setup >
Attach Remote CB Panel.
2. In the Remote Panel eld, enter the IP address of
the Carbonite Black control panel you want to
connect to.
3. Click Attach CB Panel.
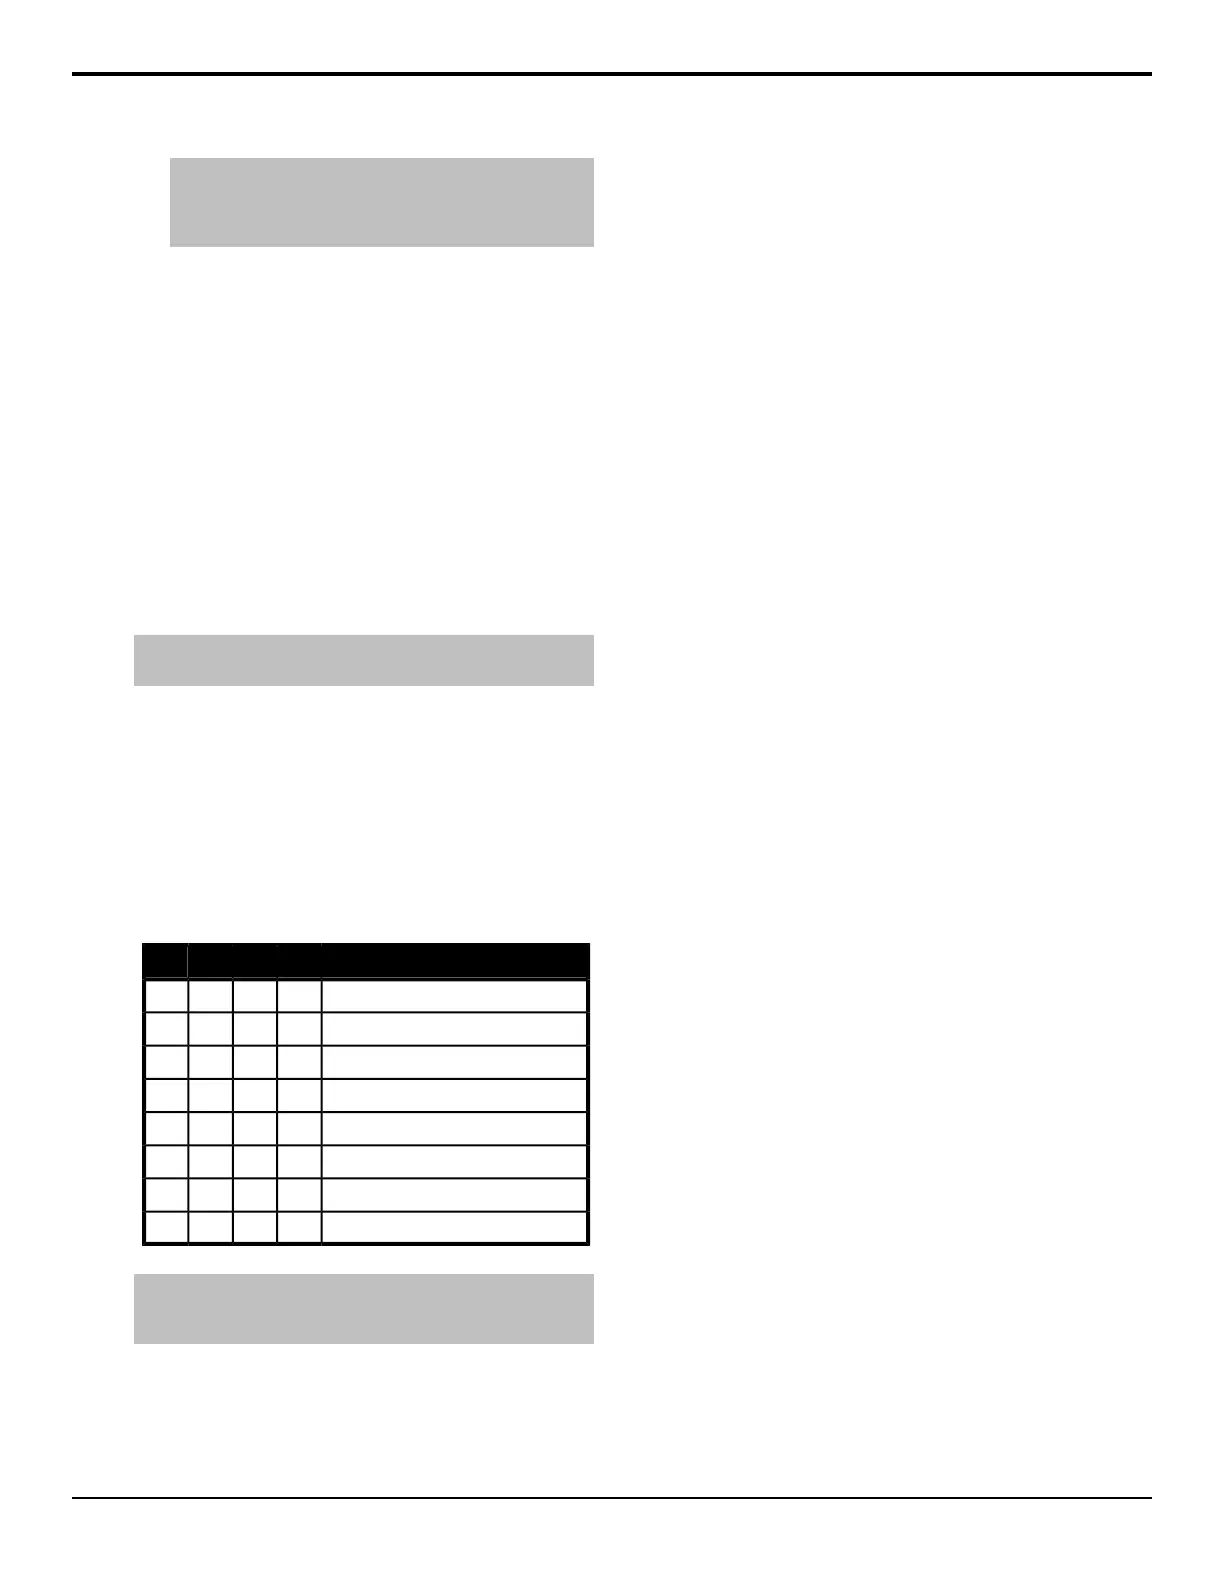
Control Panel DIP Switches
The up position for the DIP switch is OFF.
FunctionDIP4DIP3DIP2DIP1
User IP SettingsOFFOFF
Force DHCP IPONOFF
Force Static IP (192.168.0.129)OFFON
reservedONON
reservedOFF
reservedON
Default BootOFF
Boot from memory cardON
Note: When you force the static IP, the IP address that the
control panel expects to find the frame is also set
(192.168.0.123).
24 • Carbonite Black Control Panel Overview — Acuity Operation Manual (v9.2)