Menu System
The menu system on the switcher allows you to set up
the switcher, interface with external equipment, set up
and perform complex shots or sequences, and record and
edit custom controls.
The menu system is set up with a branching architecture,
with the Main Menu as the starting point of all menus.
This is the menu that is displayed when you press the
HOME button. From the Main Menu you can move
down the tree by selecting one of the buttons along the
bottom of the menu, or you can move laterally to
additional pages of the menu by pressing the More
button. You can tell when there are additional pages to
a particular menu by the title of the menu, whether it is
page 1-3 or 3-3, and whether the More button is lit or
not.
The lower menu and Menu Keypad module auto-follow
button presses on the control panel and display the
appropriate menu.
Using the Menu System
The menu system is separated into three regions; the top
menu region, the bottom menu region, and the quick
navigation region on the left. The bottom display region
is the primary menu navigation point in the switcher.
This is the menu region that auto-follows button presses
and is the only menu region available when you are in
certain calibration menus. The top menu region can be
used to park a menu that you want to be able to access
often, such as the Sequences menu when you are building
a sequence. The quick navigation region has a number
of buttons that have been pre-programmed to jump to
specic menus.
Tip: When you enter the Installation menu, the switcher goes
into a safe configuration, or locked mode. In this mode you
cannot use the control panel to select sources, perform
transitions, recall memories, or run custom controls, among other
things. Press Swap to move the Installation menu up into the
top menu region to return the switcher to normal operation.
The menu system allows you to access all of the setup
and conguration information of the switcher. In some
cases, a menu can be accessed either by navigating from
the Main Menu, by pressing a button on the control
panel that the menu system will auto-follow to, or by
pressing one of the quick navigation buttons to the left
of the menu region.
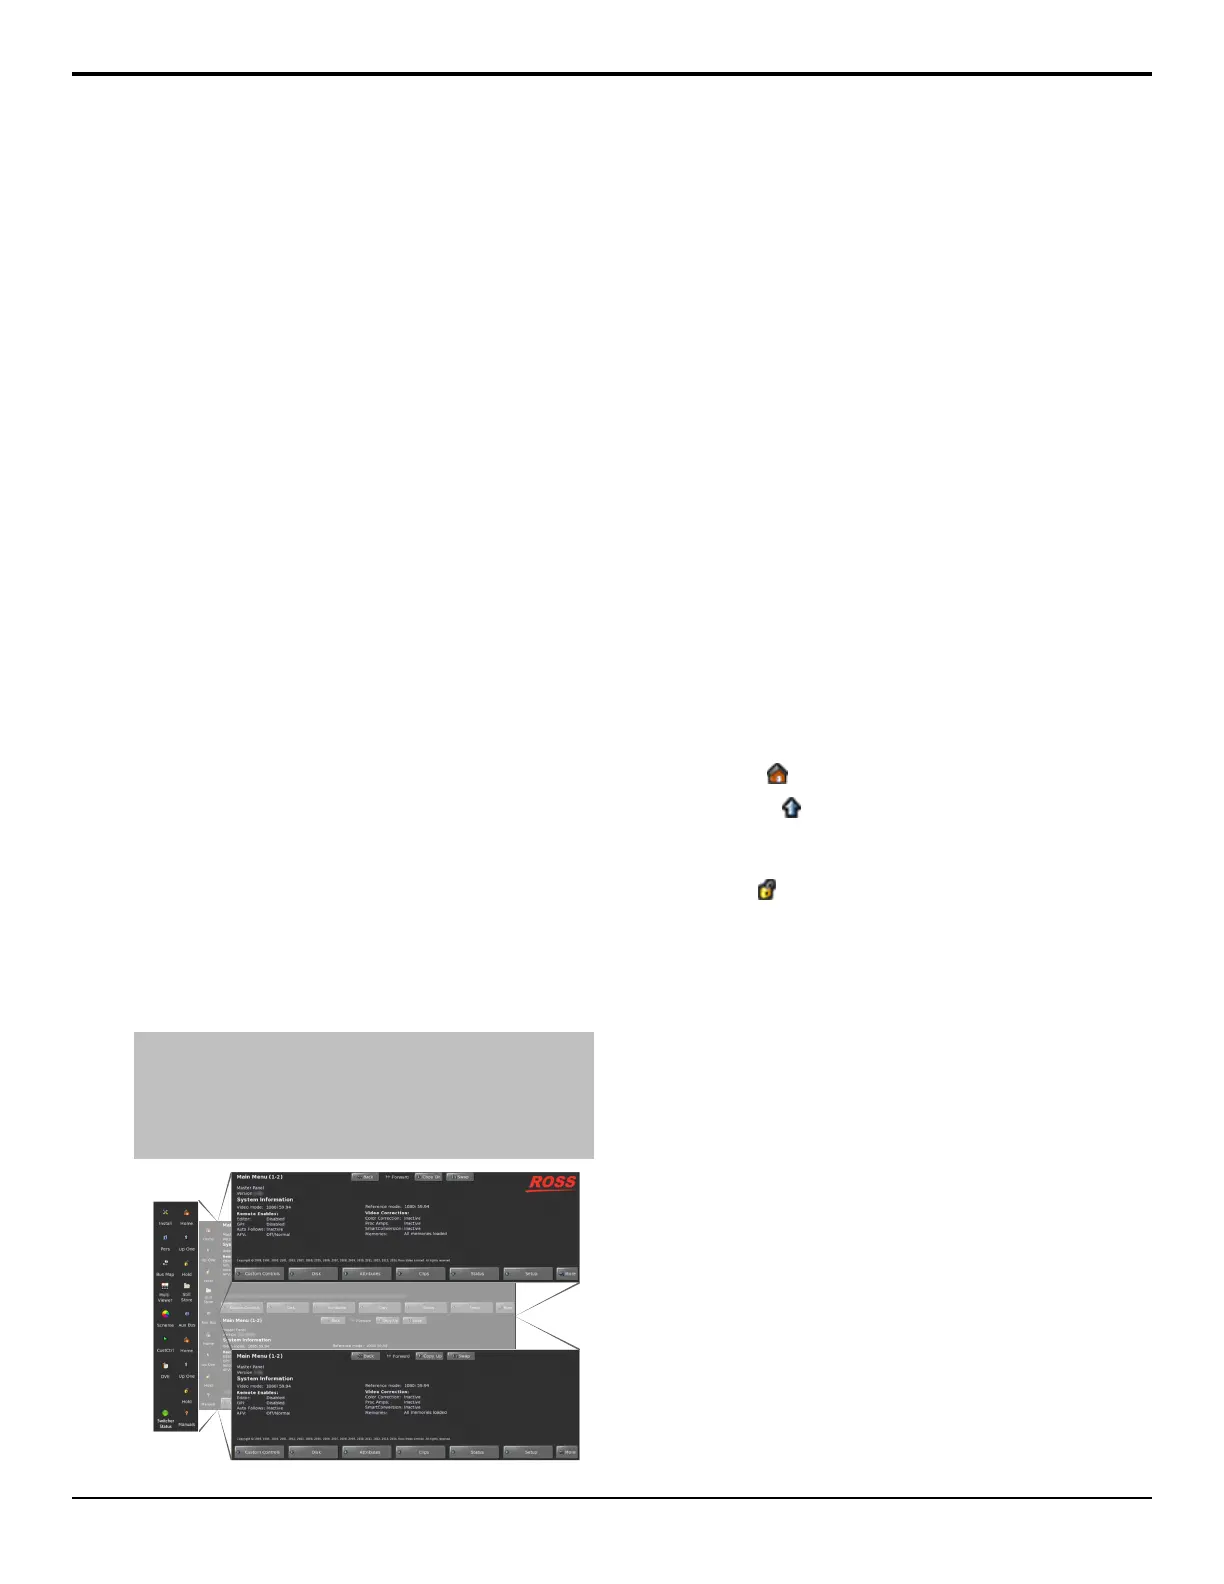
The Main Menu can always be accessed by pressing the
Home button on the left side of the menu region. This
is the start location where all of the menu trees branch
off from. Each menu can have multiple pages that are
accessed by pressing the More button at the bottom right
of the menu region. The number of pages in a menu is
shown in the top left of the menu region next to the name.
For example, the Main Menu (1-2) indicated that there
are two pages to this menu and that you are currently on
page one. The buttons along the bottom of the menu
region are either available selections for the current menu
or will take you to a sub-menu. The buttons that will take
you to a sub-menu have a down-arrow. When you have
navigated down to a sub-menu, you can press Up One
to go up one layer.
Take some time to familiarize yourself with the menu
navigation buttons.
• Home ( ) — jumps to the Main Menu.
• Up One ( ) — navigates up one layer from a
sub-menu. For example, if you are on the Setup
menu, press Up One to go up to the Main Menu.
• Lock ( ) — holds the menu region at the current
menu. This is often used if you want to ignore the
menu auto-follows and always remain on the current
menu.
• Back — like the back button on your browser, this
button will take you back to the last menu visited.
• Forward — like the forward button on your browser,
this button will take you forward to the menu you
just navigated back from.
• Copy Up/Copy Down — copies the current menu
from the bottom menu region to the top menu region
(Copy Up), or from the top menu region to the
bottom menu region (Copy Down).
• Swap — the menu from the top menu region is
copied to the bottom menu region and the menu from
the bottom menu region is copied to the top menu
region.
On the right side of some menu there are up to three
knobs. These knobs are used to make selection from the
list next to the knob. A knob can be turned either by
touching the screen and making a circular motion around
the knob, or by tapping the screen directly to the left or
right of the menu. Double-tapping the knob defaults the
value for that knob.
Acuity Operation Manual (v9.2) — Menu System • 25