4. Use the positioner, or the X and Y knobs, to adjust
the position of the center cross-hairs.
Hide
The Hide Overlays hides all preview overlays elements.
The current settings of the preview overlay elements are
not effects, they are simply not visible.
Mask Preview
The Preview Mask overlay places a dotted outline around
any active box mask, but cannot be applied to a pattern
mask. This function makes it easy to identify various
masks, particularly when one may be placed near the
edge of the screen.
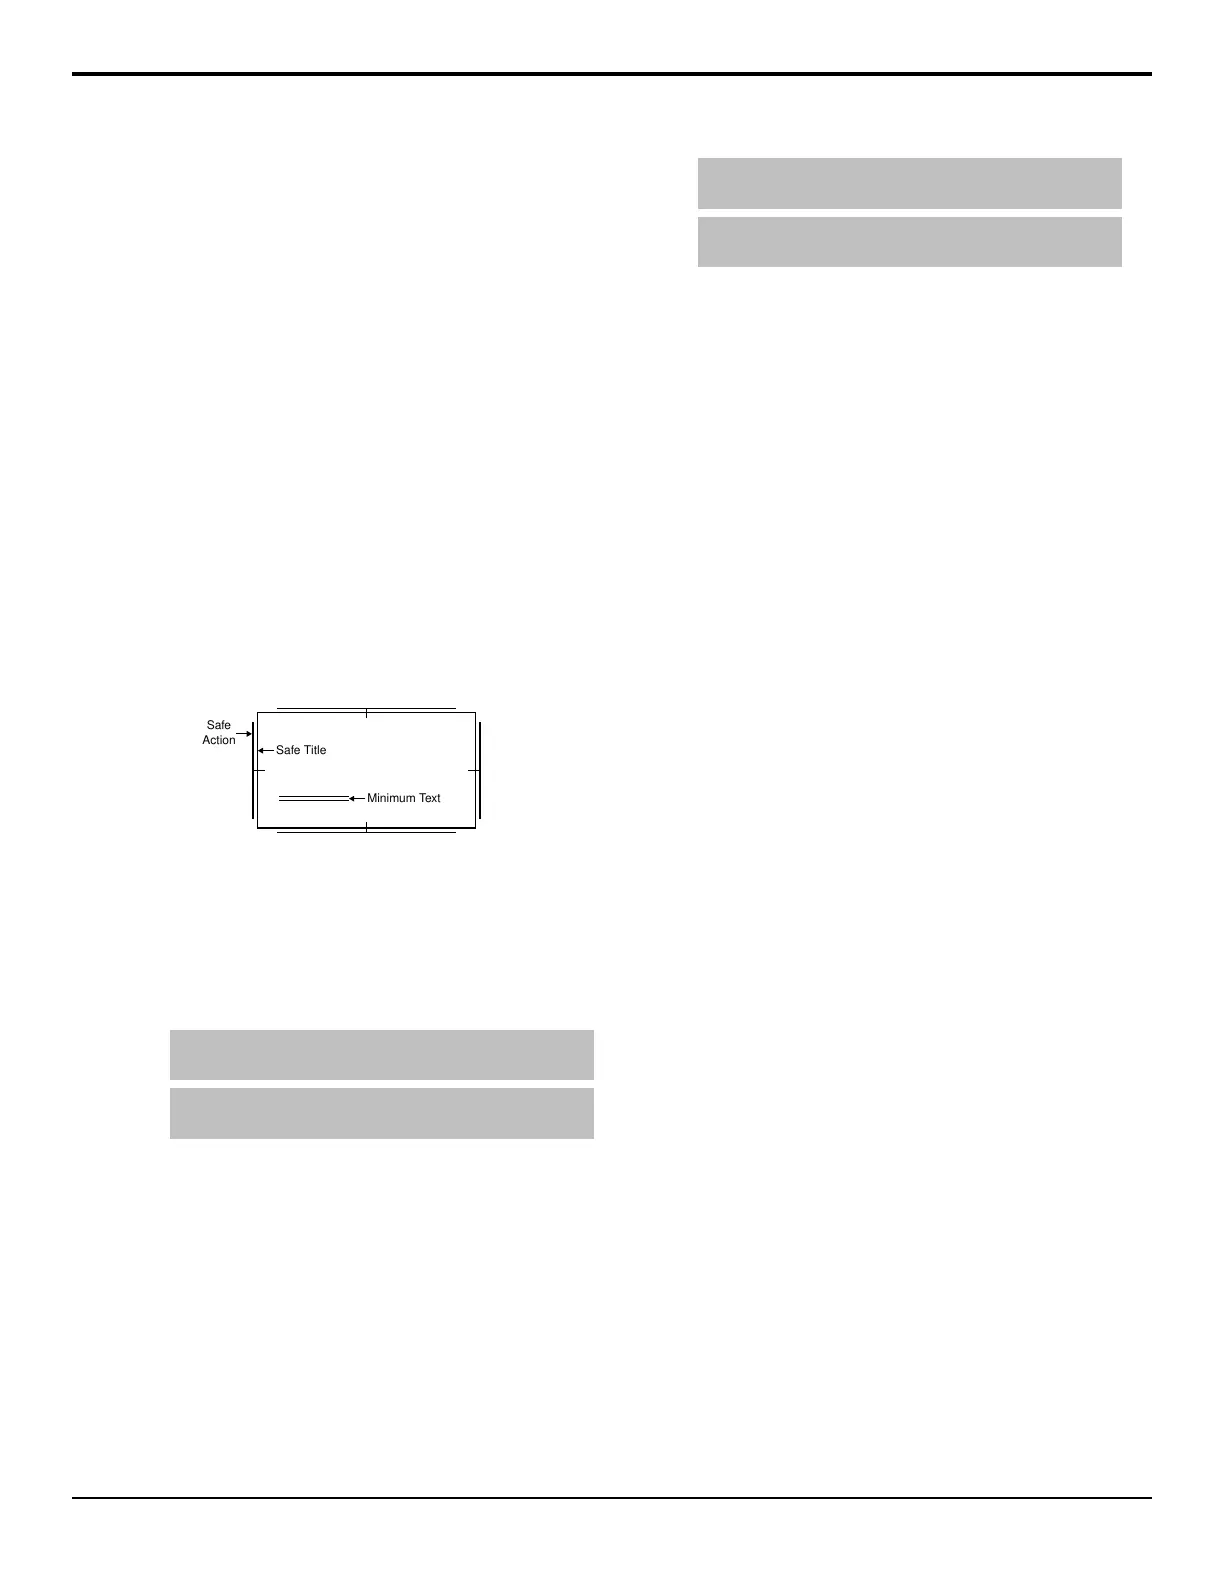
Safe Title
The Safe Title overlay shows guides for Safe Title, Safe
Action, and Safe Text Size using the SMPTE standards.
A number of pre-dened Safe ID setups are stored on
the switcher. The size and position of the elements for
these Safe ID setups can be adjusted and stored.
Safe
Action
Safe Title
Minimum Text
Figure 12: Safe Title Overlay
To Set the Preview Overlay Safe Title
1. Press HOME > More > Effects > More > More
> Preview Overlay > Safe Title Setup.
2. Use the Safe ID knob to select the Safe ID you want
to adjust the values for.
Tip: Press Modify Name to change the name of the
selected safe id.
Tip: Press More > Reset to reset the center position to
the default setting.
3. Press Top/Left and use the Left and Top knobs to
adjust the top and left sides of the safe title area.
4. Press Bottom/Right and use the Right and
Bottom knobs to adjust the right and bottom sides
of the safe title area.
To Set the Preview Overlay Safe Text
1. Press HOME > More > Effects > More > More
> Preview Overlay > Safe Title Setup.
2. Use the Safe ID knob to select the Safe ID you want
to adjust the values for.
Tip: Press Modify Name to change the name of the
selected safe id.
Tip: Press More > Reset to reset the center position to
the default setting.
3. Press Safe Text X/Y and use the Safe Text X and
Safe Text Y knobs to adjust the position of the safe
text lines on the screen.
4. Press Safe Text W/H and use the Safe Text
Width and Safe Text Height knobs to adjust the
width and height of the safe text lines.
Source ID
The Source ID element shows the name of the current
on-air video source, the transition type that is currently
selected, and the video source that is taken on-air with
the next transition.
The Program Source is displayed on the left, and shows
what is currently on-air and will be taken off-air with the
next transition. The Preview Source is displayed on the
right and shows what will be taken on-air during the next
transition.
Between the Program Source and the Preview Source is
the Transition Type. The Transition Type shows the type
of transition that will be performed for the next transition.
• D — Dissolve
• W — Wipe
• DE — DVE Wipe
• SQ — Sequence
To Set the Preview Overlay Source ID Size and
Position
1. Press HOME > More > Effects > More > More
> Preview Overlay > Source ID.
2. Use the positioner, or the X and Y knobs, to position
the text.
3. Twist the positioner, or the Size knob, to set the
size of the text.
4. Press Done.
Time Clock
The Time Clock overlay shows a count-down, count-up,
or count-down-then-up timer on the Preview Overlay.
The Time Clock can be set up to start counting down, or
up, on every transition, from a preset start time. This can
be tied to any ME, a particular ME, or a Fade to Black
transition.
To Set the Preview Overlay Time Clock
1. Press HOME > More > Effects > More > More
> Preview Overlay > Time Clock Setup.
Acuity Operation Manual (v9.2) — Switcher Basics • 35