Tip: You can also press KEY RATE on the Effects Memory
module for the ME that you want to set the key transition
rate for.
2. Press the ME X button in the Store or Recall area
for the ME you want to set the key transition rate
for.
3. Use the keypad to enter a new duration, in frames.
The new rate appears on the top line of the display
as you enter it.
4. Press ENTER to set the new rate.
Fade to Black Rate
The Fade to Black rate is set from Global Memory
module. The current Fade to Black rate is shown in both
the Global Memory module, and the Fade To Black
module.
To Set a Fade Rate
1. Press and hold FADE RATE on the Global Memory
module.
2. Use the keypad to enter a new duration, in frames.
The new rate appears on the top line of the display
as you enter it.
3. Press ENTER to set the new rate.
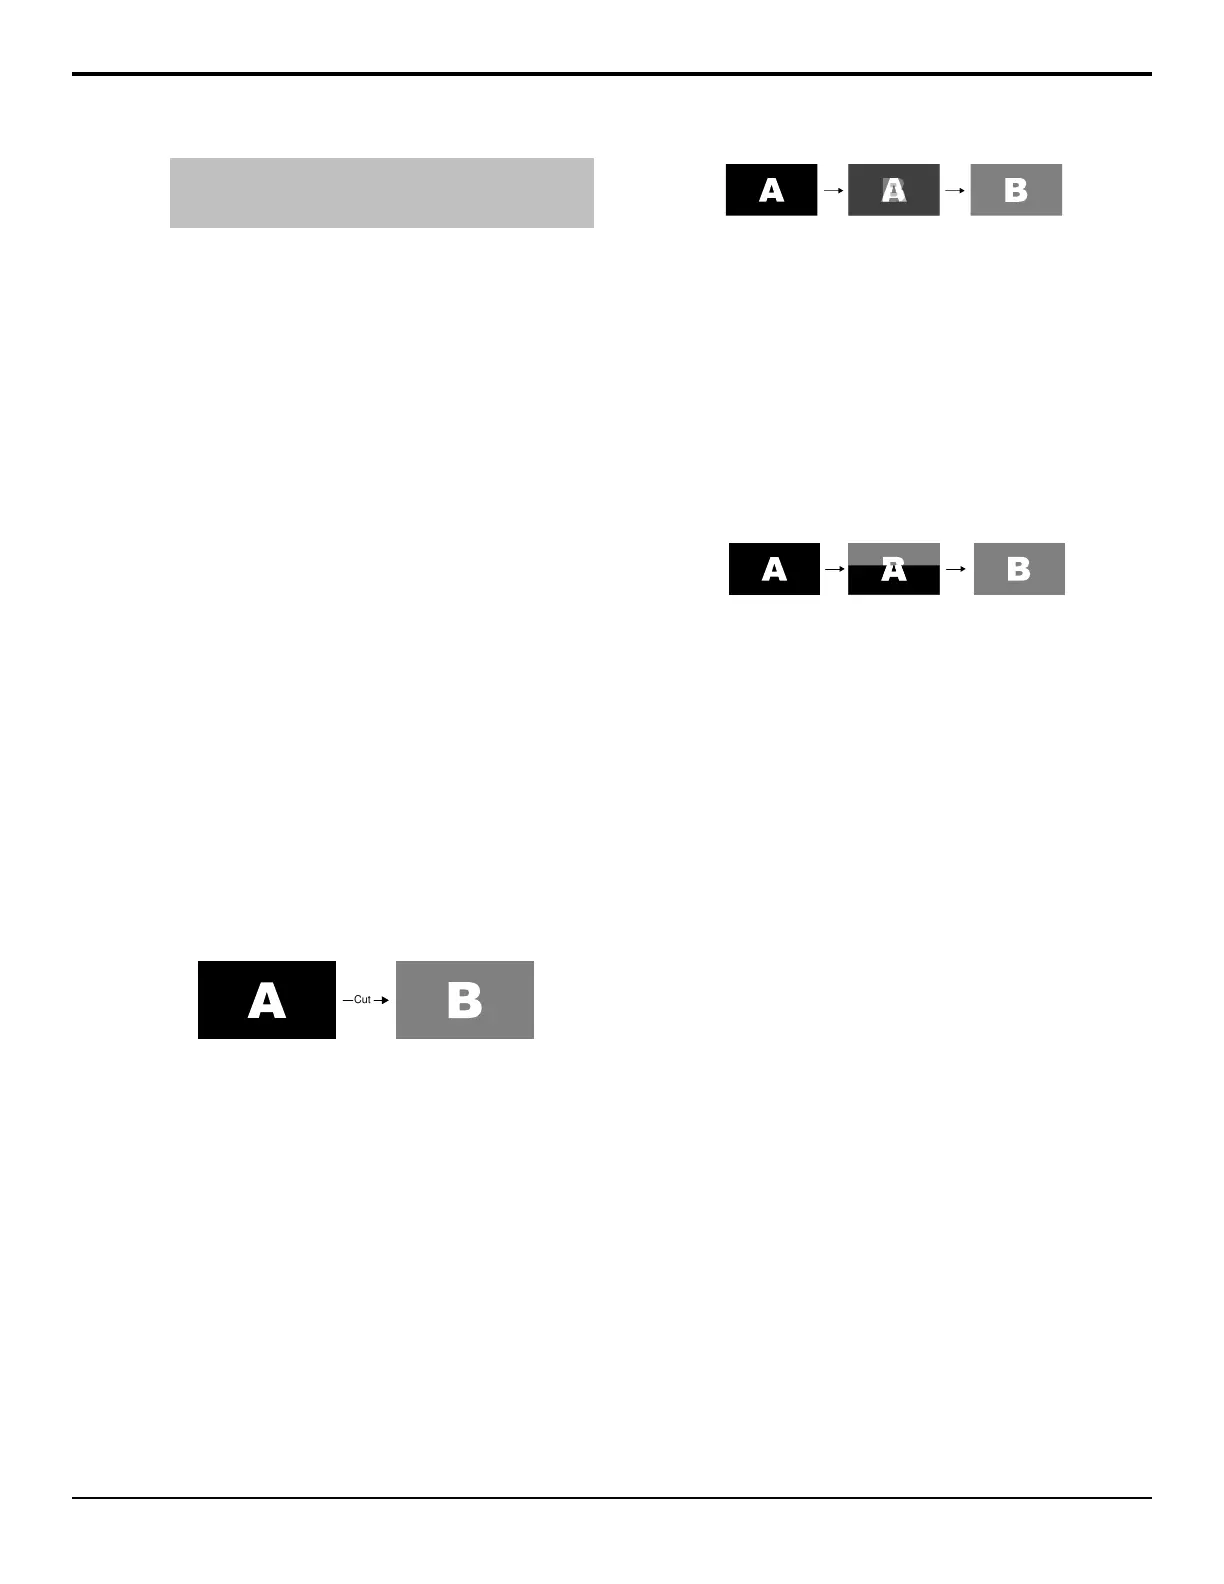
Cuts
A Cut is an instantaneous transition between video
sources. Unlike all the other transition types, there are
no intermediate steps between the video source that is
on-air, and the video source you are transitioning to.
Figure 14: Cut Transitions
A cut is performed either by selecting difference sources
on a background or key bus, or by pressing a CUT button.
Dissolves
A Dissolve is a gradual fade between video sources. For
a Background transition, the video signal on the
Background bus and the video signal on the Preset bus
are mixed together until the Preset bus video signal
completely replaces the Background bus video signal.
During the transition, both the Background bus and the
Preset bus are on-air. Only after the transition has
completed do the crosspoint selection ip-op between
the buses.
Figure 15: Dissolve Transition
Wipes
A Wipe is a gradual transition where one video signal is
replaced with another according to a wipe pattern. For a
Background transition, the video signal on the
Background bus is replaced by the video signal on the
Preset bus according to the wipe pattern. In the example
below, a line wipe is being used. During the transition,
both the Background bus and the Preset bus are on-air.
Only after the transition has completed do the crosspoint
selection ip-op between the buses.
Figure 16: Wipes
The Pattern Select menu, displayed when a wipe is
selected, shows 32 pre-assigned patterns, and 8
user-assignable patterns.
To Set Up a Wipe
A wipe transition requires that you select a wipe pattern,
and set the direction and number/size of the wipe pattern.
1. Press WIPE on the Transition module.
2. Press the pattern button for the pattern you want to
use.
3. Press Direction to select if the wipe moves forward
(Fwd) or in reverse (Rev).
For example, if the circle pattern is used, toggling
between reverse and forward changes whether the
transition starts as a circle in the center of the screen
and expands out, or the circle starts off-screen and
shrinks down to the center.
4. Press Flip Flop to select if the wipe moves in the
opposite direction with every transition (On), or
always moves in one direction (Off).
For example, with Flip Flop on, the wipe could be
performed from left to right across the screen the
rst time, and then right to left for the second.
5. Press Modify Pattern.
6. Press X/Y Size to adjust the size and position of the
pattern.
• X — move the pattern horizontally, or use the
positioner.
• Y — move the pattern vertically, or use the
positioner.
Acuity Operation Manual (v9.2) — Transition • 41