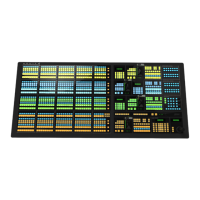
Assigning a Row to an Aux Bus
The panel row can be assigned to an Aux Bus or an
AuxKey. When assigned to an AuxKey, the entire row
is assigned to the Aux Bus, when assigned to a simple
Aux Bus, only the Key Bus of the row is assigned to the
Aux Bus.
To Assign a Row to an Aux Bus
1. Press the SEL button (mnemonic button on the
Double-Down) on the panel row you want to set the
key bus assignment for.
Tip: You can also press and hold the SEL button and use
the source buttons on the background and key bus to select
which ME, key, or aux you want to assign the row to.
2. Press Select Aux Bus.
3. Press the button for the aux (AUX X) or AuxKey
(AUX KEY X) that you want to assign to the bus or
row.
Tip: Toggle Lock Key Row to On to lock the assignment
of the key bus row to the current selection.
Tip: Press Locked to lock the current aux bus to the
selected source. This functions like the bus hold.
Assigning a Key bus to a Keyer or Utility Bus
The Key bus of the panel row can be assigned to any
keyer or utility bus on the ME that the row is assigned
to. The Utility buses that are available depend on what
the congurable program outputs are set to.
To Assign a Row to a Key
1. Press the SEL button (mnemonic button on the
Double-Down) on the panel row you want to set the
key bus assignment for.
Tip: You can also press and hold the SEL button and use
the source buttons on the background and key bus to select
which ME, key, or aux you want to assign the row to.
Tip: On the Double-Down control panel, the top button row
is assigned to the even numbered keyers (2,4,6,8) and the
button row below is assigned to the odd numbered keyers
(1,3,5,7). This can be changed with the DD Key Delegation
personality option.
2. Press Select Key/Util Bus.
3. Press the button for the key (KEY X) or utility (UTIL
Row X) that you want to assign to the bus.
Tip: Toggle Lock Key Row to On to lock the assignment
of the key bus row to the current selection.
Quick Presets
You can set up quick presets for where to assign a panel
row or button row.
The quick presets can be accessed either from the ME
Selection menu or through panel shortcut buttons,
depending on the control panel you have.
• Standard Panel — Press the SEL button for that
panel row you want to recall a quick preset on and
select the quick preset.
• Double-Down Panel — Press and hold the mnemonic
button for the button row you want to recall a quick
preset for. The source buttons on that row change to
show the available quick presets. Press the source
button for the quick preset you want to recall.
To Set Up a Quick Preset
Assigning a quick preset is based on how a panel or
button row is currently set. It does not matter which panel
row that the quick setup is congured on, it will be
available to all panel rows.
1. Set up a panel row, or button row, how you want it
for the quick preset.
2. Press the SEL button for that panel row, or the
mnemonic button for that button row.
3. Press More > Assign As Preset.
4. Press the quick preset button that you want to store
the current conguration to.
The name of the button updates to show the current
selection.
Acuity Operation Manual (v9.2) — Acuity
®
Control Panel Overview • 19

 Loading...