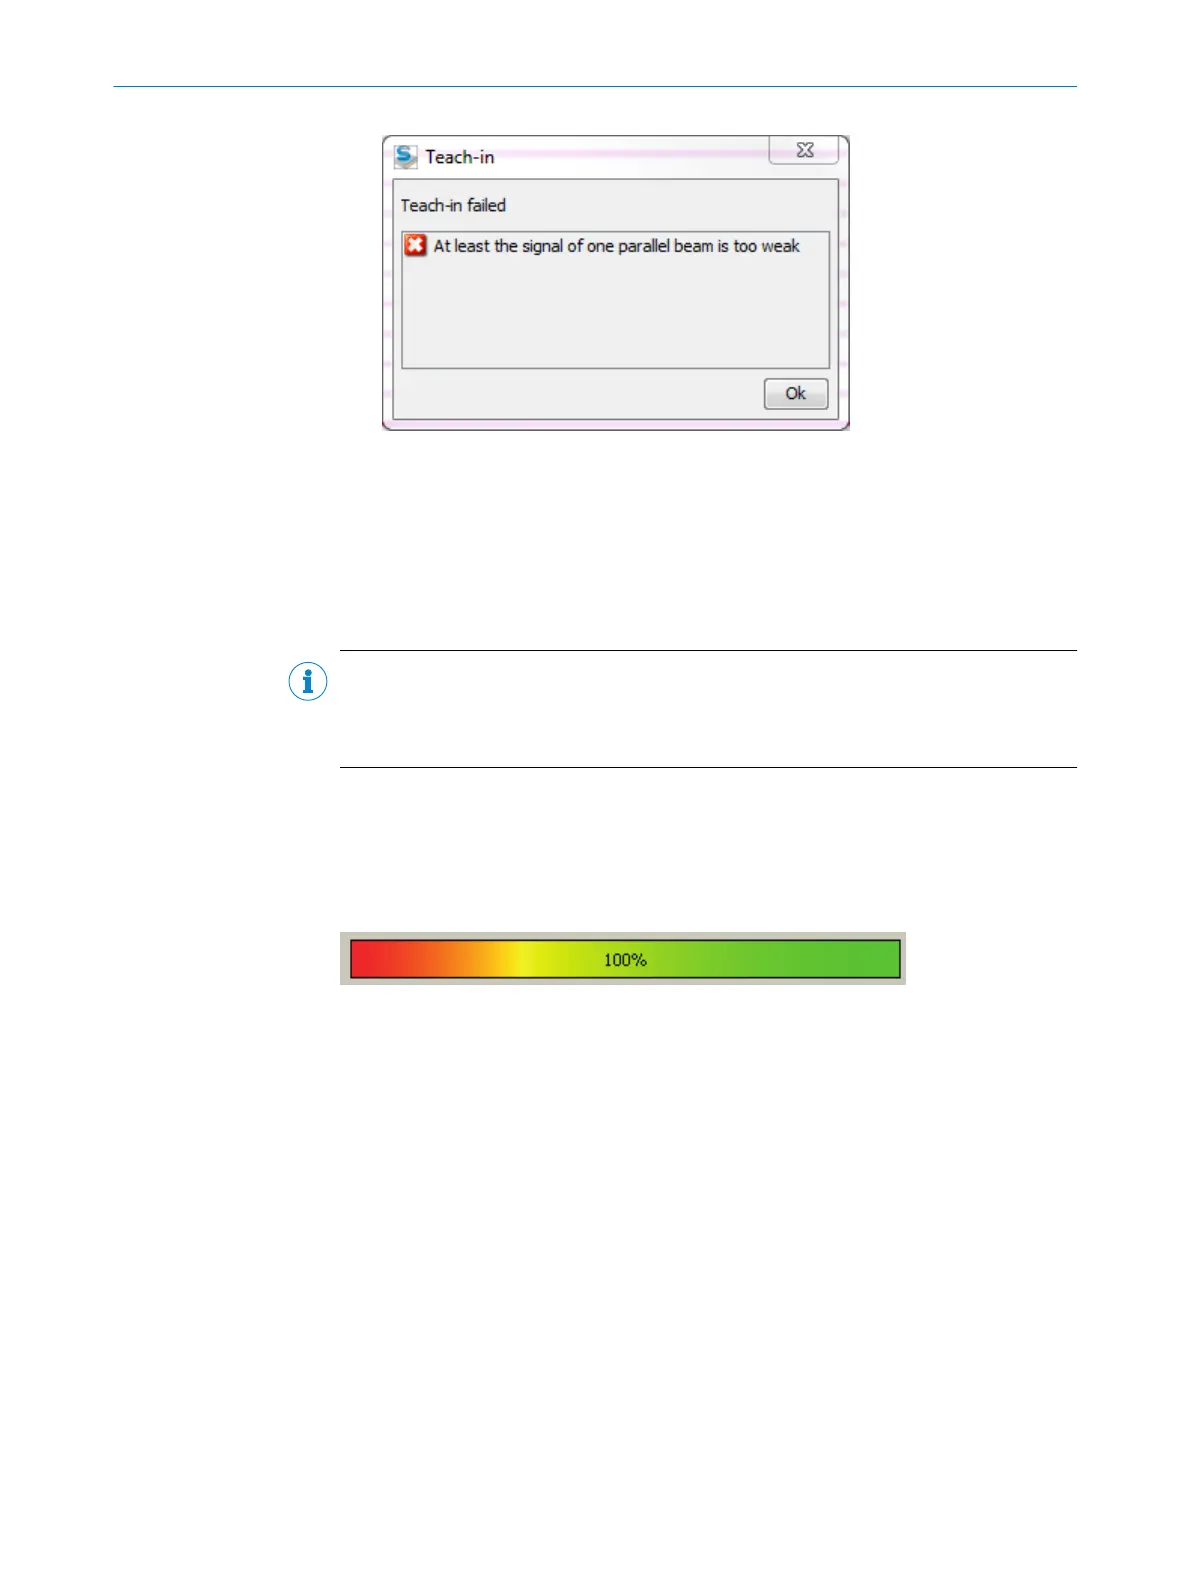
Figure 107: Teach-in failed
b
Then, check that the MLG-2 is correctly aligned, that the front screens are clean
and that there are no objects located in the light path.
b
Then carry out the teach-in process again.
Determining the teach-in input (only in the EXPERT user level)
You can configure an input as the teach-in input.
NOTE
This is only possible if a connection has been configured as an input (see "System set‐
tings for the EXPERT user level", page 65) and if the input is being used for a different
purpose (see "Advanced settings for the outputs", page 84).
Teach-in when switching on
If you activate the Automatic teach-in when switching on device option, the teach-in process
will be performed every time you switch the device on.
Teach-in quality
Figure 108: Teach-in quality
The teach-in quality indicates how successful the teach-in process has been. The
MLG-2 calculates this value based on the quality of the light level received.
The value remains constant until another teach-in process is carried out.
Beam blanking (only in the EXPERT user level)
If you do not want to evaluate certain beams for your application, you can exclude them
from the teach-in process.
How to blank blocked beams:
The beams from the MLG-2 that are not to be accounted for in the measurement must
be blocked.
CONFIGURATION WITH SOPAS ET 7
8017460.ZIK1/2017-02-13 | SICK O P E R A T I N G I N S T R U C T I O N S | MLG-2 Pro
91
Subject to change without notice