GW-29
GLASS/WINDOW/MIRROR
Rear Gate Glass
15.Rear Gate Glass
A: REMOVAL
1) Remove the rear gate garnish. <Ref. to EB-20,
REMOVAL, Rear Gate Garnish Assembly.>
2) Remove the electrical connector from rear de-
fogger terminal.
3) Remove the glass in same procedure as for wind-
shield glass. <Ref. to GW-25, REMOVAL, Wind-
shield Glass.>
NOTE:
A matching pin is cemented to corners of the glass
on the compartment side. Use a piano wire when
cutting each pin.
B: INSTALLATION
1) Install a new rubber strip (A) by aligning it with
the end of the rear gate glass (B).
2) Install the glass in same procedure as for wind-
shield glass.
3) About one hour after installation, conduct a leak test.
4) After completion of all work, allow the vehicle to
stand for about 24 hours.
NOTE:
• When the door is opened/closed after glass is bond-
ed, always lower the door glass and then open/close it
carefully.
• Move the vehicle slowly.
• For minimum drying time and time the vehicle
must be left standing before driving after bonding,
follow instructions or instruction manual from the
adhesive manufacturer.
• When a vehicle is returned to the user, tell him or
her that the vehicle should not be subjected to
heavy impact for at least three days.
5) Connect the rear defogger terminals.
6) Install the rear gate garnish. <Ref. to EB-20, IN-
STALLATION, Rear Gate Garnish Assembly.>
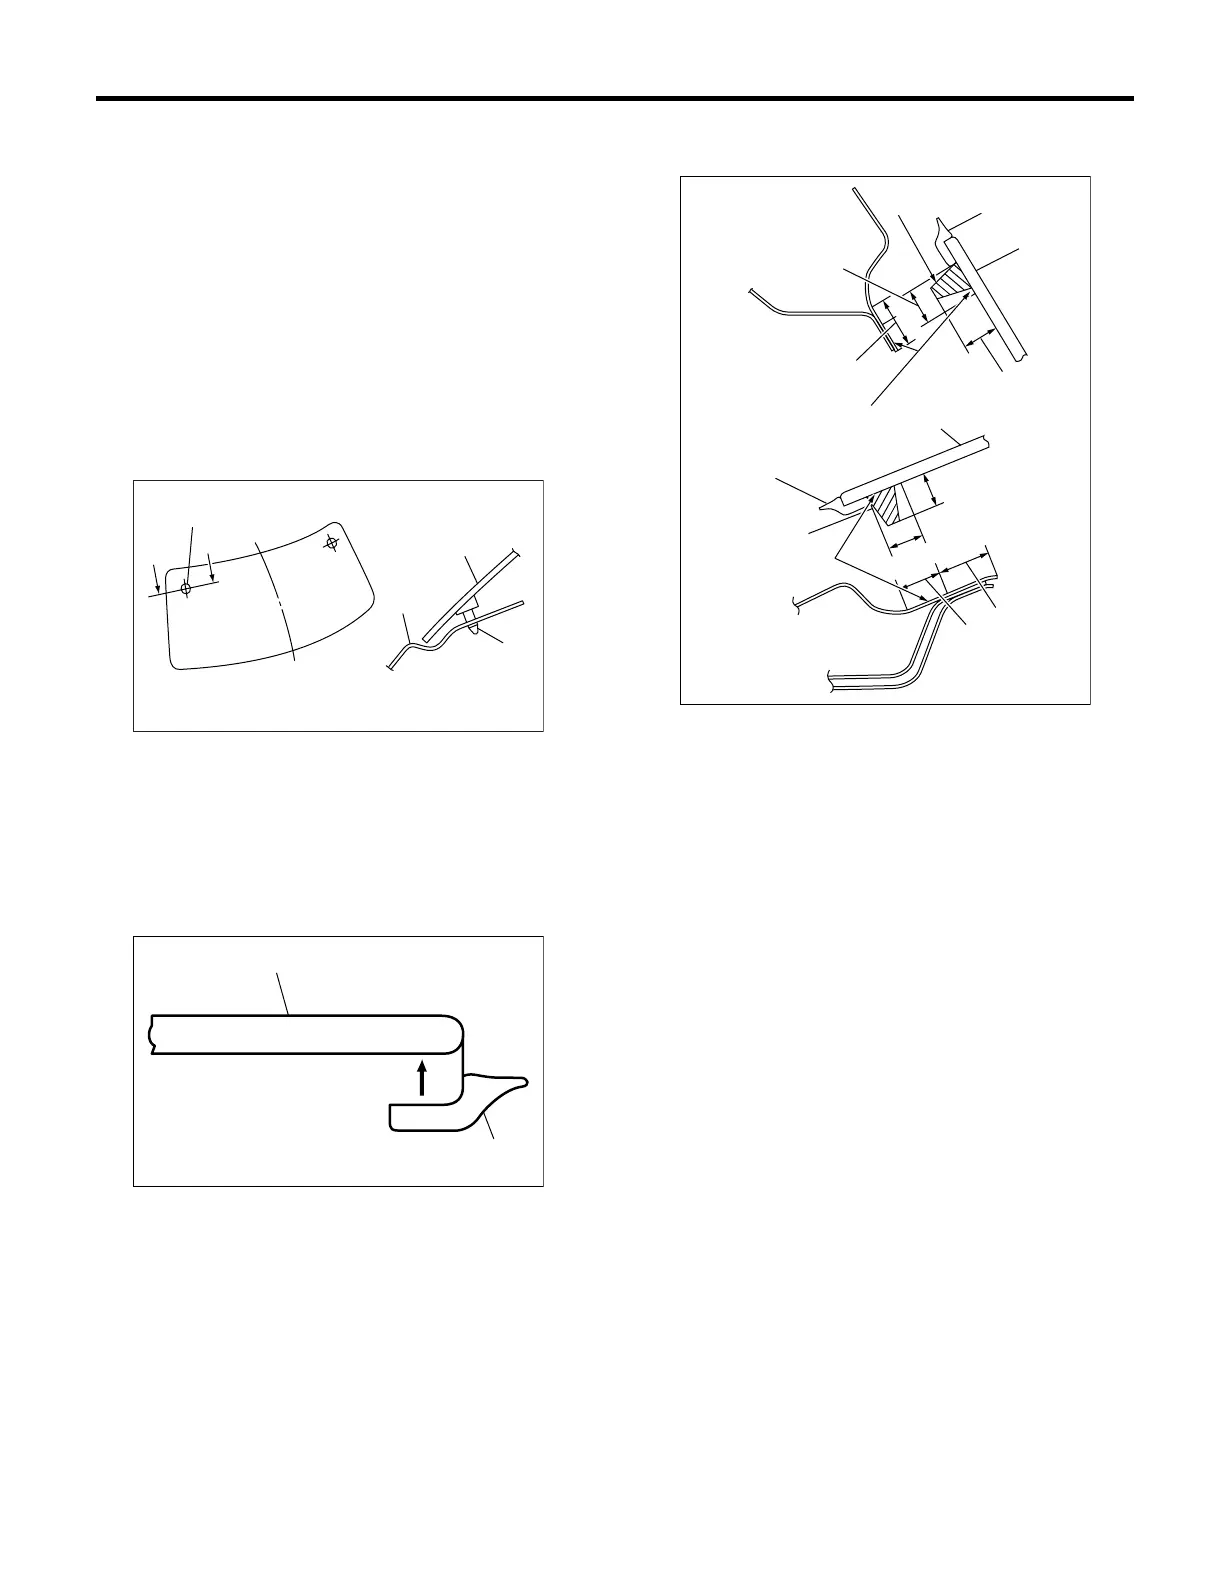
(1) Body panel
(2) Glass
(3) Matching pin
GW-00297
(3)
(3)
(1)
(2)
A-A
A
A
GW-00049
(B)
(A)
A) Upper side
B) Left and right side
(1) Adhesive
(2) Strip rubber
(3) Glass
(4) Primer
(5) 12 mm (0.47 in)
(6) 14 mm (0.55 in)
(7) 10 — 13 mm (0.39 — 0.51 in)
(8) 8 mm (0.31 in)
(9) 12 mm (0.47 in)
GW-00075
(6)
(4)
(4)
(9)
(8)
(3)
(7)
(7)
(3)
(2)
(2)
(1)
(1)
(5)
(5)
(A)
(B)