AC-4
HVAC SYSTEM (AUTO A/C)(DIAGNOSTIC)
General Description
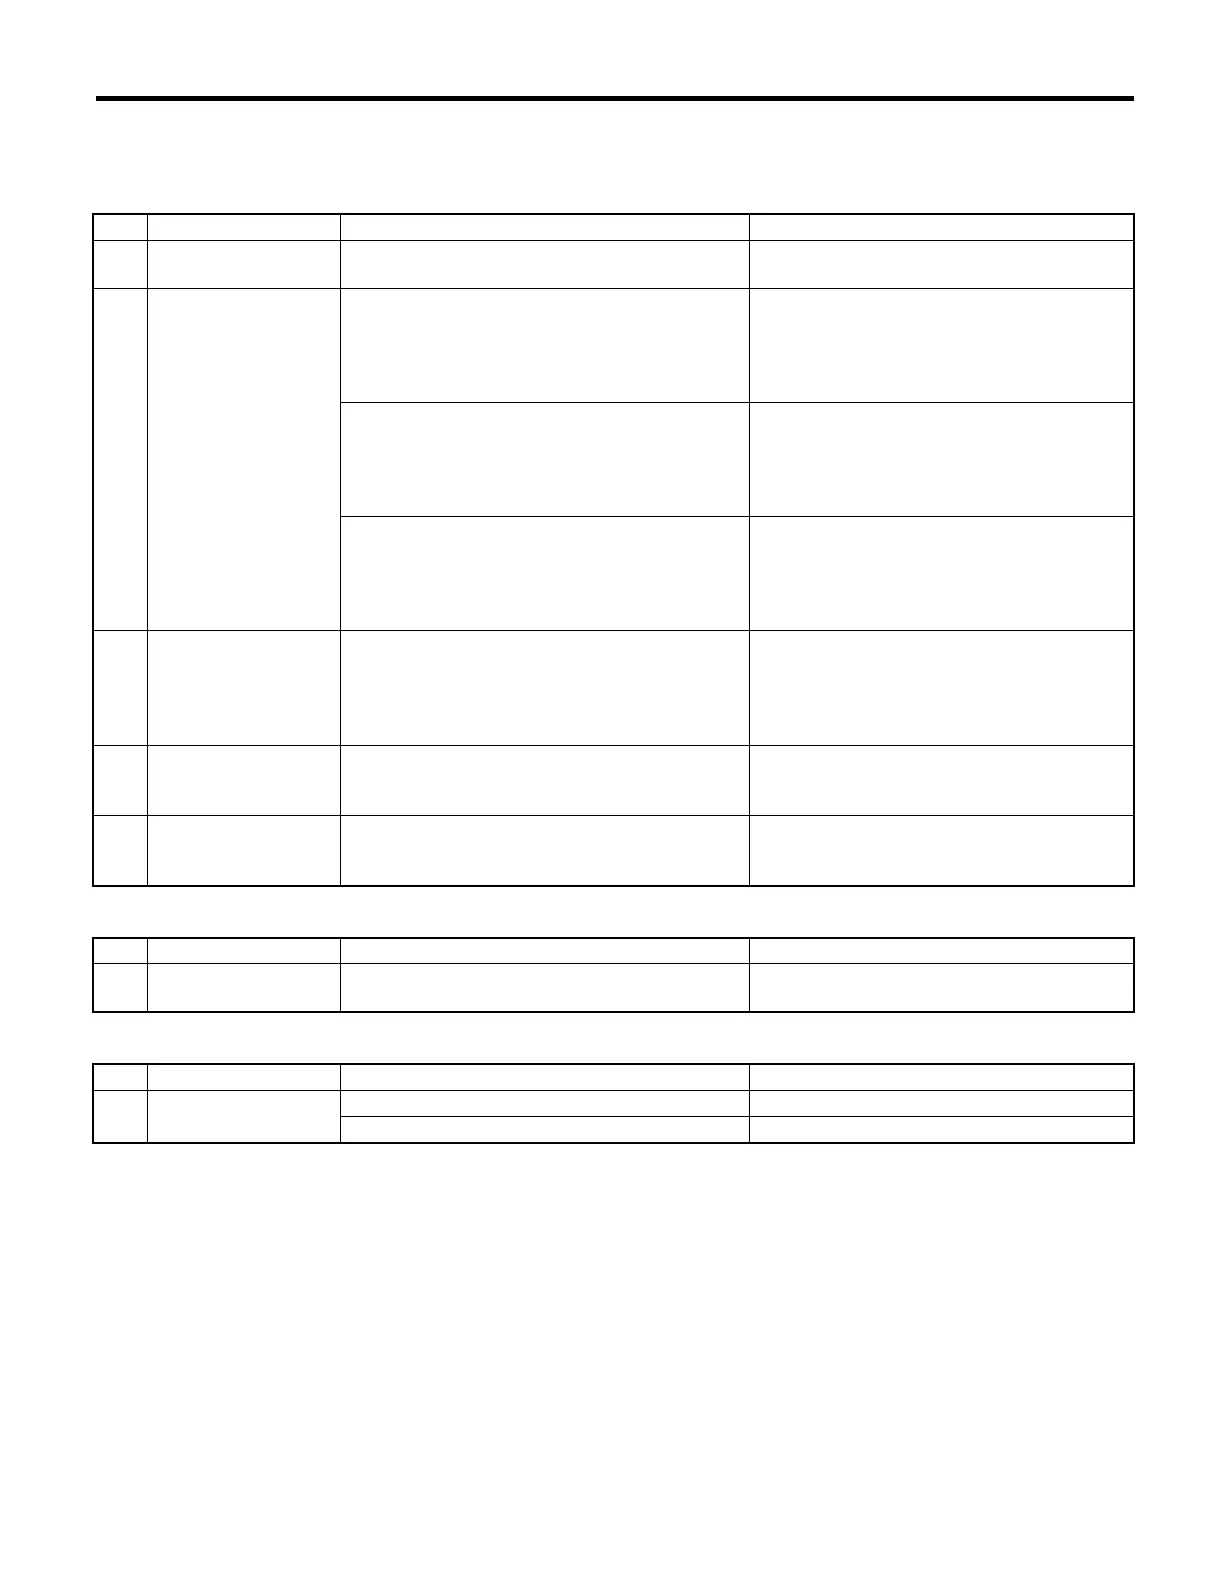
5. CONTROL SWITCHES
Start and warm-up the engine completely.
1) Inspection using switches
2) Compressor operation inspection
3) Inspection of illumination control
No. Point to check Switch operation Judgment standard
1 Fan speed control dial Turn the fan speed control dial clockwise.
Fan speed changes 1st → 2nd → 3rd → 4th
as dial turn.
2AUTO switch
1) Press the AUTO switch.
2) Turn the temperature control dial to the left
fully, and set maximum cool position.
• Outlet air temperature: COOL
• Fan speed: 4th
• Outlet opening: VENT
• Inlet opening: RECIRC
• Compressor: AUTO
3) Turn the temperature control dial to the right
slowly, and change the setting from maximum
cool position to maximum hot position gradually.
• Outlet air temperature: COOL → HOT
• Fan speed: AUTO
• Outlet opening: AUTO
• Inlet opening: AUTO
• Compressor: AUTO
4) Turn the temperature control dial to the right
fully, and set maximum hot position.
• Outlet air temperature: HOT
• Fan speed: 4th
• Outlet opening: HEAT
• Inlet opening: FRESH
• Compressor: AUTO
3 Defroster switch Press the defroster switch.
• Outlet air temperature: AUTO
• Fan speed: AUTO
• Outlet opening: DEF
• Inlet opening: FRESH
• Compressor: ON
4
FRESH/RECIRC
switch
Press the FRESH/RECIRC switch.
Inlet opening switches RECIRC → FRESH or
FRESH → RECIRC each time pressing the
switch.
5 Mode control dial Press the mode control dial.
Outlet opening switches VENT → BI-LEVEL
→ HEAT → DEF/HEAT each time dialing
clockwise.
No. Point to check Switch operation Judgment standard
1 Compressor
1) A/C switch is turned to ON.
2) Turn the fan speed control clockwise.
Compressor: ON
No. Point to check Switch operation Judgment standard
1 Illumination
1) Turn the lighting switch to ON. Illumination comes on.
2) Press the OFF switch one second or more. Illumination dimming is cancelled.









 To Next Page