IV-67
HYDRAULIC UNITS
CONTROL VALVE (SUB)
DISASSEMBLY AND ASSEMBLY
General Cautions
• Carry out disassembly and reassembly operations
in a clean place and place disassembled parts in
clean containers.
• Before disassembly, clean thoroughly around the
ports and remove paint or thread lock, etc. from
all joints with a wire brush.
• Clean the disassembled parts with appropriate
cleaning oils.
T7D908
21
T7D909
21 22
T7D910
2324
• The spool and body are selectively fitted, so if
one is found to be damaged, replace the valve as-
sembly.
• Apply a thin coating of hydraulic oil to sliding
surfaces and a thin coating of grease to seals when
assembling them.
• Replace seals with new parts each time disassem
-
bly is done.
The following describes the disassembly procedure.
For assembly, follow the disassembly procedure in
the reverse order.
Disassembly
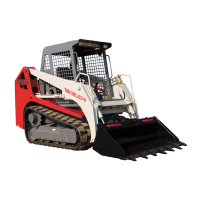
Solenoid Valve B
1. Remove the solenoid valve.
a. Remove the cap screw and remove the sole
-
noid B (21).
Cap Screw: 10.8 ±0.98 N·m
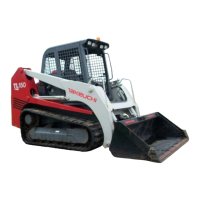
b. Remove the O-ring from the solenoid B.
c. Remove the cap screw.
Cap Screw: 6.86 ±0.98 N·m
d. Remove the solenoid B from the body.
e. Remove the O-ring from solenoid B.
• Take care not to miss the push rod.
f. Remove the plug (22).
Plug: 21.6 ±1.96 N·m
g. Remove the O-ring from plug.
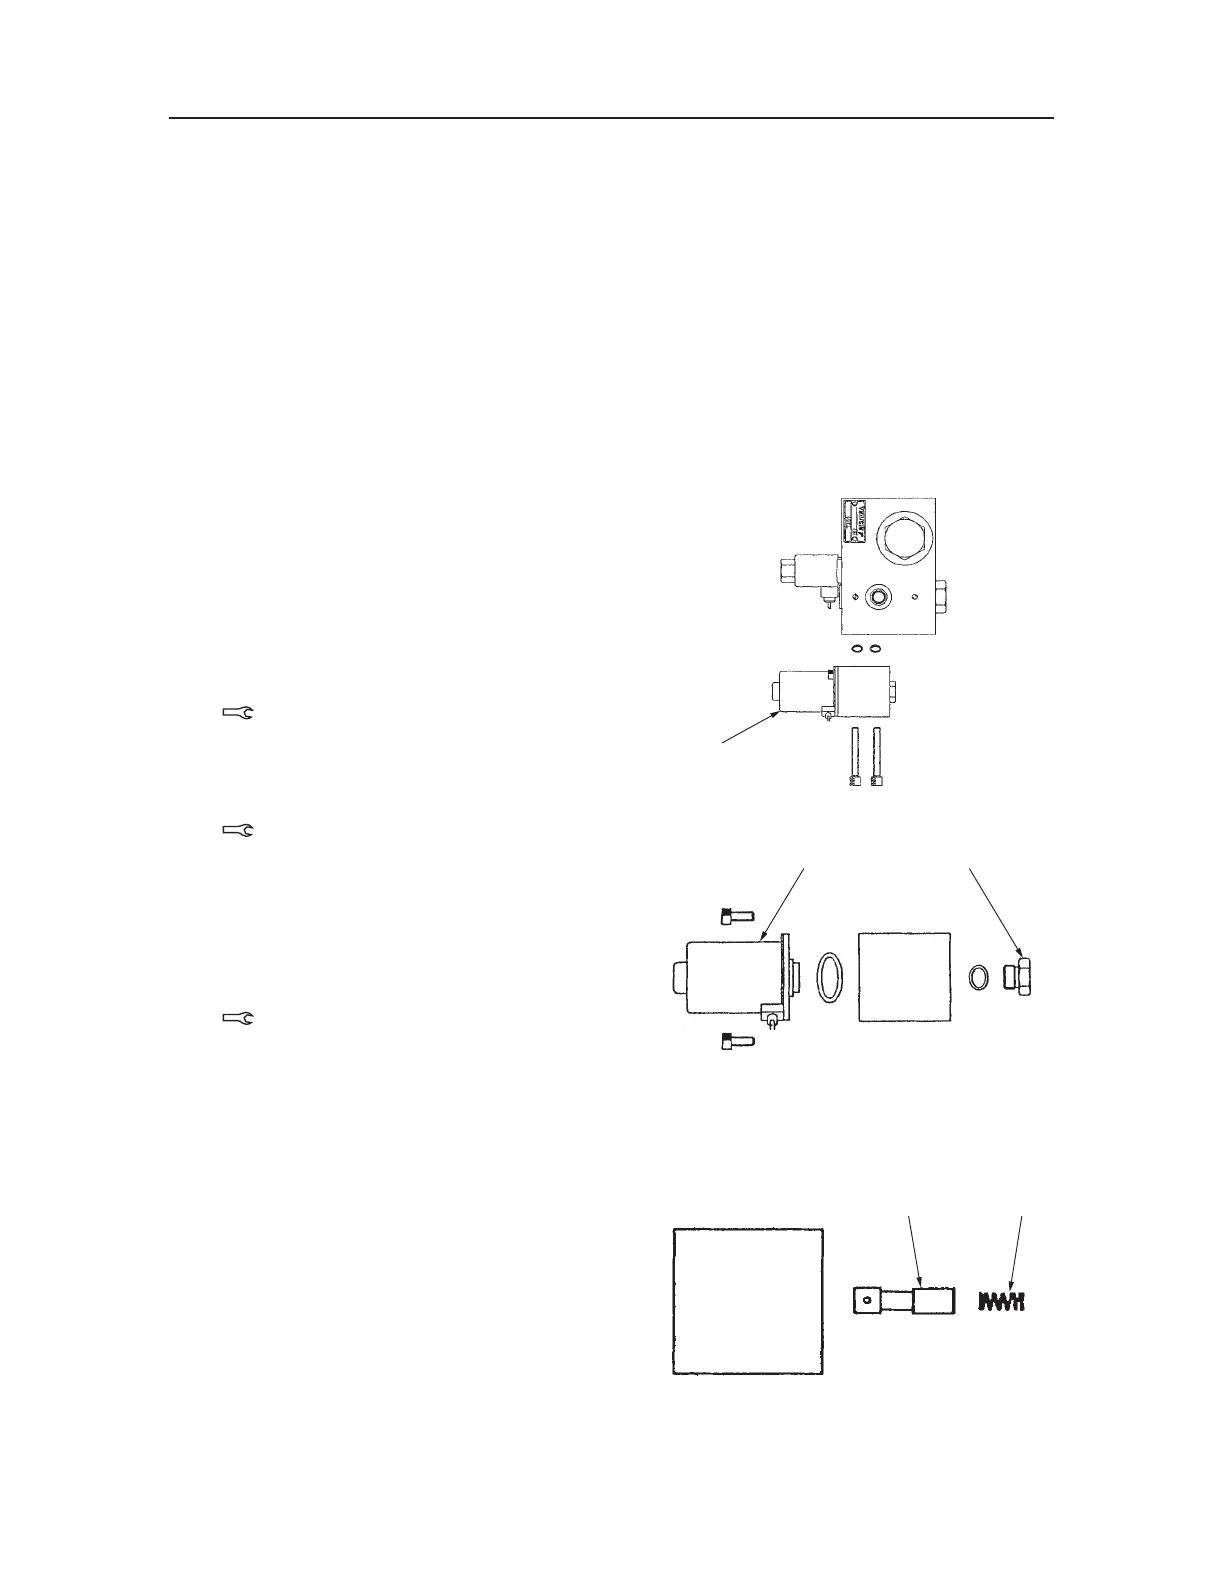
h. Remove the spring (23) and the spool (24)
from the body.
 Loading...