IV-73
HYDRAULIC UNITSPILOT VALVE
DISASSEMBLY AND ASSEMBLY
Table of Special Tools
General Cautions
• Since all parts in the pilot valve are precision
machined, carry out disassembly and reassembly
operations in a clean place and take special care
not to scratch the parts.
• Before disassembly, clean the outside surfaces of
the pilot valve.
• Clean each of the disassembled parts and apply
clean hydraulic oil to them.
• Replace all seals with new ones each time the
pilot valve is disassembled.
• During assembly, remove all the foreign matter
from each part and check them to make sure there
are no burrs, bruises using or other marks on
them. Remove all burrs and bruises using an oil
stone.
• Apply thin coating of grease to seals when assem
-
bling them.
Disassembly
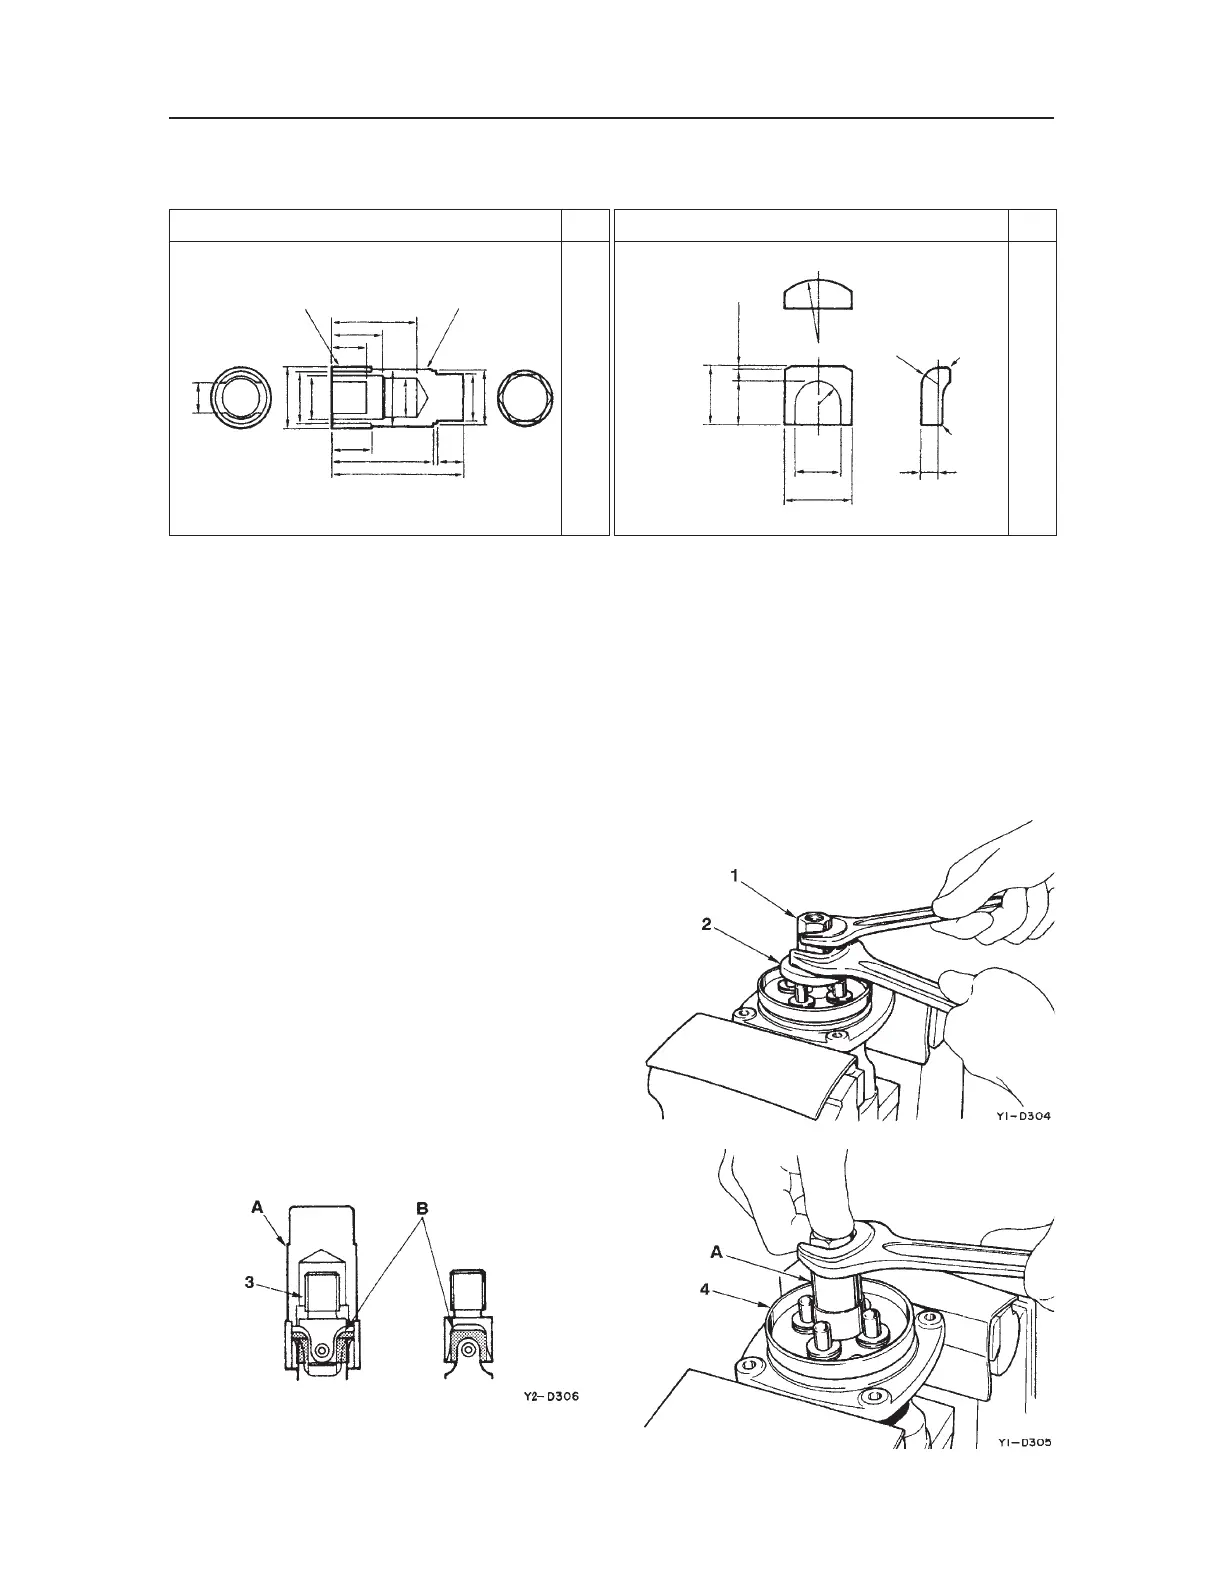
1. Remove the lock nut and the adjust nut (1), then
remove the disc (2).
• Using copper or lead plates, fasten the valve
in a vise.
2. Remove the joint (3), then remove the plate (4).
• Use installation jigs (A) and (B).
NAME, DIMENSION
Q·ty
INSTALLATION JIG (A)
1
MATERIAL A; S45C
MATERIAL B; SCM415N WITH CEMENTATION HARDENING
Y1-D302E
Ø21
Ø28
Ø19
23.5
Ø26.5
Ø25
Ø30
15
AB
42
25
17
19
50 13
65
NAME, DIMENSION
Q·ty
INSTALLATION JIG (B)
2
Y1-D303E
MATERIAL B; SCM415N WITH CEMENTATION HARDENING
12
10.4
14.5
4
9.5 0.5 s 15o
C0.5
C0.5
R4
R5.2
R12
 Loading...