- Blade clutch -
Models with Briggs & Stratton engines
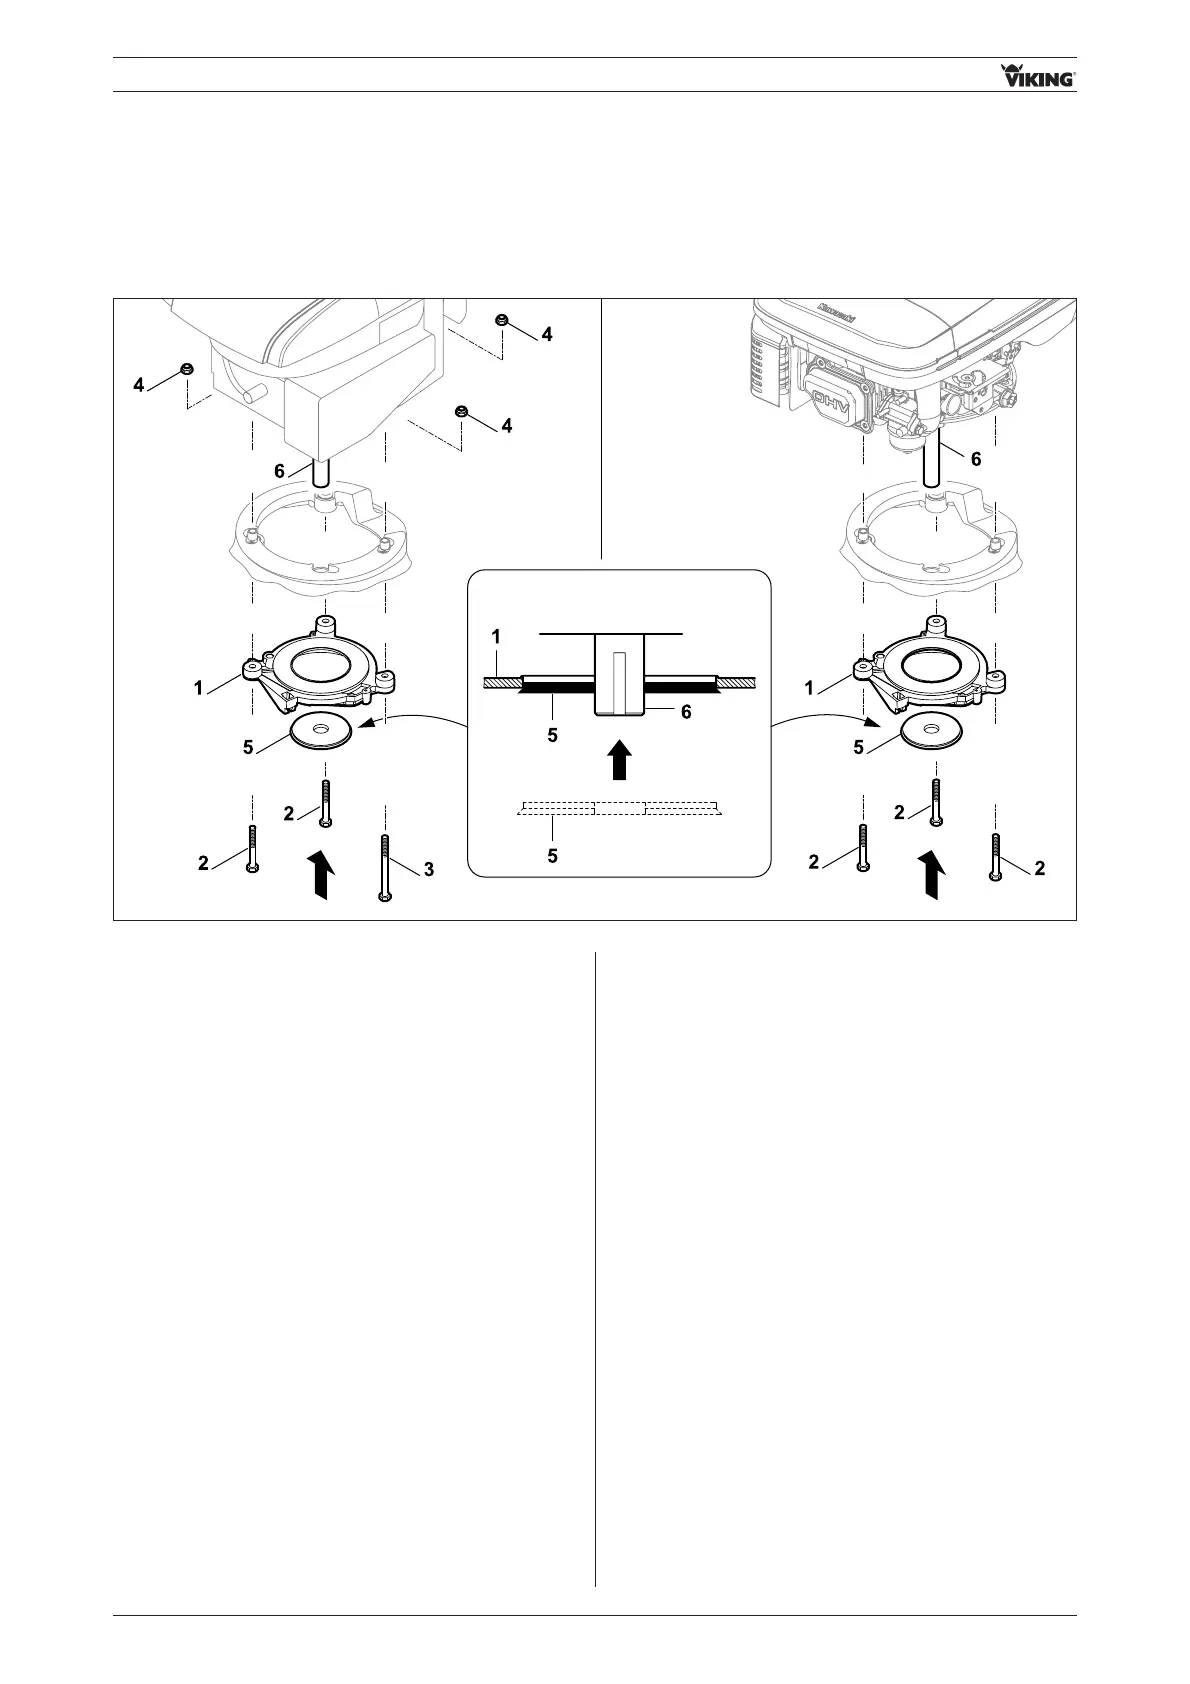
• Loosely screw clutch flange 1 to the housing and engine
using bolts 2, 3 and safety nuts 4.
Do not tighten the bolts.
VIKING special service tool (centring tool)
6107 893 4900
• Using VIKING special service tool 5, centre the clutch
flange with respect to engine shaft 6.
• Tighten nuts 4 (22-28 Nm)
- Remove centring tool.
Models with Kawasaki engines
• Loosely screw clutch flange 1 to the housing and engine
using bolts 2. Do not tighten the bolts.
VIKING special service tool (centring tool)
6107 893 4900
• Using VIKING special service tool 5, centre the clutch
flange with respect to engine shaft 6.
• Tighten bolts 2 (30-35 Nm)
- Remove centring tool.
Note:
Bolts 2 and 3 are of different lengths.
Bolt 2 = short (80 mm)
Bolt 3 = long (110 mm)
Ensure correct positioning of the bolts when installing.
Engine mounting with self-tapping screws:
Replace self-tapping screws with bolts 2, 3 and nuts 4
after detaching the engine mounting for the first time.
Briggs&Stratton Quantum engine:
2 short bolts 2 (80 mm),
1 long bolt 3 (110 mm)
Briggs&Stratton DOV engine:
3 short bolts 2 (80 mm)
Note:
Bolted connection with Loctite 243.
When refastening, ensure that the self-tapping screws 1
engage cleanly in the existing threads in the engine.
The cutting of new threads must be avoided.
11.10.04 Installing clutch flange
96 RA_6360_6375_01 - EN


 To Next Page