February 2013
4-324
ColorQube® 9303 Family
REP 91.3
Repairs/Adjustments
Replacement
CAUTION
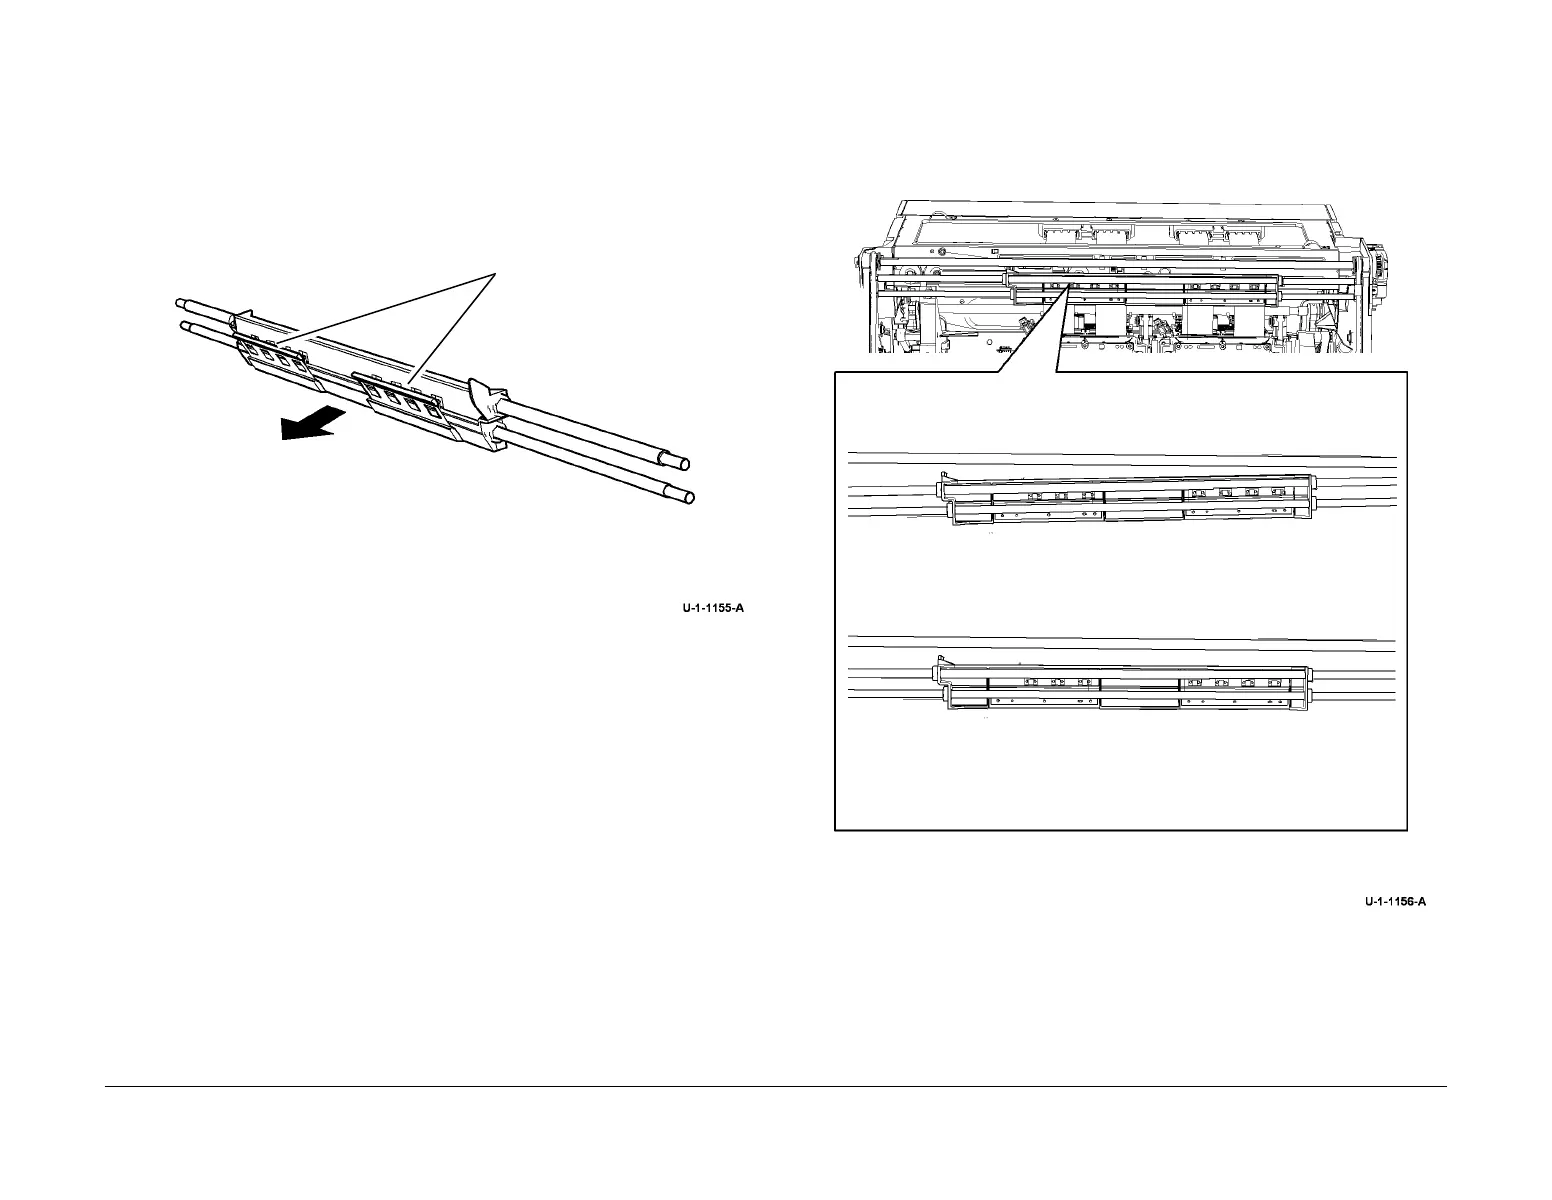
Ensure the head maintenance wiper is in the correct orientation with the wiper facing up, Fig-
ure 4.
1. Replacement is the reverse of the removal procedure.
2. Before installing the head maintenance wiper check the orientation of the wiper pads, Fig-
ure 4.
Figure 4 Wiper orientation
3. To ensure the wiper is level:
a. Lower the head maintenance wiper by rotating the upper drive shaft until sufficient
clicking (belt jumping teeth is heard to assure horizontally level).
b. Rotate the upper drive shaft in the opposite direction until the belt clips are at the top
of the tracks.
c. Check that both front and rear belt clips are touching the upper end of the track limit.
Figure 5 shows the head maintenance wiper fitted level and not level.
4. Ensure that both carriages are parked and the wiper is in the home position, all the way
up or down.
Figure 5 Level head maintenance wiper
Arrow points towards printheads
Front
Rear
Wiper pads
1
Example of the head maintenance wiper not level.
2
Correctly seated and level head maintenance wiper.

 Loading...


