February 2013
4-372
ColorQube® 9303 Family
REP 91.29
Repairs/Adjustments
7. Type A printheads only. Secure the flex cables with the cable clips, Figure 7.
Figure 7 Reinstall the cable clips
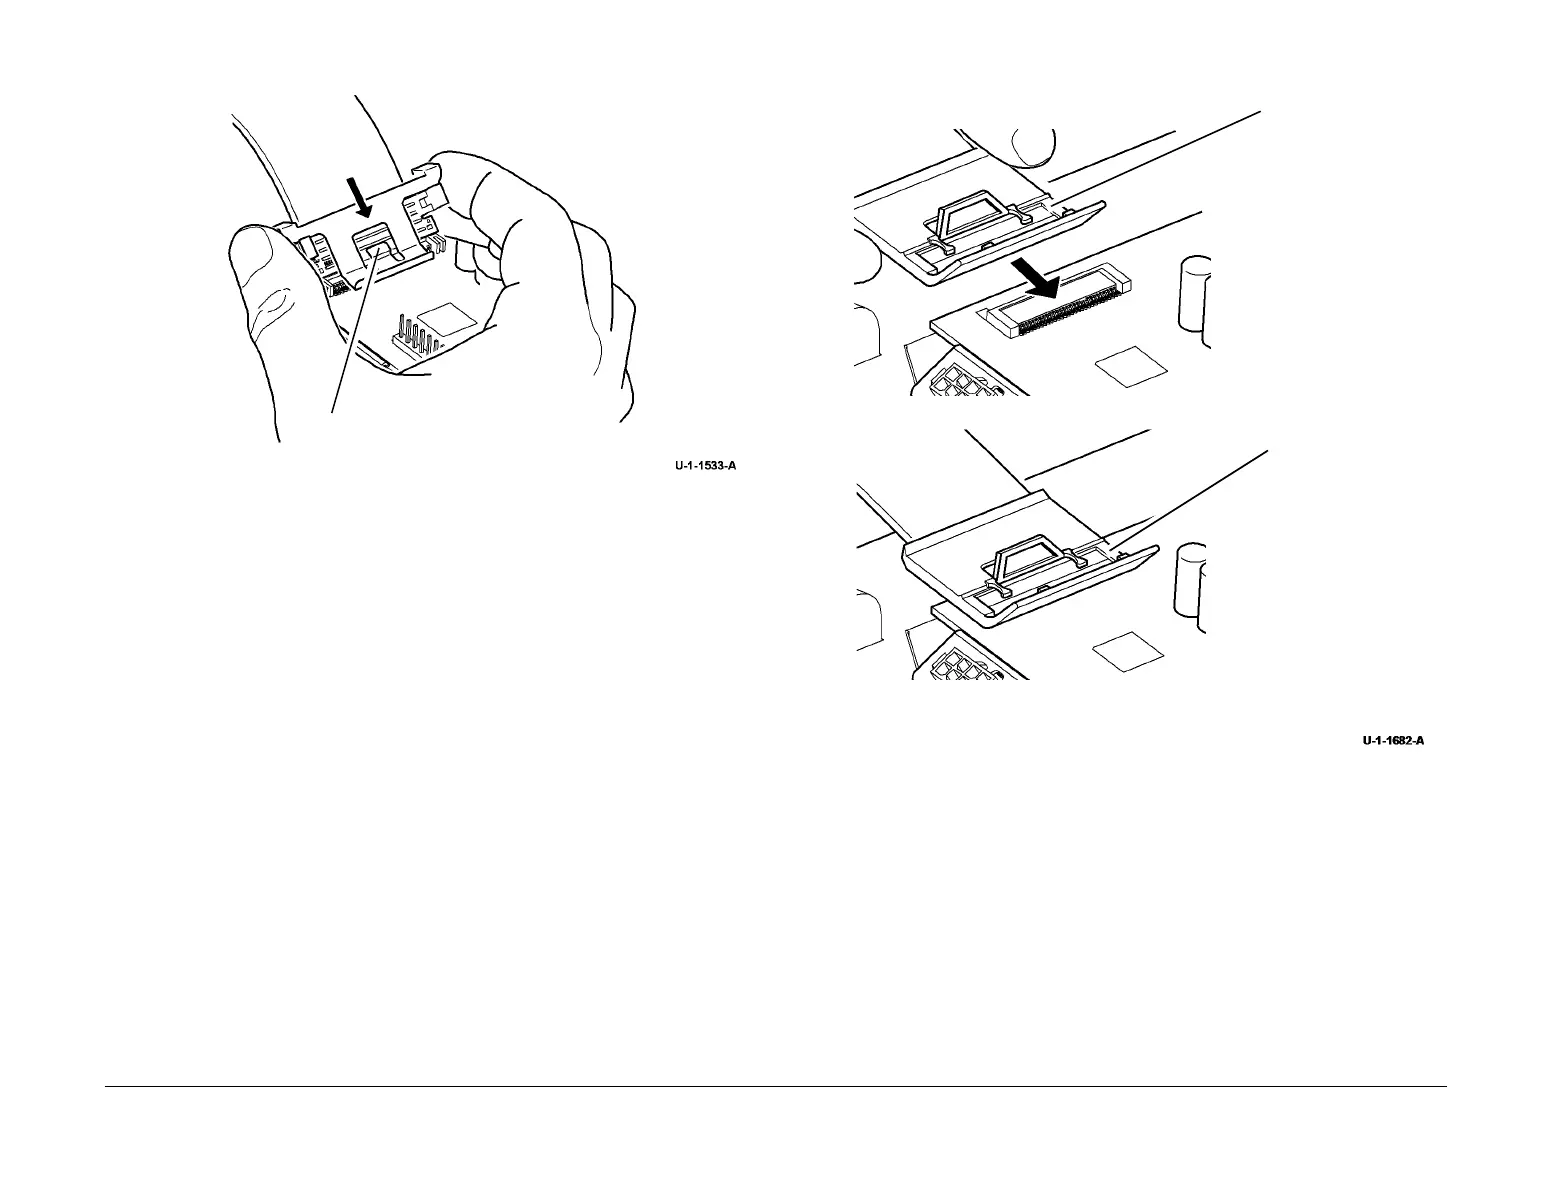
8. Type B printheads only. Connect the flex cables, Figure 8.
Figure 8 Cable connection (type B)
CAUTION
Failure to do the following may result in printhead or drum damage.
9. If reinstalling the same printhead in the same position, boot the machine directly into IME
diagnostics mode, GP 1. When the machine has booted into IME diagnostics mode, log
into diagnostics and perform dC967 to check head to drum spacing.
NOTE: Booting into IME diagnostics will prevent the normal power up / docking
sequence.
10. Ensure that both carriages are parked and the wiper is in the home position, all the way
up or down.
11. Run the relevant diagnostic routines, refer to GP 37 Post Part Replacement Routines.
NOTE: New printheads may not have all sections of NVRAM initialized. This may cause a
fault when the machine is switched on, refer to 91-519-00 to 91-522-00, 91-655-00 to 91-
658-00, 91-683-00 to 91-690-00, 91-807 to 91-811-00 Printhead NVM Read or Write Error
RAP. These faults will be cleared after performing dC972.
The clip tab will snap into position to
indicate the correct installation.
Press down on the outside
edges of the clip to install.
1
Line up the connector.
Carefully push the
connector until it
latches into place.
2
Correctly connected
flex cable.

 Loading...


