February 2013
4-375
ColorQube® 9303 Family
REP 91.31
Repairs/Adjustments
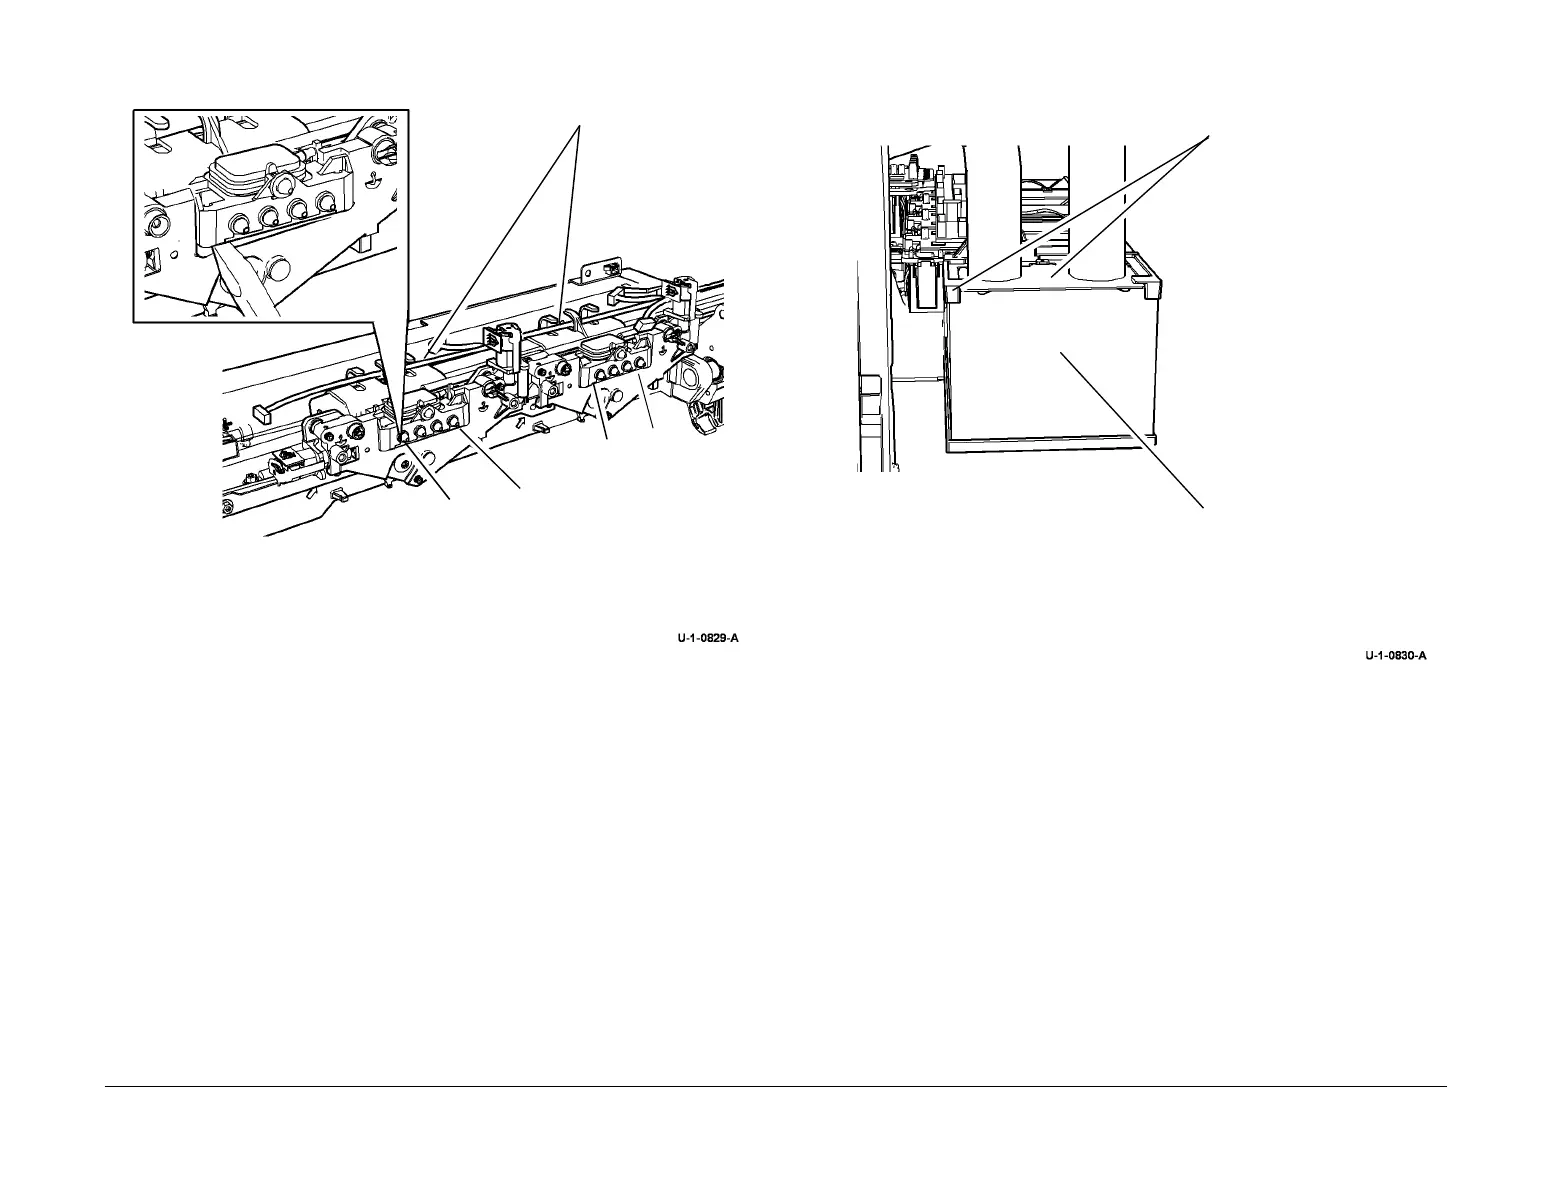
4. Remove the required umbilical from the carriage, Figure 2.
Figure 2 Unclip the umbilical
5. Remove the side and end insulation from around the umbilical on the ink reservoir, Figure
3.
Figure 3 Insulation removal
A
2
Use a flat bladed screwdriver to unclip the umbilical from the carriage. Insert the screw-
driver between the umbilical and carriage then rotate the blade to release the umbilical
(4 positions marked A).
A
A
A
1
Release the wiring
from the top of the
umbilical.
1
Remove the umbilical end
insulation and plastic sur-
round.
2
Remove the side insulation.

 Loading...


