February 2013
4-132
ColorQube® 9303 Family
REP 12.6-171
Repairs/Adjustments
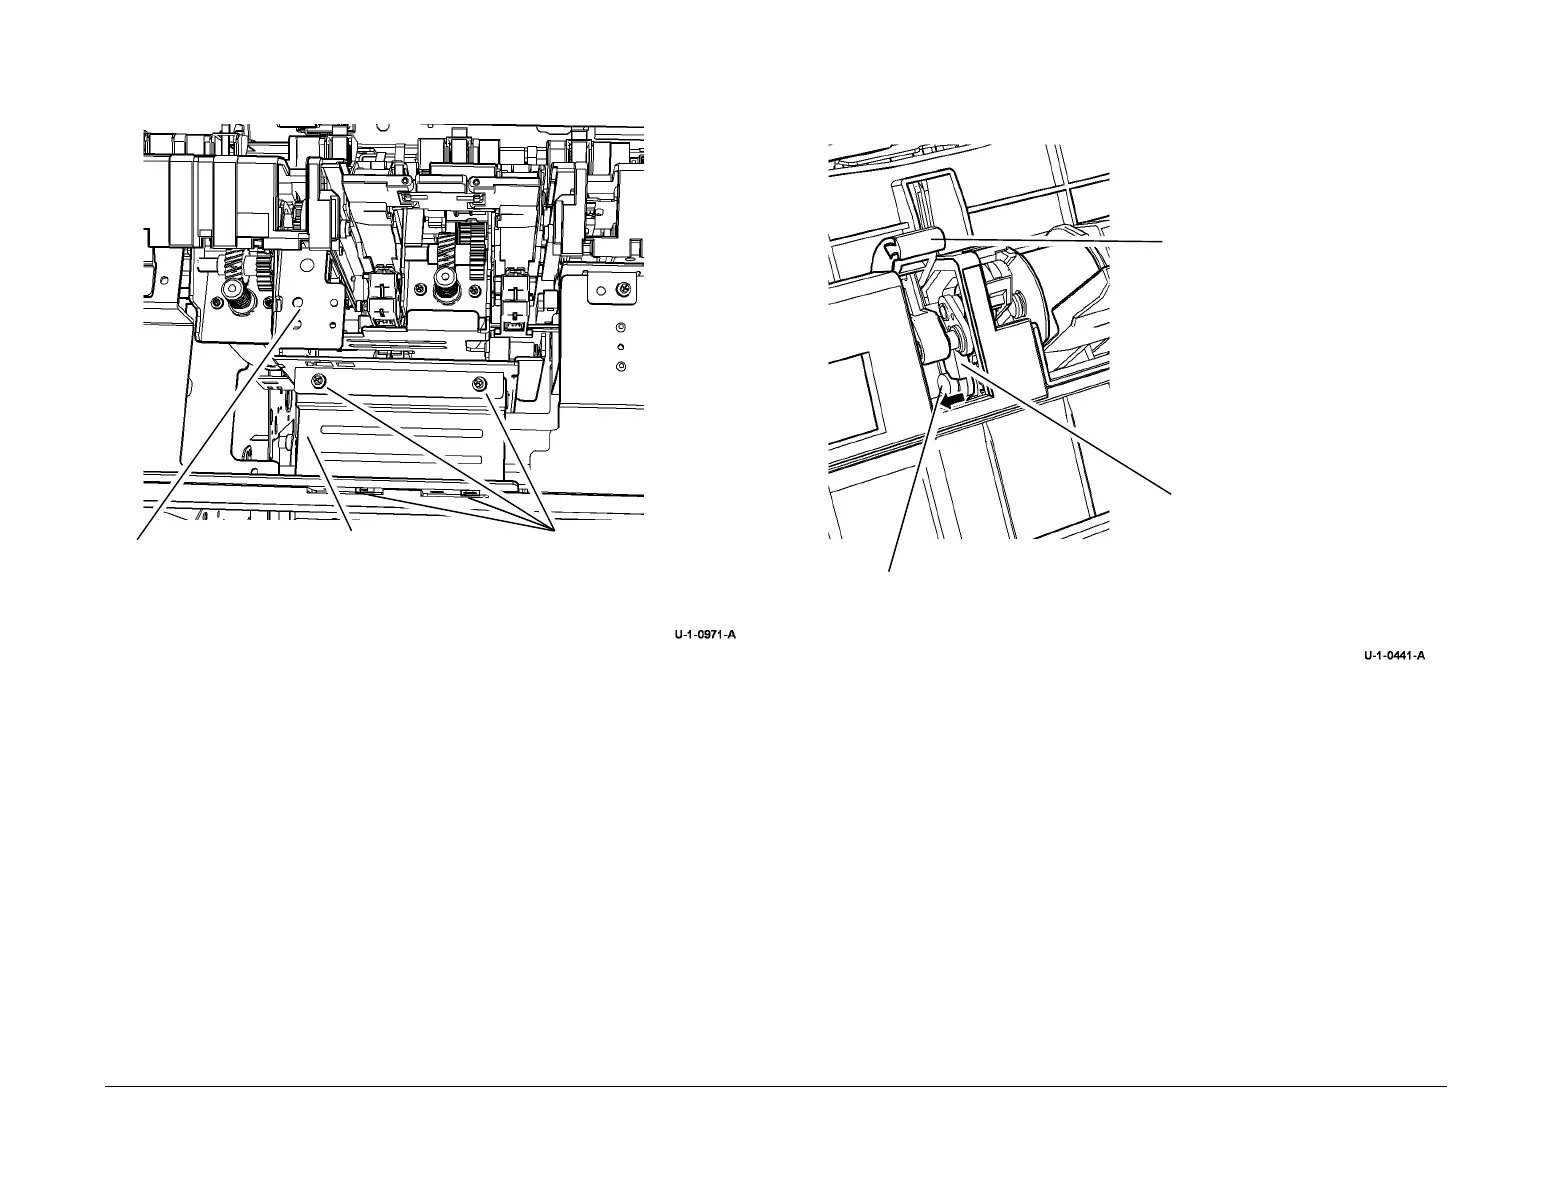
7. Remove the support bracket and ejector assembly, Figure 3.
Figure 3 Remove the ejector assembly
Replacement
1. Set the front and rear support fingers so that their ends are aligned when extended. See
REP 12.8-171.
2. When reinstalling the eject assembly ensure that the tag on the ejector locates into the
slot in the frame.
3. When refitting the pressing plate, the shaft of the front support finger drive gear must fit in
the ejector assembly, see Figure 4. Replace the front pressing plate finger.
Figure 4 Reinstalling the Pressing Plate
4. The remainder of the replacement procedure is the reverse of the removal procedure.
5. Locate the Mod/Tag plate on the metal panel under the HVF docking latch. Ensure that
Tag 004 is struck off.
1
Remove 4 screws.
2
Remove the support
bracket.
3
Remove the ejector assembly
and wiring loom.
1
Move the cover to the front
to locate the shaft end.
End of the gear
shaft.
Front pressing plate finger.

 Loading...


